


Page 18
BASIC OPERATION
RECORDING
Recording
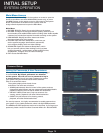
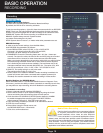
RECORD Mode
Configure Recording Options:
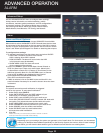
You have three recording modes: Schedule, Manual and Stop.
By default, the DVR is set to record by schedule.
To set the recording options, right click from the mouse and click on RECORD
MODE. There you can select amongst the three options for each individual
channel. Or you can highlight ALL to make a change to all channels at once.
SCHEDULE: System will record according to schedule that is set.
MANUAL: System always records. System records
not matter what settings are in place.
STOP: System does not record , no matter what other parameters are set.
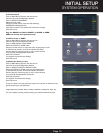
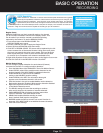
RECORD Settings
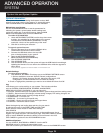
In order to set the record settings, from the Main Menu,
click RECORD. Set parameters as follows:
1. Under RESOLUTION, select CIF, HD1, or D1 or QCIF. NOTE:
Channels 1 & 2 allows options D1, HD1, CIF and QCIF.;
Channels 3-8: allow settings of CIF and QCIF.
2. FRAMERATE: Choose the recording frame rate 1-30, (fps – frames per
second). The lower the value, the less life-like and more jerky the recorded
movements will be. However, a lower frame rate uses less HDD space.
Make your choice depending on the precision with which you want to follow
the events being recorded. Frame-rate of each channel can be adjusted
but is limited by the total resources available. The total frame rate for all
channels combined cannot exceed 420 (NTSC) fps. The ratios of D1, HD1
and CIF are as follows: 1 D1= 4 x CIF, 1 HD1 = 2 x CIF.QCIF=1/4 CIF.
3. QUALITY, The quality rating is on a 6 point scale.
The selections are 6-High, 5,4,3,2,1-Low.
4. AUDIO, select On to enable or disable. If audio recording is enabled, the
system will record audio from connected audio capable cameras (not
included). See caution statement on audio recording in Video section.
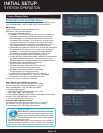
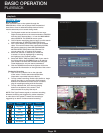
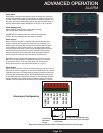
Detailed Settings for RECORD Mode:
Select RECORD CONFIG. The RECORD CONFIG screen will appear. From
this screen, you have the ability to select a schedule or manually record. Also,
you may select to stop recording, which will disable the recording feature.
To schedule a recording:
1. Select a channel and then highlight SCHEDULE
2. Set the Period Times for up to 4 period settings by using the virtual
mouse and setting the start and stop times for each period.
3. Click check box for SCHEDULE, DETECT(motion detect) or ALARM
to enable the appropriate recording type. Click NEXT PAGE to
adjust cameras 5 through 8. Click OK to save and exit.
4. Copy the setting (if desired) to another or all channels as desired.
5. Click OK. to save settings.
6. Record Size: Using the virtual mouse, set
the RECORD SIZE from 1-120 minutes.
7. Click ok to confirm selections.
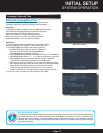
Audio/Video Recording
Caution: Audio surveillance in some states is illegal
or requires permission from one or both parties to
record someone’s voice. Laws are also different
from residential vs. commercial applications. Some
federal, state, and local laws prohibit certain surveillance activi-
ties and/or the use or distribution of the information obtained from
such activities. Prior to using this system, you should become
familiar with the pertinent laws to ensure compliance with those
applicable to surveillance activities.
Record Mode
Record Configuration
Record
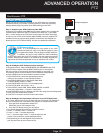
Main Menu