37
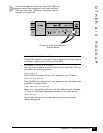
Appendix B - Custom Settings
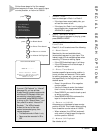
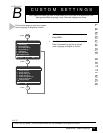
press
1 Copy Settings
2 Playback Settings
3 Record/Edit Settings
4 Channel Settings
5 VCR Settings
6 Timer Recording
7 Language/Langue
/ = Move = Sel MENU = Quit
MAIN MENU
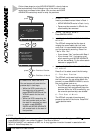
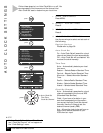
press
5
press
6
VCR SETTINGS
1 Child Lock Off
2 Remote Eject On
3 Panel Display Auto
4 Screen Display Auto
5 RF Output Channel Ch3
6 Clock Settings
7 Advanced Settings
/ = Move = Sel MENU = Quit
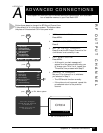
press
MENU
press
to
SET MONTH,
SET YEAR,
SET DAY,
SET HOUR,
SET MINUTE,
SET AM/PM
SET MONTH [1-12] :08
Aug 2001 12:25 PM
Su Mo Tu We Th Fr Sa
1234
567891011
12 13 14 15 16 17 18
19 20 21 22 23 24 25
26 27 28 29 30 31
To Set MENU to Quit
9
0
Use 0-9 for Channel
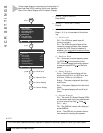
If Auto Clock Set is not available in your area, follow these steps to
set the clock manually (see notes below before proceeding).
MANUAL CLOCK SETTINGS
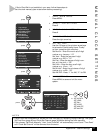
1 OPEN “MAIN MENU”
Press MENU.
2 SELECT “VCR SETTINGS”
Press 5.
3 SELECT “CLOCK SETTINGS”
Press 6.
4 CHOOSE “SET CLOCK MANUALLY”
Press the right arrow key.
5 SET THE TIME
Use the 0-9 keys or the up/down arrow keys
to set each of the following items. To skip
an item, press the right arrow key:
Set Month – Enter the month as a 2-digit
number; e.g. January = “01”
Set Year – Enter the year as a 2-digit
number; e.g. 2001 = “01”
Set Day – Enter the day as a 2-digit num-
ber; e.g. the ninth = “09”
Set Hour – Enter the hour as a 2-digit
number; e.g. 12:xx = “12”
Set Minute – Enter the minute as a 2-digit
number; e.g. xx:25 = “25”
Set AM/PM – Press “1” for AM, “2” for PM
6 SAVE SETTINGS
Press MENU to save and exit the menu
system.
NOTES
• If Auto Clock Set is available but has set the time incorrectly, try adjusting Daylight Savings Time (page
38),Time Zone (page 36) and Clock Set Channel (page 36) before setting the clock manually.
• If you choose “Set Clock Manually,” then “Auto Clock Set” will automatically turn off, and “Time Zone”
and “Clock Set Channel” will be removed from the menu.


