


22
NS-DVDR1 DVD Recorder
www.insignia-products.com
Checking timer recording details
Programming can be checked whenever the
recorder is turned on.
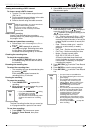
To check timer recording details:
1 Press HOME. The Home menu opens.
2 Select TV, Timer Record, then press
ENTER.
3
Press / to select a program.
4 Press ENTER to edit the selected program.
The Timer Record menu opens.
Canceling a timer recording
You can clear a timer setting anytime before the
recording actually starts.
To cancel a timer recording:
• Press / to select a program you want to
erase on the Timer recorder List, then press
CLEAR and select OK, then press ENTER.
Timer recording troubleshooting
Even though the timer is set, the recorder will
not record when:
• There is no disc loaded.
• A non-recordable disc is loaded.
• Disc Protect is set to ON in the Disc menu
(see “Disc Settings” on page 15).
• There are already 99 titles (DVD-RW,
DVD-R), 49 titles (DVD+RW, DVD+R)
recorded on the disc.
You cannot set up a timer program when:
• A recording is already underway.
• The time you’re trying to set has already
passed.
• There are already 16 timer programs set.
If two or more timer programs overlap:
• The earlier program takes priority.
• When the earlier program finishes, the later
program starts.
• If two programs are set to start at exactly the
same time, the program entered first takes
priority.
If the disc is damaged, the recording may not
complete successfully. In this case even though
the Check field shows “Rec. OK,” it may not be.
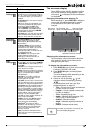
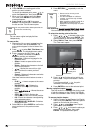
Recording one TV program while watching another
To record one TV program while watching
another:
1 Press TV/DVD to select the TV mode during
recording. The TV indicator appears.
2 Using the TV, select the channel to be
viewed.
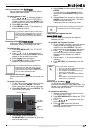
Recording from external components
You can record from an external component,
such as a camcorder or VCR, connected to any
of the recorder’s external inputs.
To record from an external component:
1 Make sure that the component you want to
record from is connected correctly to the
recorder.
2 Press INPUT repeatedly to select the
external input to record from.
• AV1—Audio/Video Input on the back panel.
• AV2—Audio/Video Input on the front panel.
• DV—DV Input on the front panel.
3 Load a recordable disc.
4 Set a recording mode as necessary by
pressing REC MODE repeatedly. Options
include XP, SP, LP or EP.
5 Press REC once to start recording. The
REC indicator lights in the display window.
6 Press STOP ( ) to stop recording.
Recording from DV Input
Before DV dubbing
You can connect a DV-equipped camcorder to
your recorder using a single DV cable for input
and output of audio, video, data, and control
signals.
• Your recorder is only compatible with
DV-format (DVC-SD, DV25) camcorders.
Digital satellite tuners and Digital VHS video
recorders are not compatible.
• You cannot connect more than one DV
camcorder at a time to your recorder.
• You cannot control your recorder from
external equipment connected through the
DV IN jack (including two recorders).
• You may not be able to control the connected
camcorder through the DV IN jack.
• Digital camcorders can usually record audio
as stereo 16-bit/48 kHz, or twin stereo tracks
of 12- bit/32 kHz. Your recorder can only
record one stereo audio track. Set the DV
Record Audio option to Audio 1 or Audio 2
as required (see “Recording from DV Input”
on page 22).
• Audio input to the DV IN jack should be 32 or
48 kHz (not 44.1 kHz).
• Picture disturbance on the recording may
occur if the source component pauses
playback or plays an unrecorded section of
tape, or if the power fails in the source
component, or the DV cable becomes
disconnected.
Note
• Make sure that the Audio In settings
DV Record Audio are set as you want
them. See “Audio Settings” on
page 14.
• If your source is copy-protected using
CopyGuard, you will not be able to
record it using your recorder. See
“Copying copyrighted material” on
page 20 for more details.
• Recording continues until you press
STOP ( ) or the disc is full.
• To record for a fixed length of time, see
“Instant timer recording” on page 21.