58 EN
8
0
7
9
CH
C.MEMORY
TIME SCAN
OK
PAUSE/
SPECIAL
FUNCTION
REMOTE
PAUSE
8
This function makes it easier to create edited videos when your
VCR is used as the source player in combination with another
JVC VCR equipped with a Remote PAUSE Connector. You can
pre-program up to 8 scenes or “cuts” for automatic editing in
the sequence you have specified.
You can also perform Random Assemble Editing with a second
non-JVC VCR. ੬ pg. 59
Random As-
semble Editing
EDITING (cont.)
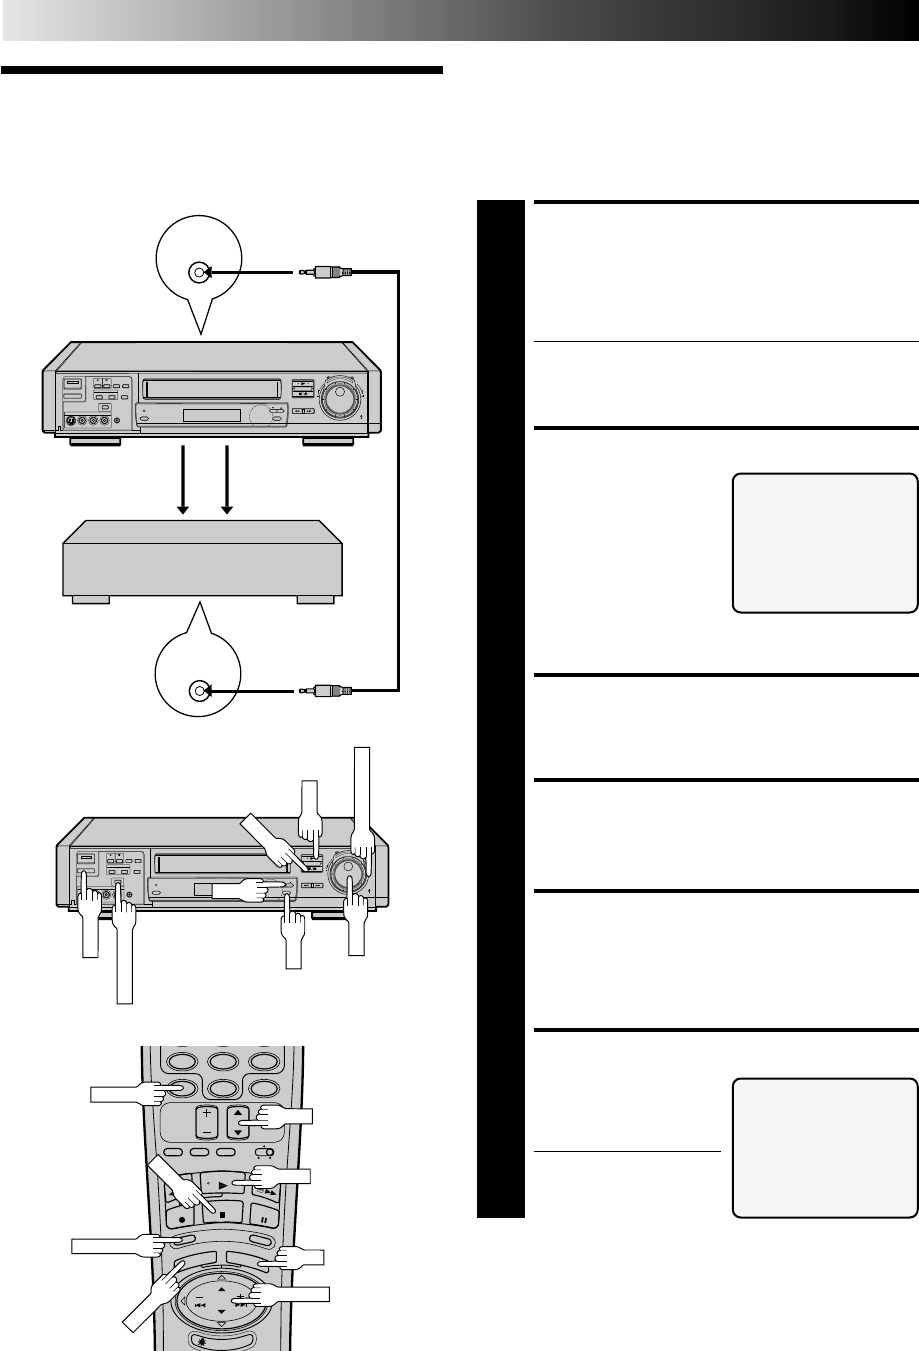
Audio signal Video signal
Mini-plug Cable
(supplied)
Another VCR
(w/PAUSE connector)
MAKE CONNECTIONS
1
Connect your VCR’s VIDEO OUT and AUDIO OUT
connectors to the VIDEO IN and AUDIO IN connectors
on the recording deck, and connect your VCR’s PAUSE/
SPECIAL FUNCTION connector to the PAUSE connec-
tor on the recording deck.
● If the recording deck doesn’t have a PAUSE connec-
tor, connect to the R.A. EDIT connector instead.
● The Mini-plug cable is a mono 3.5 mm mini-plug to
mono 3.5 mm mini-plug connector.
PREPARE FOR EDITING
2
Perform steps 2 – 9, 13 –
15 on page 52, “Edit From
A Camcorder”.
NOTE:
If you mistakenly select
“AV COMPU LINK” in
step
7
on page 52, an error
message appears when
you finish step 6. Make sure “R.A. EDIT/PAUSE” is
selected before you continue.
LOAD SOURCE CASSETTE
3
Insert the source cassette into your VCR.
START SOURCE PLAYBACK
4
Press PLAY.
ACCESS MAIN MENU
SCREEN
5
Press MENU as many times as necessary to bring up the
Main Menu screen.
ACCESS R.A. EDIT SCREEN
6
Place the arrow next to
“R.A. EDIT” by pressing
CH5∞ or TIME SCAN5∞,
then press OK.
● The screen is superim-
posed on the video
playback in step 7.
-ERROR-
CHOOSE SPECIAL FUNCTION
ON MAIN MENU AND SELECT
R.A. EDIT/PAUSE
BEFORE YOU BEGIN
R.A. EDIT
PRESS (MENU) TO MAIN MENU
Player
Your VCR
Recorder
CANCEL
PLAY
8
CH
MAIN MENU
PROGRAM SET
TUNER SET
FUNCTION SET 1
FUNCTION SET 2
FUNCTION SET 3
=R.A. EDIT
PRESS (5,∞), THEN (OK)
PRESS (MENU) TO END
