


12
In Step 3, you identified a suitable MCU
mounting location. Now follow these steps to
mount the MCU using one of the following
options:
Option 1 - Velcro mount to a horizontal surface
Option 2 - Flush mount to a vertical surface
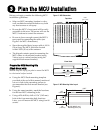
Option 1 - Velcro Mount
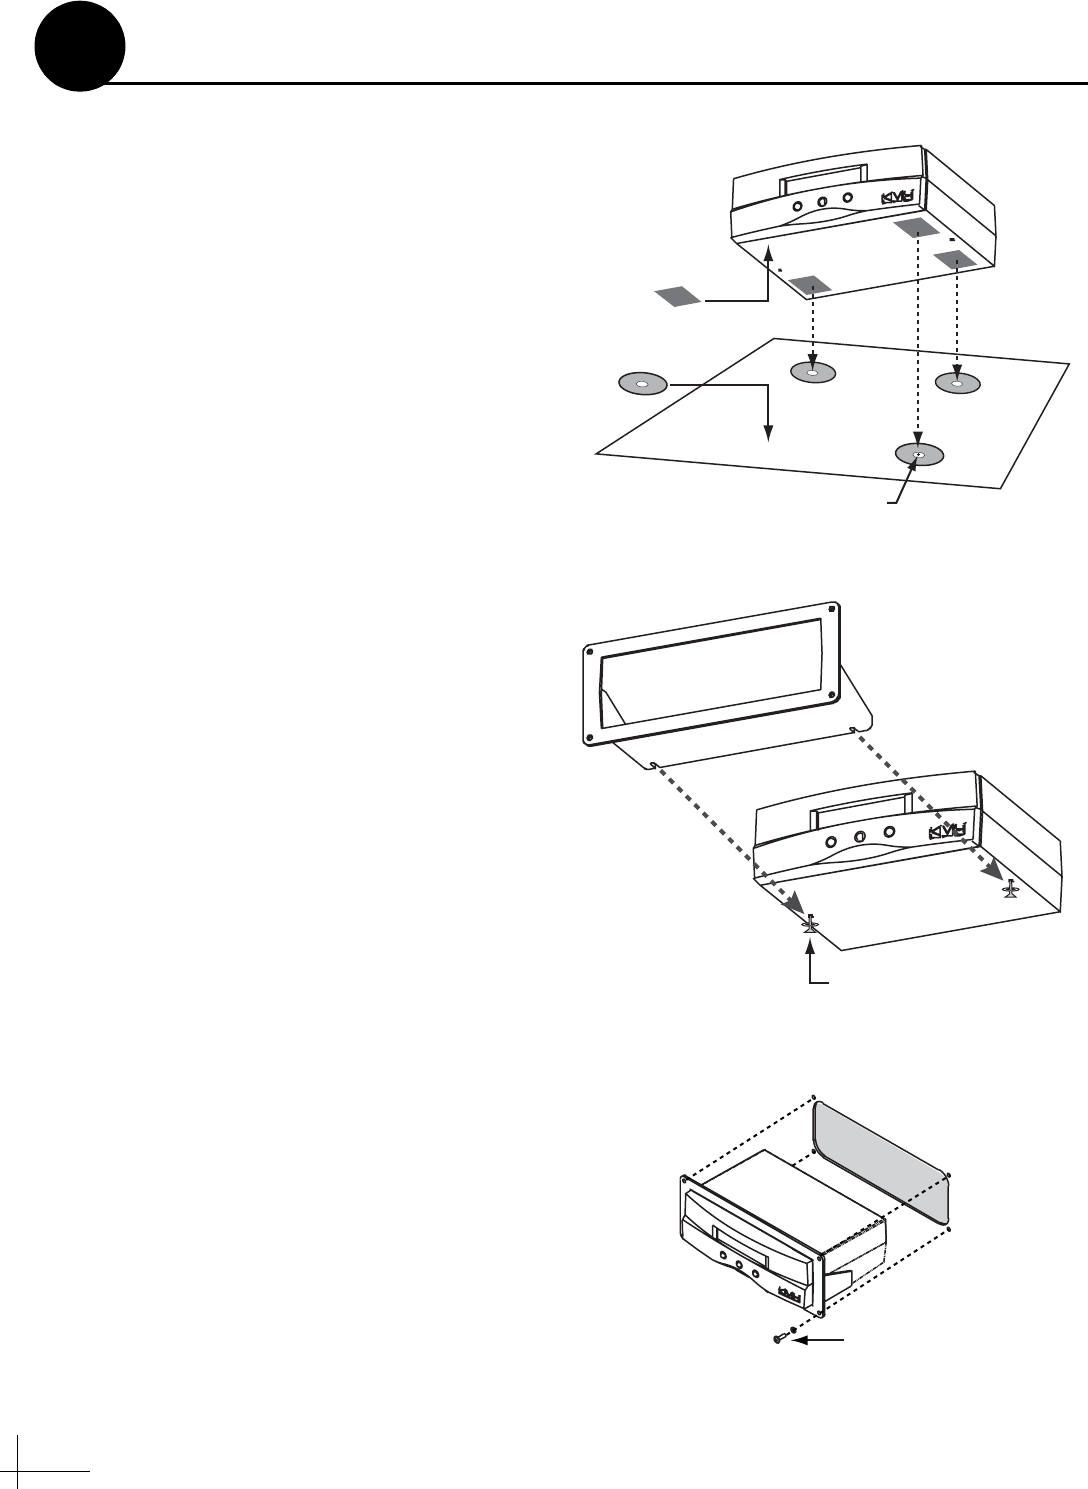
a. Clean the bottom of the MCU and the
mounting surface using a mild detergent.
b. Peel the backing from the four supplied
Velcro fabric squares and stick them to the
bottom corners of the MCU (see Figure 23).
c. Position the four Velcro hook disks onto the
mounting surface. Drill screw holes for the
disks and secure in place with #4-24 screws.
d. Press the MCU firmly into place so the
fabric’s loop material engages the hook disks.
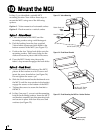
Option 2 - Flush Mount
a. At the two holes in the bottom of the MCU,
place a #6 flat washer on a #6-32 screw and
insert the screw from below (see Figure 24).
Do not tighten the screws yet.
b. Slide the flush mount bracket backward onto
the MCU until the two notches in the bracket
engage the screws at the bottom of the MCU.
c. Tighten the screws to secure the bracket to
the MCU.
d. In Step 3 on page 5, you cut out the mounting
hole in the mounting surface. Insert the MCU
and bracket assembly into this mounting hole
and secure in place with four #8 screws and
washers (see Figure 25).
Fabric Strip (x4)
Hook Disk (x4)
#4-24 Screw (x4)
Figure 23: Velcro Mounting
#6-32 x 1/2" Screw
and Washer (x2)
Figure 24: Flush Mount Bracket
#8 Screws and
Washers (x4)
Figure 25: Flush Mounting the MCU to a Vertical Surface
Mount the MCU
10