13
Follow these steps to turn on the system and set it
up for the desired pair of satellites.
a. Ensure the antenna has a clear, unobstructed
view of the sky.
b. Apply power to the receiver(s), TV(s), and
MCU. Wait two minutes for system startup.
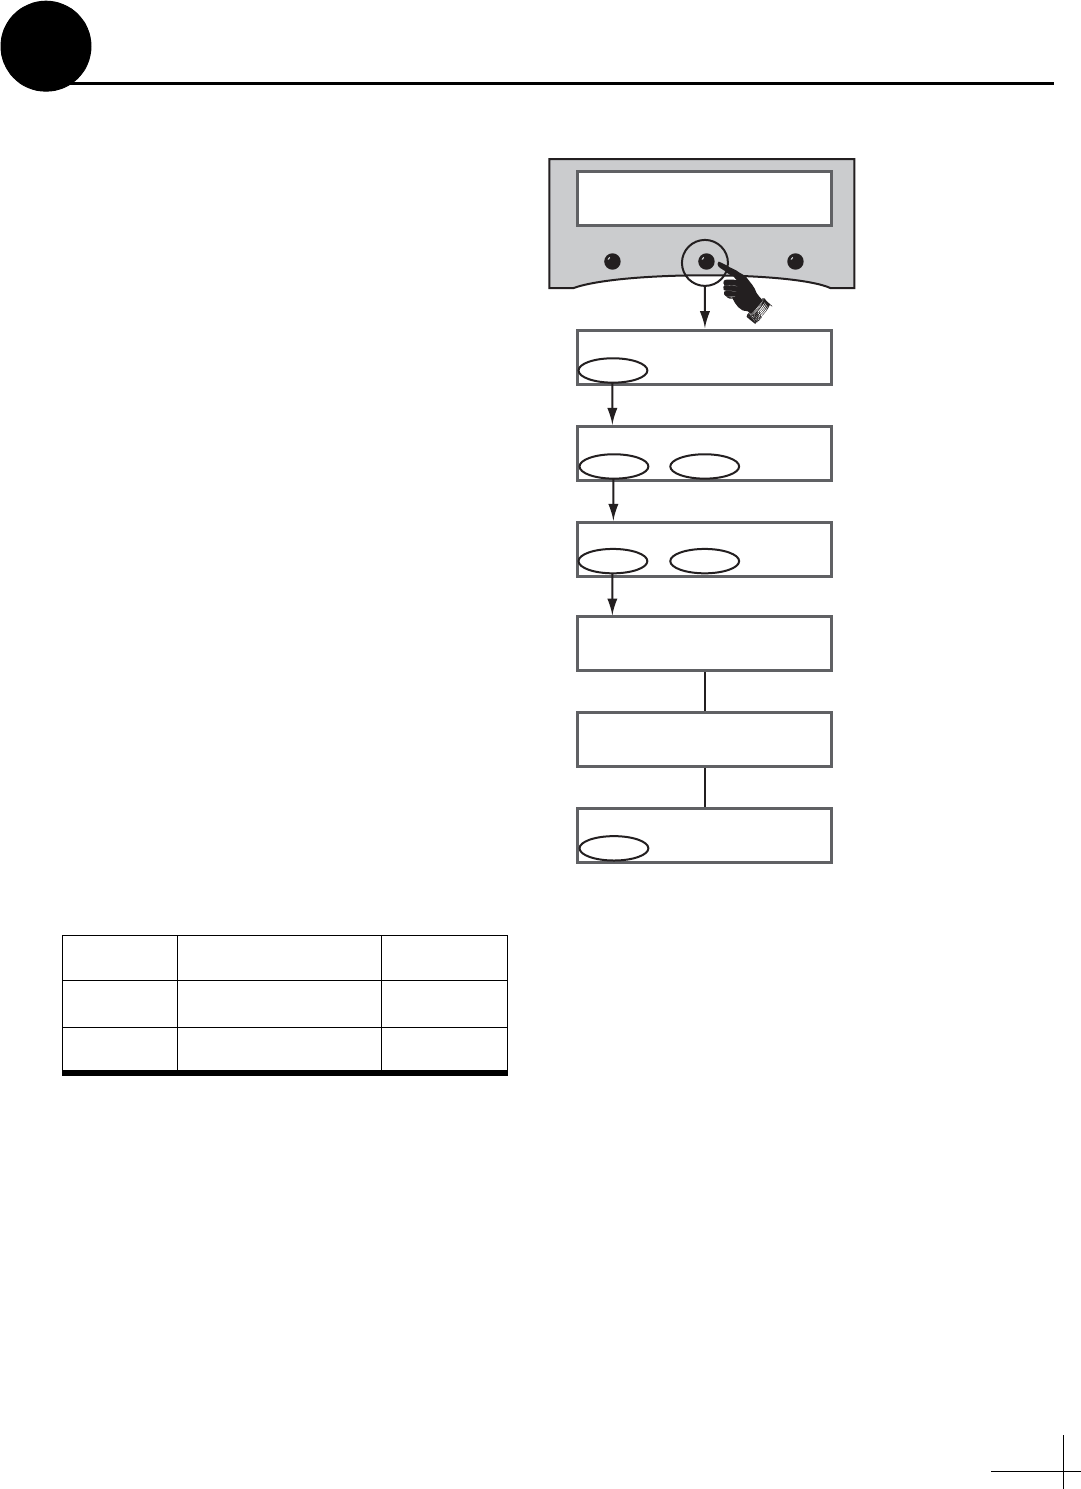
c. Press the center MENU button on the MCU
to access the onscreen menu (see Figure 26).
d. At “Install Satellite?”, press YES.
e. At “Install A <SAT NAME>”, press NEXT
until the display shows the first (primary)
satellite you want to select. Then press YES.
(See Appendix C on page 25 for a list of
available satellites.)
NOTE: If you don’t find the satellite you want,
you can set up a user-defined satellite (USER 1 or
USER 2). See Appendix D on page 26.
f. Repeat Step 11e to select the second satellite.
If you want to set up the antenna to track just
one satellite, select “None” instead.
g. At “Restart Antenna?”, press YES. Wait two
minutes while the antenna restarts.
h. (Linear systems only) Set up the receiver(s)
for the same satellites, and in the same order,
that you set them up in the antenna:
Antenna Receiver DiSEqC
Sat. A Alternative 1 or A DiSEqC 1
Sat. B Alternative 2 or B DiSEqC 2
Install Satellite?
Yes Next Return
Install A <SAT NAME>
Yes Next Cancel
Menu
<SAT NAME1> and
<SAT NAME2> installed
Press NEXT until desired satellite shown
Install B <SAT NAME>
Yes Next Cancel
Installing sats
Please wait
Press NEXT Until desired satellite shown
Restart antenna?
Yes No
Figure 26: Satellite Selection Menus on MCU
Select Satellites
11


