


5
Before you begin, consider the following MCU
installation guidelines:
• Select an MCU mounting location in a dry,
well-ventilated area belowdecks away from
any heat sources or salt spray.
• Be sure the MCU’s front panel will be easily
accessible to the user. The owner will use the
MCU’s buttons to control the antenna.
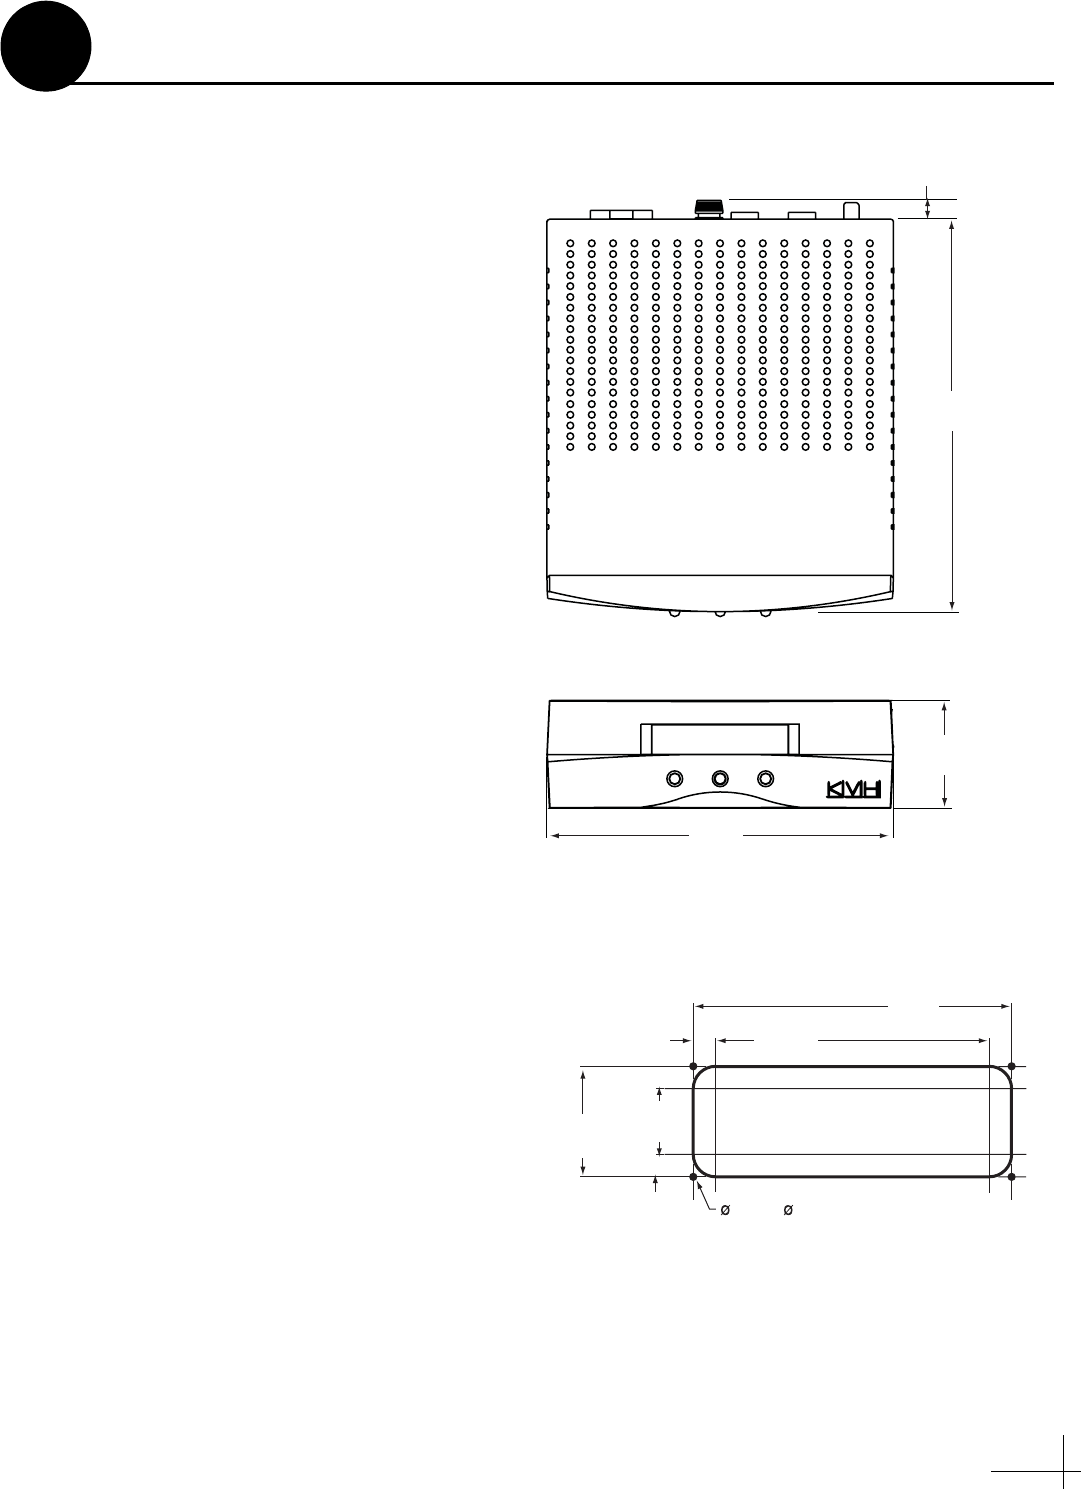
• Be sure to leave enough room at the MCU’s
rear panel for connecting the cables (see
Figure 5 for MCU dimensions).
• Since the supplied data/power cable is 100 ft
(30 m) long, the MCU should be located
within 100 ft (30 m) of the antenna.
• The kitpack contains parts for mounting the
MCU either to a horizontal surface (using
Velcro) or to a vertical surface (using the
supplied flush mount bracket).
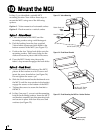
Prepare the MCU Mounting Site
(Flush Mount only)
NOTE: Skip this step if you plan to mount the MCU
to a horizontal surface instead.
a. Using the MCU flush mounting template
provided at the end of this manual, mark and
cut out a hole in the mounting surface to
accommodate the flush mount bracket (see
Figure 6).
b. Using the same template, mark the locations
for the four MCU mounting holes.
c. Using a #29 drill bit, drill a 0.136" (3.45 mm)
hole at the four mounting hole locations.
Later, you will mount the MCU using four #8
screws.
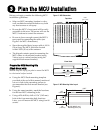
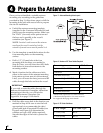
2.52"
(64.1 mm)
8.1"
(205.7 mm)
9.18"
(233.2 mm)
0.66"
(16.7 mm)
Figure 5: MCU Dimensions
Front View
Top View
8.87"
(225 mm)
7.62"
(194 mm)
.63"
(16 mm)
3.08"
(78 mm)
1.83"
(46 mm)
.63"
(16 mm)
.136" ( 3.45 mm)
Mounting Hole (x4)
Figure 6: MCU Mounting Holes Layout
Plan the MCU Installation
3