


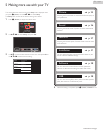
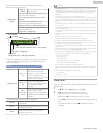

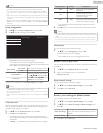

Weak channel installation
This function lets you add the channels that were not added by the
AutoProgram due to the reception conditions during the initial setup. It
is available only when you select Antenna in Installation mode.
1
Use H I to Select Channels, then press OK.
2
Use H I to select Weak channel installation, then press OK.
●
The PIN code will be required if you have locked channels.
If Pin is forgotten go to Change PIN. L p. 30
3
Use J K to select channel Input box, then use H I to select a
channel you want to memorize.
4
Use J K to select Search, then press OK.
5
Display will be changed to Store from Search when the channel is
found, then press OK.
Note(s)
●
In most cases, Digital channels are not broadcast on the RF channel on which they appear
on your TV. To add Digital channels you need to know the RF channel on which the Digital
channel is being broadcast. (e.g. If there is a Digital channel 9.1 which is being broadcast
on RF channel 25, you need to enter 25 while performing a weak channel installation.) To
find out the RF channel on which a particular Digital channel is being broadcast, please
contact your local service provider. Installing Digital channels using Weak channel
installation might not work for direct cable connections and if the Digital signal is too weak
for the TV to process.
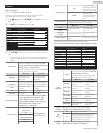
Installation mode
1
Use H I to Select Channels, then press OK.
2
Use H I to select Installation mode, then press OK.
3
Use H I to select Antenna or Cable, then press OK.
●
When Antenna is selected, the TV detects antenna signals. It
searches for DTV and Analog TV channels available in your area.
●
When Cable is selected, the TV detects signals supplied by cable.
It searches for DTV, Analog TV and Cable channels available in
your area.
Uninstall channels
The channels selected here can be skipped when selecting the channels
using CH + / –.
Those channels can still be selected with the NUMBER buttons.
1
Use H I to Select Channels, then press OK.
2
Use H I to select Uninstall channels, then press OK.
3
Use H I to select the channel you want to remove, then press
OK.
●
G indicates next to the Channel not skipped.
●
E indicates next to the skipped Channel.
●
The removed channels are not displayed on the list of Favorite
channels.
●
To reactivate a removed channel, use H I then press OK.
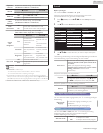
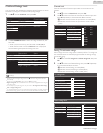
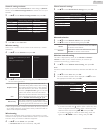
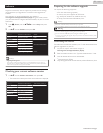
Preferences
You can set the unit to reduce the power consumption or adjust the
backlight brightness in Location setting when using the HOME feature as
compared to the RETAIL feature.
fun-Link (HDMI CEC) allows you to operate your connected fun-Link
device when turned On.
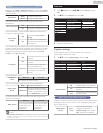
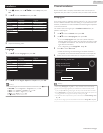
Setting your location to home
Choosing Home gives you full flexibility to change predefined settings for
picture and sound.
1
Use H I to Select Preferences, then press OK.
2
Use H I to Select Location, then press OK.
Restore default settings
Network
Preferences
Channels
Language RetailLocation
fun-Link Control
fun-Link (HDMI CEC)
OnE-sticker
3
Use H I to Select Home, then press OK.
Retail
The Unit will be set up with predefined settings for
retail displays. In this setting, the Power Consumption
may possibly exceed the limit requirement of the
ENERGY STARN qualification.
Home
This setting is ENERGY STARN qualified.
The Unit is set to maximize the energy efficiency for
Home setting and it can be adjusted through a choice
of Picture and Sound quality selections according to
your preference.
Note(s)
●
You must set Home in the Menu. Otherwise, personalized Picture and Sound Settings will
Not Be Memorized after the Unit goes into Standby Mode.
●
If you select Home, E-sticker will not be displayed.
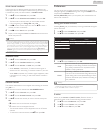
E-sticker
When you set Location to Retail, E-sticker (Electronic Sticker) is
displayed. E-sticker can be Turned Off using procedure below.
1
Use H I to Select Preferences, then press OK.
2
Use H I to select E-sticker, then press OK.
3
Use H I to select Off, then press OK.
32 .English
Continued on next page.