14
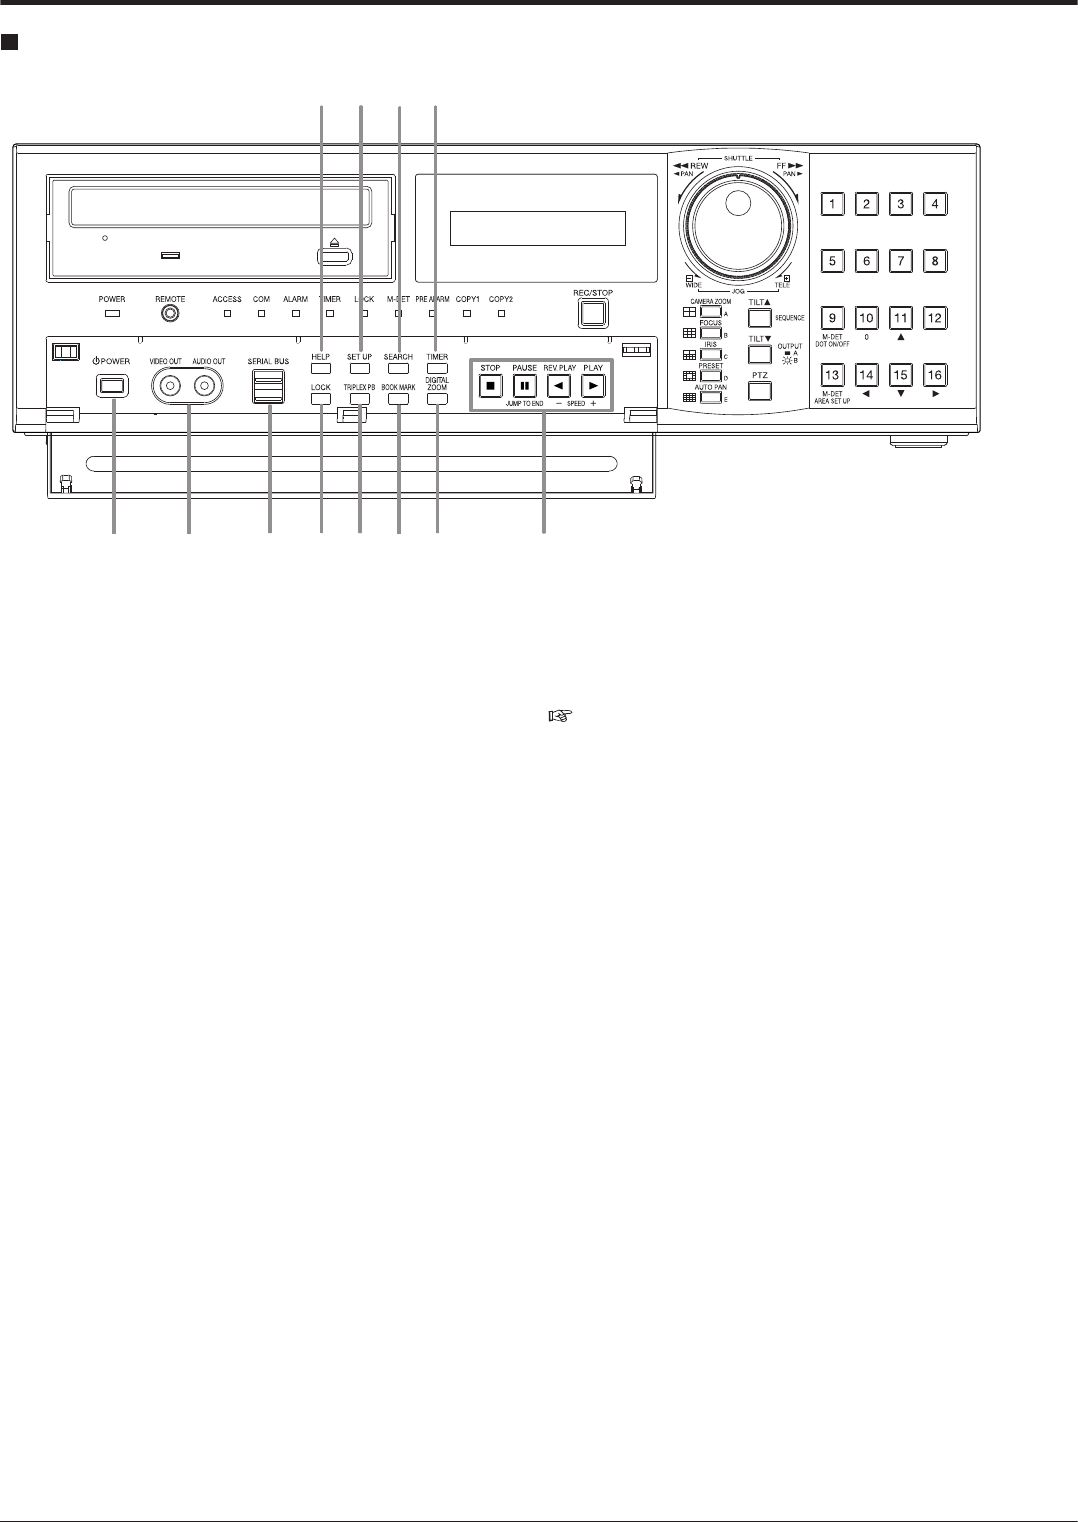
22 24 29 30
31
32
25 26
27
28
3323
Major operations and their functions (continued)
Front view (inside of the door)
22. POWER button
Turns on the unit (MAIN switch on the rear of this unit
must be ON). When the button is pressed again, the unit
switches to stand-by mode. The POWER and other but-
ton
operations are not accepted while the POWER indi-
cator is flashing.
23. ANALOGUE OUTPUT connectors
VIDEO OUT connector
Output connector for video signal (RCA pin).
AUDIO OUT connector
Output connector for audio signal (RCA
pin).
24. SERIAL BUS port
Input and output port for the devices equipped with SE-
RIAL BUS connectors. Bus power cannot be used.
25. HELP button
Displays the help menu (for caution on use, operating
method, and explanation on functions).
Used when the warning message is displayed.
This
button can be used even while the menu screen is
displayed.
26. SET UP button
Displays the <User Menu>.
27. SEARCH button
Displays the <User Menu> with search menu opened.
28. TIMER button
Sets the unit to timer recording/stand-by mode and lights
up the TIMER indicator. When pressing this button for
more than 2 seconds, timer recording/stand-by mode is
cancelled and the TIMER indicator is turned off.
29. LOCK button
Activates simple lock or password lock when pressing
while the MAIN switch (main power) on the rear panel is
turned on and lights up the LOCK indicator. Moreover,
the password can be set on the <Password Setting> (
page 60).
30. TRIPLEX PB button
In split screen display, inserts the playback picture of
needed camera while also displaying the live picture
from other camera.
31. BOOK MARK button
When pressing this button during frame still playback of
the single screen display, the selection screen appears
to register the bookmark or to copy the picture being dis-
played.
32. DIGITAL ZOOM button
Pressing this button in single screen display displays the
screen in 100 % magnification (live or playback). Press-
ing
the camera number button (11, 14, 15, or 16) moves
the magnification centre point.


