


61
Operations
Activating the PASSWORD LOCK
step
1. Press the LOCK button while the MAIN switch is set
to ON.
• The PASSWORD LOCK turns on and the LOCK
indicator lights up.
•
The PASSWORD LOCK locks the data only in
the main device. The data in the copy device is
not locked.
•
The PASSWORD LOCK of the disk management
password turns on after inputting the password
and exits the setting screen.
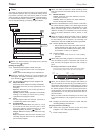
Releasing the PASSWORD LOCK
[for the levels 1 and 2]
step
1
-1
. Press the LOCK button for more than 2 seconds to
display the unlock password screen.
step
1
-2
. Input the password of the desired level by pressing
the number buttons.
PASSWORD LOCK can be unlocked even when the
MAIN switch on the rear panel is set to ON and the POW-
ER button on the front panel set to OFF
.
When the password lock is turned on while the power of
this unit is turned off, use the LCD display on the front
panel to release the lock. In this case, input the password
and then press the LOCK button.
step
1
-3
. Select “Unlock.”
• The PASSWORD LOCK is released and the
normal screen appears.
When the PASSWORD LOCK of levels 1 and 2 are set
and then level 1 is unlocked, the PASSWORD LOCK of
level 2 is still active.
When the PASSWORD LOCK of levels 1 and 2 are set,
you cannot unlock only level 2. Unlock level 1 also.
Be sure to input the PASSWORD correctly. When you
input the incorrect PASSWORD, the password already
input is cancelled. Input the PASSWORD again.
Press the LOCK button when not releasing the lock.
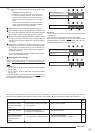
[for the level 3]
step
2
-1
. Press the “D (Next)” button while displaying the
<User Menu> to proceeding to the next menu.
• The <Unlock Password Level 3> appears.
When the PASSWORD LOCK of levels 1, 2, and 3 are
set, you cannot unlock only level 3. Unlock levels 1 and 2
first.
step
2
-2
. Input the PASSWORD of level 3 by pressing the
number buttons.
step
2
-3
. Select “Unlock.”
• The PASSWORD LOCK is released and the
<User Menu> appears.
When the PASSWORD LOCK of levels 1, 2, and 3 are
set, the PASSWORD LOCK of level 2 is active when un-
locking
level 1, and level 3 is active when unlocking levels
1 and 2.
To exit the menu without releasing the lock, press the
LOCK button while displaying the screen for unlocking.
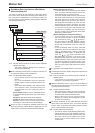
[for the disk management password]
step
3
-1
. In the <Main Storage Memory>
(
page 79), select
“Clear” of desired area and then select “Execute.”
• The <Unlock Password Disk Management>
screen appears.
step
3
-2
. Input the PASSWORD of disk management
password by pressing the number buttons.
step
3
-3
. Select “Unlock.”
• When exiting the <Main Storage Memory>, the
lock of disk management password is turned on
again.
If you forget the password, consult your dealer.
Changing the PASSWORD
step
1. Unlock the PASSWORD of levels 1 to 3.
[for the levels 1 to 3]
step
2
-1
. Display the password setting screen of the level to
be changed and then select “Clear.”
step
2
-2
. Input the new PASSWORD referring to “Registering
the PASSWORD.”
[for the disk management password]
step
3
-1
. Select <Disk Management Password>.
step
3
-2
. Input the PASSWORD of disk management
password by pressing the number buttons.
step
3
-3
. Select “Unlock.”
• The PASSWORD LOCK is released and the
password setting screen appears.
step
3
-4
. Select “Clear” to clear the password.
step
3
-5
. Input the new PASSWORD referring to “Registering
the PASSWORD.”
Changing the lock mode from PASSWORD
LOCK to SIMPLE LOCK
step
1. Unlock the password of levels 1 to 3.
step
2. Clear the registered password for all the levels, 1 to
3 and disk management password.