


32
2)
2)
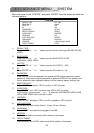
Software Operation
Software Operation:
NOTE: The version of the licensed software will shown on the login page.
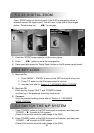
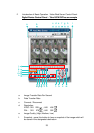
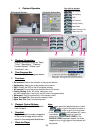
c Connect DVR to PC via RJ45 network line.
d
d
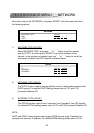
LAN Setting :
LAN Setting :
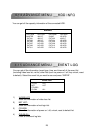
The default DVR IP is “192.168.1.10”, and default “username” and
“password” are both “admin”. Users should set PC’s IP address as
“IP:192.168.1.
XXX
XXX (1~255, except 10)” (in order to make the PC and DVR
under the same domain).
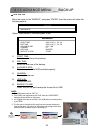
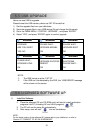
e Double click to enter login page.
Key in IP (192.168.1.10), username (admin), password (admin), port (80)
in the login page. After connect to the DVR with local LAN, users could
modify the network settings in DVR or in system config of the licensed
software AP.
f
f
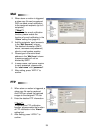
Network Type ~ Static IP :
Network Type ~ Static IP :
Set the network information in the DVR menu (Section 4.12) or in System
Config of the licensed software AP (P.37).
Network Type ~ Dynamic IP (DHCP and
Network Type ~ Dynamic IP (DHCP and
PPPoE
PPPoE
) :
) :
Set the Network information in System Config of the licensed software AP.
For detailed DHCP and PPPoE setting, please refer to P.37 and P.38.
g After setup the network information, double click to enter login page.
Key in “Username”, “ Password”, “IP” (Static IP) or “Host name” (Dynamic
IP), and “Port”. And then click the green button to connect.
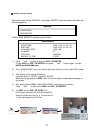
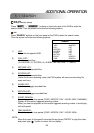
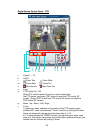
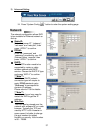
h LOGIN AP Icon Explanation.
Address Book:
Address Book: Press this
button to add a new IP into
the IP Address Book
or choose any preset IP
address to access the
software AP.
Search:
Search: Search available
DVR IP address in local area
network and modify the
network setting of the DVR.
Player:
Player: Press this button to
access and play the recorded
files that are saved in your PC.
Upgrade Firmware:
Upgrade Firmware: Press this
button, upgrade DVR firmware.
The provided firmware files
should be saved at PC first.
Copy:
Copy:
Press this button to
copy all the software
installation files, so users could
keep all the settings of video
web server for next software
installation on other PC.