


15
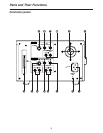
CH3 CH4
CH4
CH1+CH3 CH2+CH4
CH3
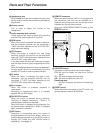
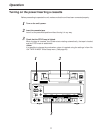
AUDIO OUT connectors
CH1 output CH2 output
CH1
CH2
CH3
CH4
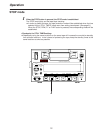
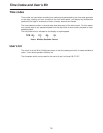
LED
CH1
CH1
CH2
CH1 CH3
CH4
CH2
CH3
CH4
No display
CH3
CH4
No display
CH3
CH4
No display
CH3
CH4
CH1
CH2
CH3
CH4
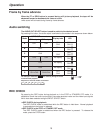
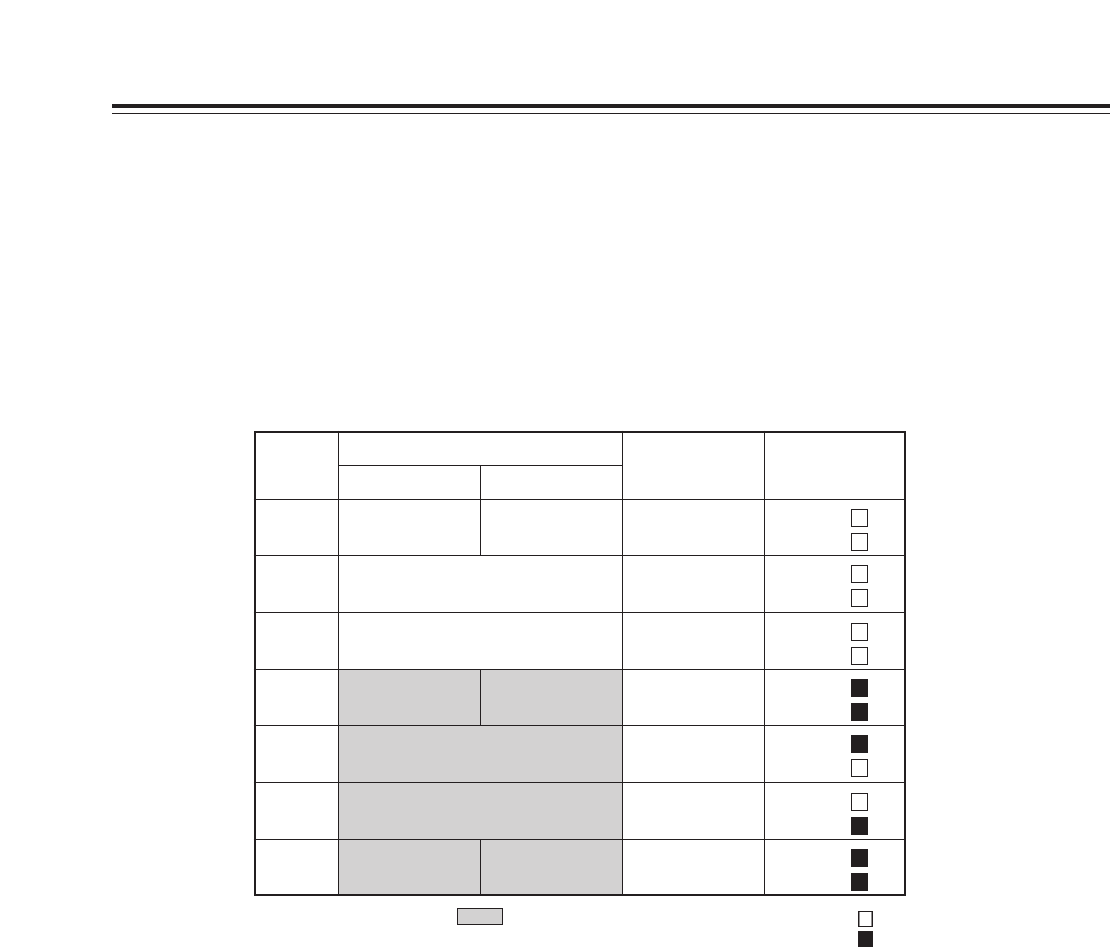
The AUDIO OUT SELECT button is used to switch to the desired sound.
By pressing this button, the audio output is switched to the modes in the sequence shown below.
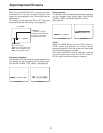
Display tube
CH2
• • • • • • • OFF
• • • • • • • ON
The settings in the boxes ( ) are valid only during DV format
4-channel mode playback.
Audio switching
Frame by frame advance
When the FF or REW button is pressed during still picture playback, the tape will be
advanced forward or backward one frame at a time.
O
No sound will be heard during frame by frame advance.
REC CHECK
By pressing the REC button during playback or in the STOP or STANDBY OFF mode, it is
possible to check the audio input signals, time code generator value and the video input signals
which have been selected using the INPUT SELECT switch.
O
REC CHECK during playback
The REC CHECK mode is established while the REC button is held down. Normal playback
is restored when the button is released.
O
REC CHECK in the STOP or STANDBY OFF mode
The REC CHECK mode is established when the REC button is pressed. To release the
mode, press the STOP button.
Mode
A
B
C
D
E
F
G
Sequence in which the modes are selected
[[..
A
>>
B
>>
C
>>
D
>>
E
>>
F
>>
G
..]]
aa"""""""""""""""""""""""""""""""""""""""""""" }}
Operation