– 58 –
Setup menus
USER menu
<AUDIO>
Item Setting
No.
Superimposed
No.
Superimposed
Description
display display
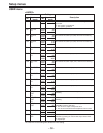
700 INT SG 0000 OFF
0001 ON
701 CH1 IN 0000 4dB
LV
0001 0dB
0002 –20dB
702 CH2 IN 0000 4dB
LV
0001 0dB
0002 –20dB
703 CH3 IN 0000 4 dB
LV
0001 0 dB
0002 –20 dB
704 CH4 IN 0000 4 dB
LV
0001 0 dB
0002 –20 dB
705 CUE IN 0000 4dB
LV
0001 0dB
0002 –20dB
0003 –60dB
706 CH1 OUT 0000 4dB
LV
0001 0dB
0002 –20dB
707 CH2 OUT 0000 4dB
LV
0001 0dB
0002 –20dB
708 CH3 OUT 0000 4 dB
LV
0001 0dB
0002 –20 dB
709 CH4 OUT 0000 4 dB
LV
0001 0 dB
0002 –20 dB
710 CUE OUT 0000 4dB
LV
0001 0dB
0002 –20dB
711 MONIL 0000 4dB
OUT
0001 0dB
LV 0002 –20dB
712 MONIR 0000 4dB
OUT
0001 0dB
LV 0002 –20dB
713 MONI 0000 UNITY
OUT
0001 VAR
714 EMPHASIS 0000 OFF
0001 ON
715 CH1 IN 0000 ANA
SEL 0001 DIGI
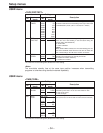
The underline on the setting item denotes the initial setting.
This selects whether or not the internal signal is to be
generated.
0: The signal is not generated.
1: The signal is generated.
This selects the audio input (CH1) reference level switching.
This selects the audio input (CH2) reference level switching.
This selects the audio input (CH3) reference level switching.
This selects the audio input (CH4) reference level switching.
This selects the audio input (CUE) reference level switching.
This selects the audio output (CH1) reference level switching.
This selects the audio output (CH2) reference level switching.
This selects the audio output (CH3) reference level switching.
This selects the audio output (CH4) reference level switching.
This selects the audio output (CUE) reference level switching.
This selects the audio monitor output (Lch) reference level
switching.
This selects the audio monitor output (Rch) reference level
switching.
This selects the audio monitor output volume UNITY/
VARIABLE reference switching.
0: The volume is output at the preset value.
1: The volume is linked with the headphones volume control.
This sets the emphasis ON or OFF.
This selects the CH1 input when USER SET has been
selected by pressing the unit’s AUDIO input selector switch.
0: Analog input.
1: Digital input.


