


57
Changing the unit’s settings (continued)
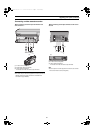
Audio mode: (DMR-E51GCS only)
To select Audio mode then select the broadcasting system.
Use [3, 4] (10) to select “BG”, “I”, or “DK”.
≥BG: PAL B.G.H
≥I: PAL I
≥DK: PAL D.K.K1
Mono:
To select the type of sound to be recorded.
Use [3, 4] (10) to select “Off”.
≥Select “On” if the stereo sound is distorted due to inferior
reception conditions, or if you want to record the normal (mono)
sound during a stereo, bilingual or NICAM broadcast.
5 Press [RETURN] (23).
Adding, deleting and moving channels
Use this function if:
≥Channels were not set correctly using automatic tuning.
≥A channel that should have been set wasn’t.
≥A channel’s reception is poor and you want to delete it.
Preparations
≥Switch [DVD, TV] (15) to “DVD”.
≥Press [FUNCTIONS] (11) to show the FUNCTIONS window.
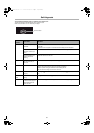
1 Use [3, 4, 2, 1] (10) to select “SETUP” and press
[ENTER] (10).
≥The SETUP screen appears.
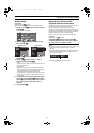
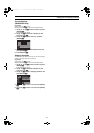
2 Use [3, 4] (10) to select the “Tuning” tab and
press [2] or [1] (10).
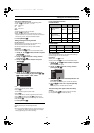
3 Use [3, 4] (10) to select “Manual” and press
[ENTER] (10).
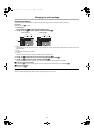
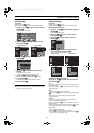
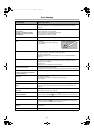
4 Use [3, 4, 2, 1] (10) to select the desired TV
station and use the [A], [B], [C] buttons ((29), (28),
(33)) to select “Delete”, “Add”, “Move”.
Follow the operations below.
To delete a programme position “Delete”:
Press [A] (29).
To insert a blank programme position “Add”:
Press [B] (28).
To move a TV station to another programme position “Move”:
Press [C] (33), and then use [3, 4] (10) to select the new
programme position to which you want to assign the TV station.
Press [ENTER] (10).
5 Press [RETURN] (23).
Note
≥Setting can take up to 3 minutes approximately.
Hint
≥If you have performed Manual Tuning to enter TV stations, the
[jj] indication may appear under [Pos/Name] on the display
when programming a G-
CODE timer recording.
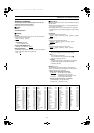
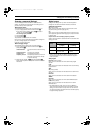
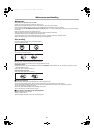
List of TV Reception Channels
For DMR-E51GCS
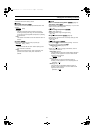
For DMR-E50GN
Auto-Setup Restart
You can use the SETUP menus to start Auto Channel setting if
Auto Setup (page 12) fails for some reason.
Preparations
≥Switch [DVD, TV] (15) to “DVD”.
≥Press [FUNCTIONS] (11) to show the FUNCTIONS window.
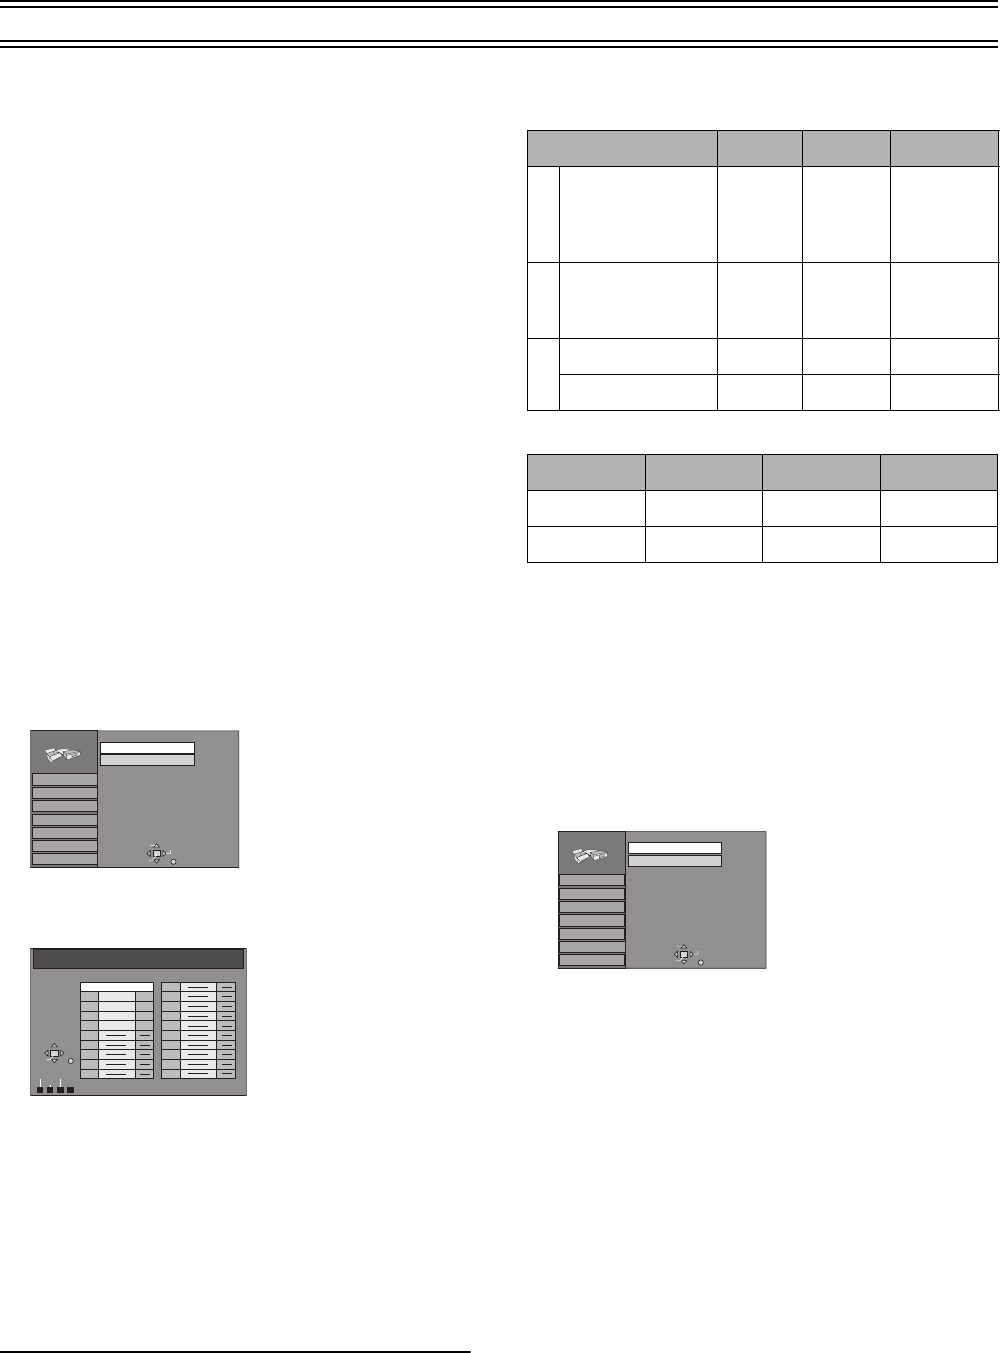
1 Use [3, 4, 2, 1] (10) to select “SETUP” and press
[ENTER] (10).
≥The SETUP screen appears.
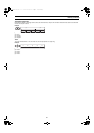
2 Use [3, 4] (10) to select the “Tuning” tab and
press [2] or [1] (10).
3 Use [3, 4] (10) to select “Auto-Setup Restart” and
press [ENTER] (10).
≥A message appears asking you to confirm the operation.
4 Use [2] (10) to select “Yes” and press [ENTER]
(10).
≥Auto Setup starts. This takes about 5 minutes.
The clock setting menu appears after Auto Setup
finishes
(1) Use [3, 4, 2, 1] (10) to set the correct time and date.
(2) Press [ENTER] (10) to conclude the setting.
Manual
Tuning
SETUP
RETURN
Settings
Disc
Picture
Sound
Display
Connection
Auto-Setup Restart
ENTER
SELECT
TAB
Manual Tuning
Pos
Name
Ch
ENTER
RETURN
SELECT
Pos
Name
Ch
B C D
A
Delete
Add
Move
1 ARD 4
2 ZDF
2
3 N3
5
4 HR3
8
5 BR3 10
6
7
8
9
10
11
12
13
14
15
16
17
18
19
20
SYSTEM VHF UHF CATV
B
G
CCIR Standard
(B.G.H)
E2-E12 E21-E69
S01-S05
M1-M10
U1-U10
S21-S41
I
Hong kong Special
Administrative
Region of China (I)
s 21-69 s
D
K
OIRT (D.K.K1) R1-R12 21-69 44-470MHz
China (D) 1-12 13-57 Z1-Z35
Country VHF UHF CATV
Australia 0-12 28-69 45-470MHz
New Zealand 1-11 21-69 44-470MHz
Manual
Tuning
SETUP
RETURN
Settings
Disc
Picture
Sound
Display
Connection
Auto-Setup Restart
ENTER
SELECT
TAB
DVD(PAL).book 57 ページ 2003年5月22日 木曜日 午後12時3分