Settings Using the On-Screen Display
RQTV0115
22
22
To see these displays, set the OSD item in the “OPTION” menu to
“AUTO” (l 21).
Press [VHS STATUS].
The time and operation details appear on the screen for about 5
seconds.
Notes:
≥These displays do not appear when paused or during slow play.
≥The on-screen display may be distorted depending on the playback
tape or the input signal.
To change the audio, press [AUDIO].
The audio changes as follows:
When playing a tape: LR>L>R>Normal audio track>LR
While watching the TV: LR>L>R>Normal>LR
≥You cannot change the audio while you use “dc” channel (l 38).
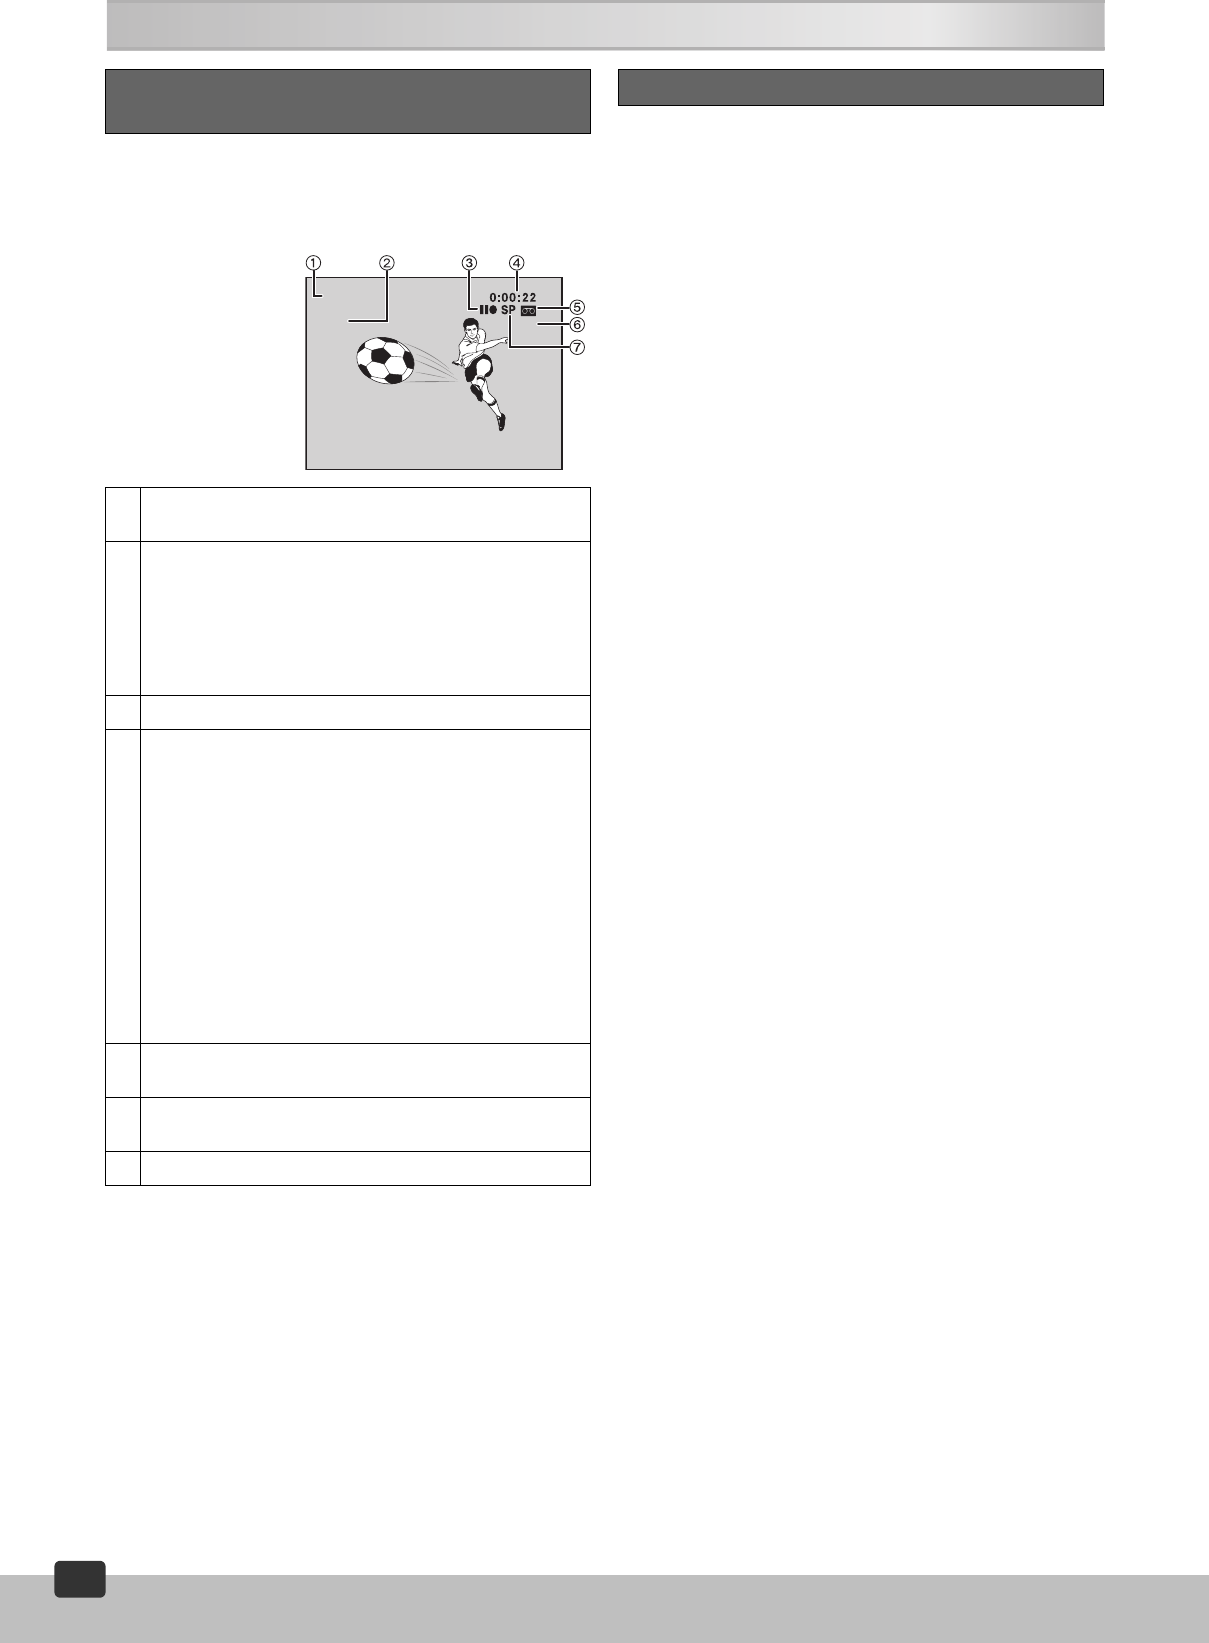
Various Indications in On-screen
Display
1 Channel display
This indication only appears when VHS playback is stopped.
2 L and R indicators
The Left (L) and Right (R) indicators show which sound mode
is selected as follows:
Stereo: Both the L and R indicators appear.
L: The L indicator appears.
R: The R indicator appears.
Normal: Neither the L nor R indicator appears.
3 Operation status display
4 Shows the time and tape counter
Pressing [VHS STATUS] once makes the on-screen display
appear. After that, press the button repeatedly to change the
display as follows:
Present time>Tape counter>Remaining tape
time>Present time
During Index Search:“S 01” to “S 20” is displayed. (l 19)
During Jet Rewind: “J.REW” is displayed. (l 14)
≥Press [RESET] to reset the tape counter (elapsed time) to
“0:00:00”.
The tape counter is automatically reset to “0:00:00” when a
video cassette is inserted.
≥The remaining time is approximate. It will be incorrect if you
set the wrong tape time in “TAPE SELECT” in the “OPTION”
menu or if the tape is of poor quality.
5 Cassette-in indicator
Shows whether you have inserted a video cassette.
6 Colour system indicator (l 21)
Shows selected colour TV system except “AUTO”.
7 Recording mode indicator (l 16)
L R
PAL
CH 1
Changing Audio
VP60GCS.book Page 22 Monday, March 6, 2006 3:23 PM


