


C2629M-E (7/09) 35
ENABLING AND USING CTRL+ALT+DEL
Enabling the Ctrl+Alt+Del key combination allows you to open the Windows Task Manager dialog box to perform Windows system
administration tasks. To complete the procedure, you must be logged on to the DX8100 as an administrator or a member of the administrators
group on a computer that is part of a network domain.
NOTE: The DX8100 keyboard is remapped. To see which keys replace the Ctrl and Alt keys, refer to the Important Security Information for
System Administrators guide.
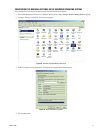
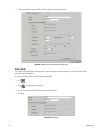
To enable the Ctrl+Alt+Del key combination:
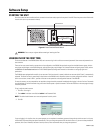
1. Click .
2. Click . The System page is displayed.
3. From the Setup Ctrl + Alt + Del key combination area, click the Enable Ctrl+Alt+Del key combination selection check box.
4. Click Apply.
5. Reboot the DX8100.
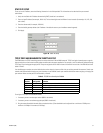
USING CTRL+ALT+DEL
You must enable the Ctrl + Alt + Del key combination and verify your actual keyboard mapping. In some cases, the DX8100 keyboard is remapped
and the actual Ctrl and Alt key function is assigned to other keys. For information on which keys replace the Ctrl and Alt keys, refer to the
Important Security Information for System Administrators guide.
Ctrl+Alt+Del allows you to access the Windows Task Manager dialog box from within the DX8100 shell. When you exit the Windows
environment, you are returned to the DX8100 shell. In this case, you do not have to log back into the DX8100.
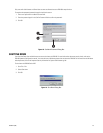
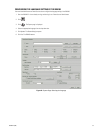
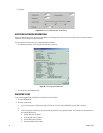
To access the Windows Task Manager dialog box:
1. Press the assigned keyboard keys that implement the Ctrl + Alt + Del function. The Windows Security dialog box opens.
2. In the Windows Security dialog box, click Task Manager. The Windows Task Manager window opens.
To return to the DX8100 shell without rebooting the DX8100, exit the Windows Task Manager dialog box.
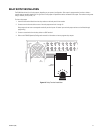
NETWORK SOFTWARE CONFIGURATION
Using the TCP/IP protocol, up to five DX8100 Series HVRs can be networked together for remote viewing and management. In addition, up to five
simultaneous computer, web, and mobile clients can connect to each HVR. The DX8100 Series HVR supports both static IP addressing and
dynamic addressing through Dynamic Host Configuration Protocol (DHCP). Consult your network administrator for more information regarding IP
address configuration.
The system must be turned on, connected to a network, and you must be logged in with either Power User or Administrator access to configure
network software settings. You must reboot the HVR for any network configuration changes to take effect.
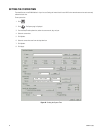
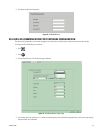
To begin the network setup process:
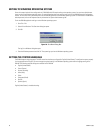
1. Click .
2. Click . The Network page is displayed.
3. Click the Network tab if it is not already visible.
4. Enter a new name for your HVR in the Site Name field. (Site names can be up to 30 characters in length. The default site name is DX8100.)
5. Enter a unique system ID for your HVR in the System ID field. (System IDs must start with a letter, must be 15 characters or less, and cannot
include spaces or special characters.)
Your HVR’s site name is used to identify your system to clients and other DX8100 servers. Your HVR’s system ID is used to uniquely identify
your system on a local area network (LAN). System IDs are required to prevent possible conflicts with other network devices.