


42 C2629M-E (7/09)
INSTALLING THE DX8100 VIEWER
To install the DX8100 Viewer:
1. Start the Windows operating system.
2. Close all programs, including any antivirus software.
3. Insert the DX8100 Resource disc into the computer's DVD drive and wait for the DX8100 Resource disc window to appear.
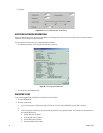
4. Click Software. The DX8100 software installation options are displayed.
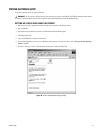
5. Click DX8100 Viewer. The DX8100 Viewer Setup dialog box opens.
6. Click Next. The Software License Agreement dialog box opens.
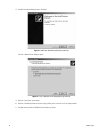
7. Read the license agreement and select the “I accept this License Agreement” check box.
8. Click Next. The Select Installation Folder dialog box opens.
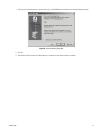
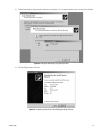
9. Click Next to accept the default installation folder. The DX8100 Viewer software is installed, and the “Installation is completed
successfully” dialog box opens.
10. Click Finish to complete the installation process.
INSTALLING THE DX8100 WEB CLIENT
The first time you use a web browser to connect to an HVR server, an ActiveX
®
control application is downloaded and installed on your local
computer. This control facilitates usage of the web client’s interactive features. Pelco recommends that you only use Internet Explorer because
the DX8100 Web Client application is not compatible with Netscape Navigator
®
.
To install the DX8100 Web Client application:
1. Install and enable IPSec security services. For instructions on installing IPSec security services, refer to Installing the PC Client Application
on page 40 or Installing the Client Emergency Agent Application on page 41.
You must install either the PC Client application or the Client Emergency Agent application to install IPSec security services.
2. Start the Microsoft Internet Explorer web browser.
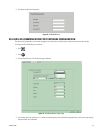
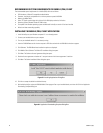
3. Enter the IP address of one of the DX8100 servers you want to connect to in the address bar. The Web Client log-in window appears.
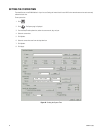
Figure 35. Web Client Log-in Window