


12 Hookups (cont’d)
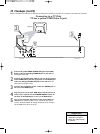
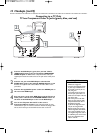
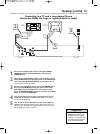
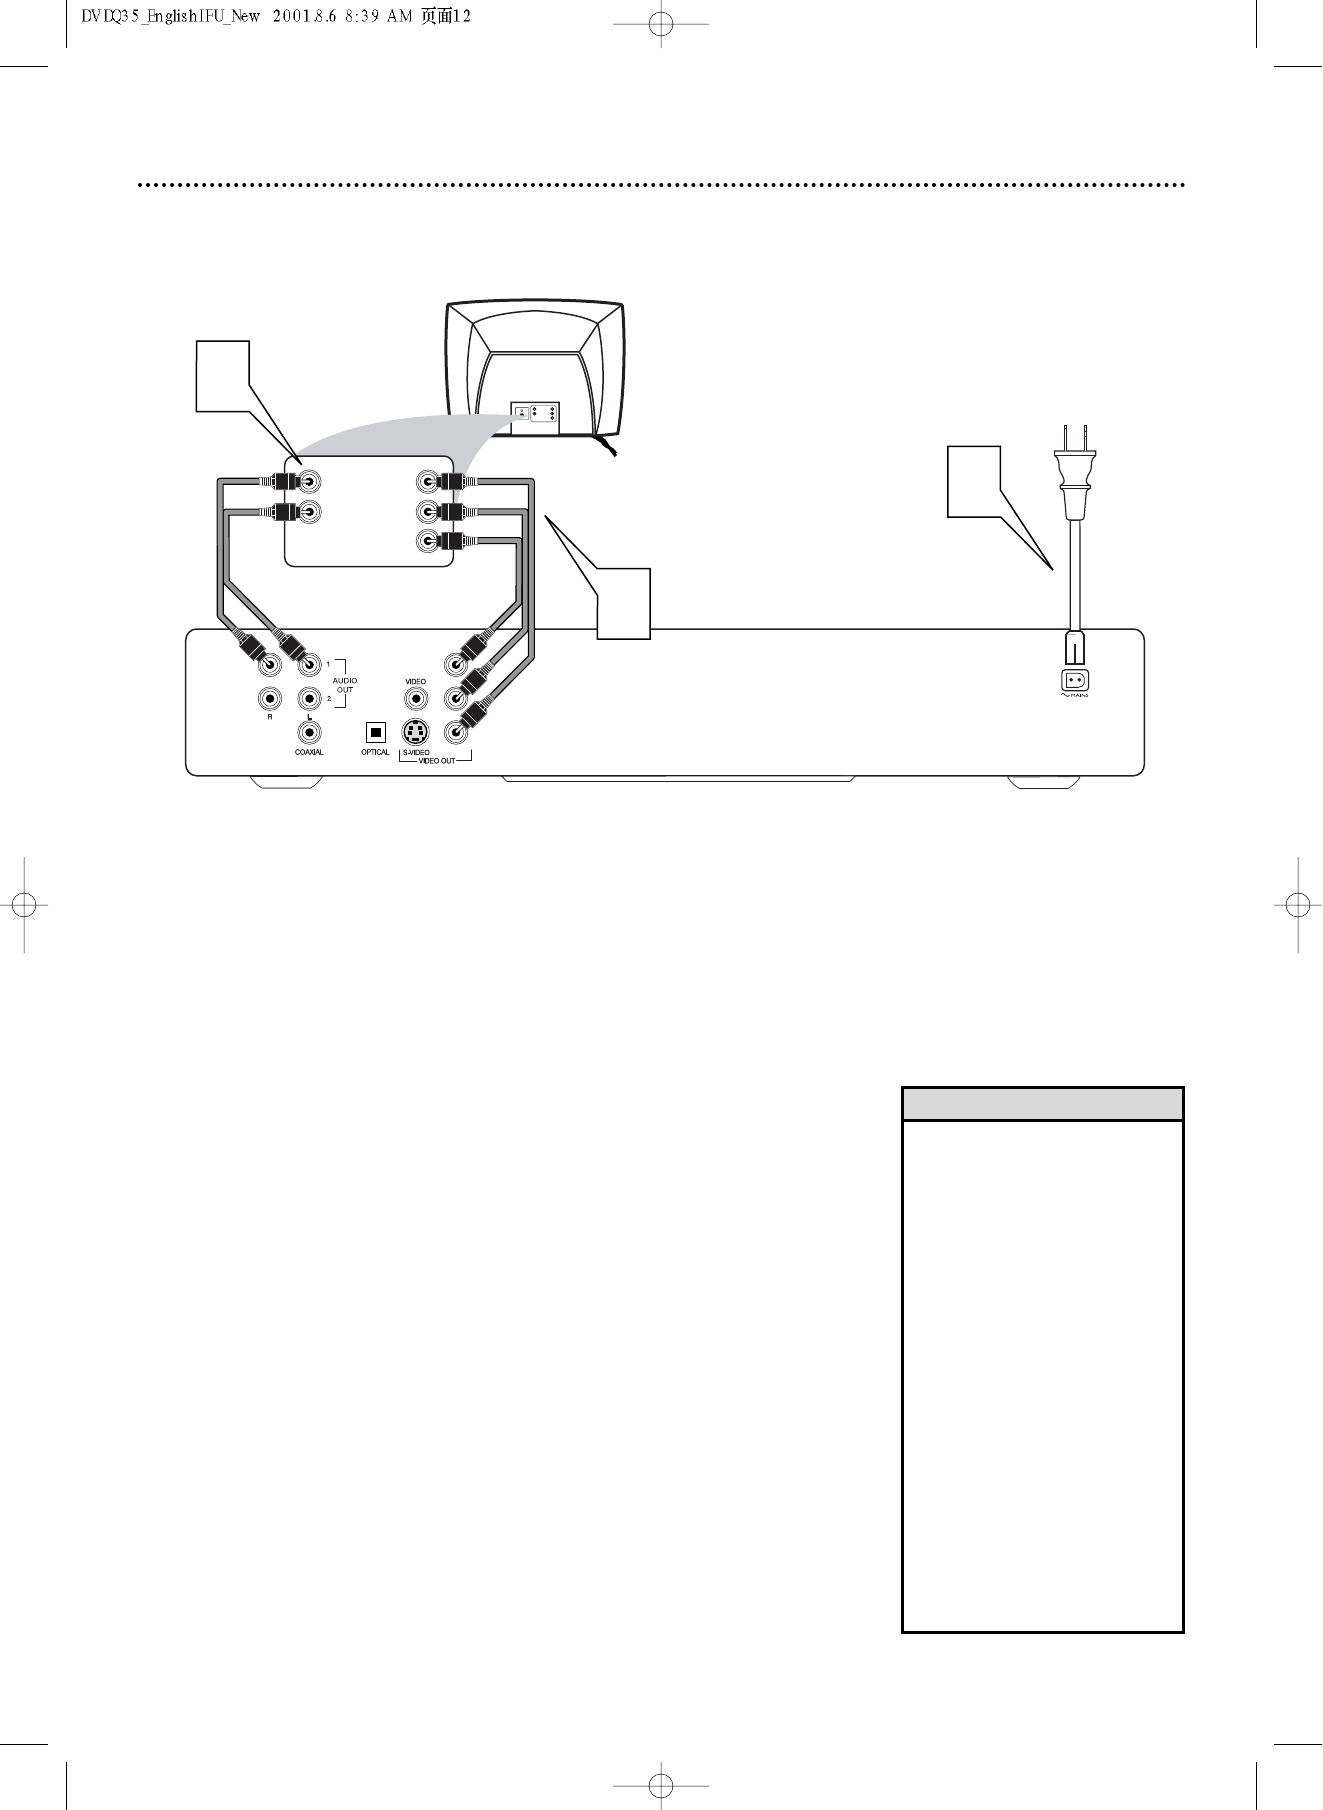
Connecting to a TV Only
TV has Component Video In Jacks (green, blue, and red)
Back of TV
(example only)
LEFT AUDIO IN
RIGHT AUDIO IN
Pr/Cr
Y
Pb/Cb
LEFT AUDIO IN
RIGHT AUDIO IN
Pr/Cr
Y
Pb/Cb
1
2
3
Y
Pb
Pr
1
Connect the DVD Player’s green, blue, and red Y Pb Pr
(VIDEO OUT) jacks to the corresponding COMPONENT
VIDEO IN jacks on the TV. Use component video cable (not
supplied) and match the cable colors to the jack colors when possi-
ble.
2
Connect one pair of the DVD Player’s red and white
AUDIO OUT jacks to the left/right AUDIO IN jacks on the
TV. Use the supplied audio cables. Match the cable colors to the
jack colors.
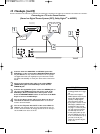
3
Connect the supplied AC power cord to the MAINS jack on
the rear of the DVD Player.
4
Plug the power cords of the DVD Player and the TV into an
active power outlet. Press the POWER ON/OFF button on
the front of the DVD Player to turn on the DVD Player.
5
Turn on the TV power. Set the TV to the correct
Component Video In channel. Such channels usually are near
channel 00. See your TV owner’s manual for details. Or, change chan-
nels at the TV until you see the DVD screen saver on the TV.
• Set VIDEO OUTPUT to YPBPR.
Details are on page 34.
•
On the TV, the Component Video
In jacks may be labeled YUV or
Pr/Cr Pb/Cb Y and may be red,
blue, and green.
Cb is similar to Pb.“B” refers to
the blue part of the video. Cr is
similar to Pr.“R” refers to the red
part of the video.
• The Y Pb Pr jacks on the DVD
Player can send video as either
Component/Interlaced video or
Progressive Scan video.
If your TV has Progressive Scan
and you are using the DVD
Player’s Y Pb Pr jacks, you must
activate Progressive Scan.Details
are on page 35. Make sure you
are using the Progressive Scan In
or Y PB PR In jacks on the TV. Set
the TV to its Progressive Scan
Video In channel.
Helpful Hints