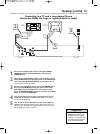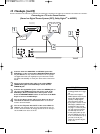
Hookups 9
Determining the best possible connection...
The capabilities of your existing equipment, especially your TV, will determine your connection possibilities.
However, the following guidelines describe which options provide the best picture and sound quality.
૽૽૽૽ Component Video or Progressive Scan Video provides the best picture quality. Details are on
page 12.
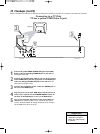
૽૽૽ S-Video provides excellent picture quality. Details are on page 11.
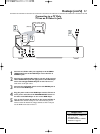
૽૽ Composite Video (a yellow Video jack) provides good picture quality. Details are on page 10.
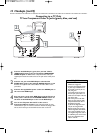
૽૽ Your TV may have only an RF-style jack, usually labeled Antenna In or 75 ohm or RF In.You will
need an RF modulator in order to view the DVD Player at your TV. See your electronics retail-
er for details on RF modulator availability and operations.
૽૽૽૽ Digital audio connections provide the clearest sound, but you must have a digital stereo receiv-
er. Connect either the DVD Player’s COAXIAL or OPTICAL digital audio out jack to your
Stereo for the best sound quality. Details are on page 14.
૽૽૽ If digital connections are not possible, connect one pair (Right and Left) of the DVD Player’s
red and white AUDIO OUT jacks to the Audio In jacks of your Stereo or TV. Details are on
pages 10-13.
If your TV has a single Audio In jack instead of separate left/right Audio In jacks, you will need a
different audio cable than the one supplied.You need a “splitter” audio cable to go from the
left/right AUDIO OUT jacks of the DVD Player to the single Audio In jack on your TV. See an
electronics retailer for details.
Before you begin...
● Refer to the manuals of your TV, Stereo, or other equipment as necessary. Note the style of jacks and
connectors on the other equipment. Determine how to choose different Audio and Video In channels
on your other equipment so you can see and hear the DVD Player on the TV, Stereo, etc.
● Disconnect all equipment from the power outlets. Connect the equipment to the power outlets only
after you have finished hooking up everything. Never make or change connections with equipment con-
nected to the power outlet.
Remember...
● Connect the DVD Player directly to the TV. For example, do not connect the DVD Player to a VCR,
then connect the VCR to a TV.This type of connection may distort the picture and sound.Also, your
VCR might have the copy protection system, which could distort the DVD image or prevent playback
of some Discs.
● Set the TV to the correct Video In channel. Such channels may be called AUX or AUXILIARY IN,
AUDIO/VIDEO or A/V IN, EXT1 or EXT2 or External In, etc.These channels are often near channel
00. See your TV manual for details. Or, change TV channels until you see the DVD screen saver on the
TV.
● Set the Stereo to the correct channel or “source” mode.
● Do not connect the DVD Player’s AUDIO OUT jacks to the PHONO IN jack of your Stereo.
● You only need one audio connection and one video connection between the DVD Player and your TV
and/or Stereo. So, you might not use all the jacks on the DVD Player.
● If you use S-Video or Component Video (Y Pb Pr), set VIDEO OUTPUT accordingly. Details are on page
34.
● If you connect the DVD Player to a TV using the Y Pb Pr jacks and your TV has Progressive Scan, you
must set the DVD Player to Progressive Scan. Details are on page 35.
● There are two sets of AUDIO OUT jacks in case you want to connect the DVD Player to additional
equipment. For example, you can use one set of AUDIO OUT jacks for the connection to the TV, and
use the second pair of AUDIO OUT jacks to connect to a Stereo. Make sure you connect a Right and a
Left AUDIO OUT jack to each piece of equipment. If you are connecting to a single TV only, you will
not use both sets of AUDIO OUT jacks.
Once you determine the best option, find your choice on pages 10-14. Follow the
steps for the hookup you choose.


