Controls and displays
03
23
En
Chapter 3
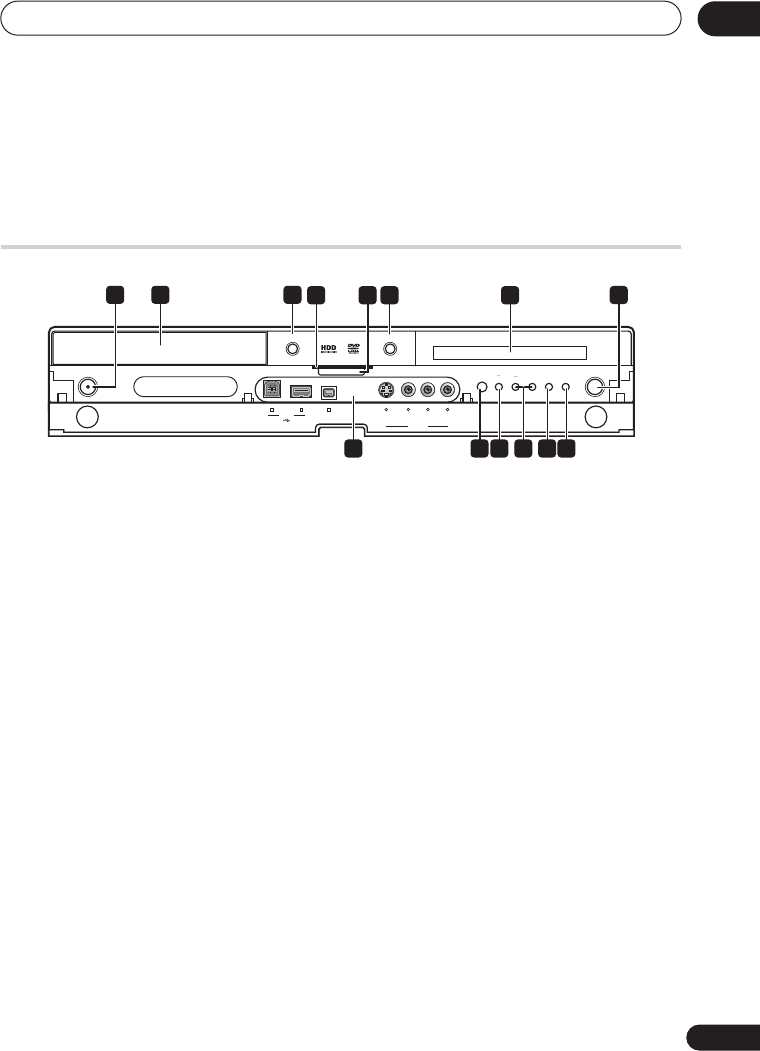
Controls and displays
Front panel
1
STANDBY/ON
Press to switch the recorder on/into standby.
2 Disc tray
3
OPEN/CLOSE
Press to open/close the disc tray.
4 HDD/DVD indicator
Indicator lights blue when the hard disk
(HDD) is selected; orange when the DVD
drive is selected.
5 HELP FUNCTION
Press to display the on-screen help.
6 HDD/DVD
Press to switch between the hard disk drive
(HDD) and DVD for recording and playback.
7 Front panel display and IR remote
sensor
See
Display
on page 26 for details.
8
ì
REC
Press to start recording. Press repeatedly to
set the recording time in 30 minute blocks.
9 Front panel inputs
(page 15)
See
Front panel connections
on page 15 for
more information on these.
10
Press to start or restart playback.
11
Press to stop playback.
12 CH +/–
Use to change channels, skip chapters/
tracks, etc.
13 ONE TOUCH COPY
(page 81)
Press to start One Touch Copy of the
currently playing title to DVD or the HDD.
14 STOP REC
Press to stop recording.
HDD/DVD
ONE
TOUCH
COPY
STOP
REC
CH
OPEN/CLOSE
STANDBY/ON
ì REC
+–
S-VIDEODV IN VIDEO L AUDIO R
(MONO)
INPUT 2
USB
DVR-640H-S
31 2
4 5 6
109 11 13 1412
8
7
DVR640H_RLT_EN.book 23 ページ 2006年4月11日 火曜日 午後12時26分


