


Connections & Setup
22 Chapter 1
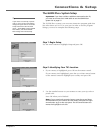
Step 4: Configuring for a VCR
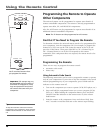
1. If your TV is connected to a VCR, press OK.
If it is not, highlight No and press OK. (Answering No automatically
skips to the end of GUIDE Plus+ setup.)
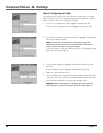
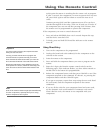
2. Use the up and down arrow buttons to highlight the brand of your
VCR that is connected to the TV and press OK.
If your brand isn’t listed, highlight Not Listed and press OK.
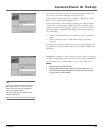
3. Tune your VCR to channel 02. Next, turn OFF your VCR. When you
complete these steps, press OK to begin testing.
Important Note: When code testing is in progress, don’t touch
your TV, VCR, or any of the remote controls for these products.
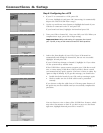
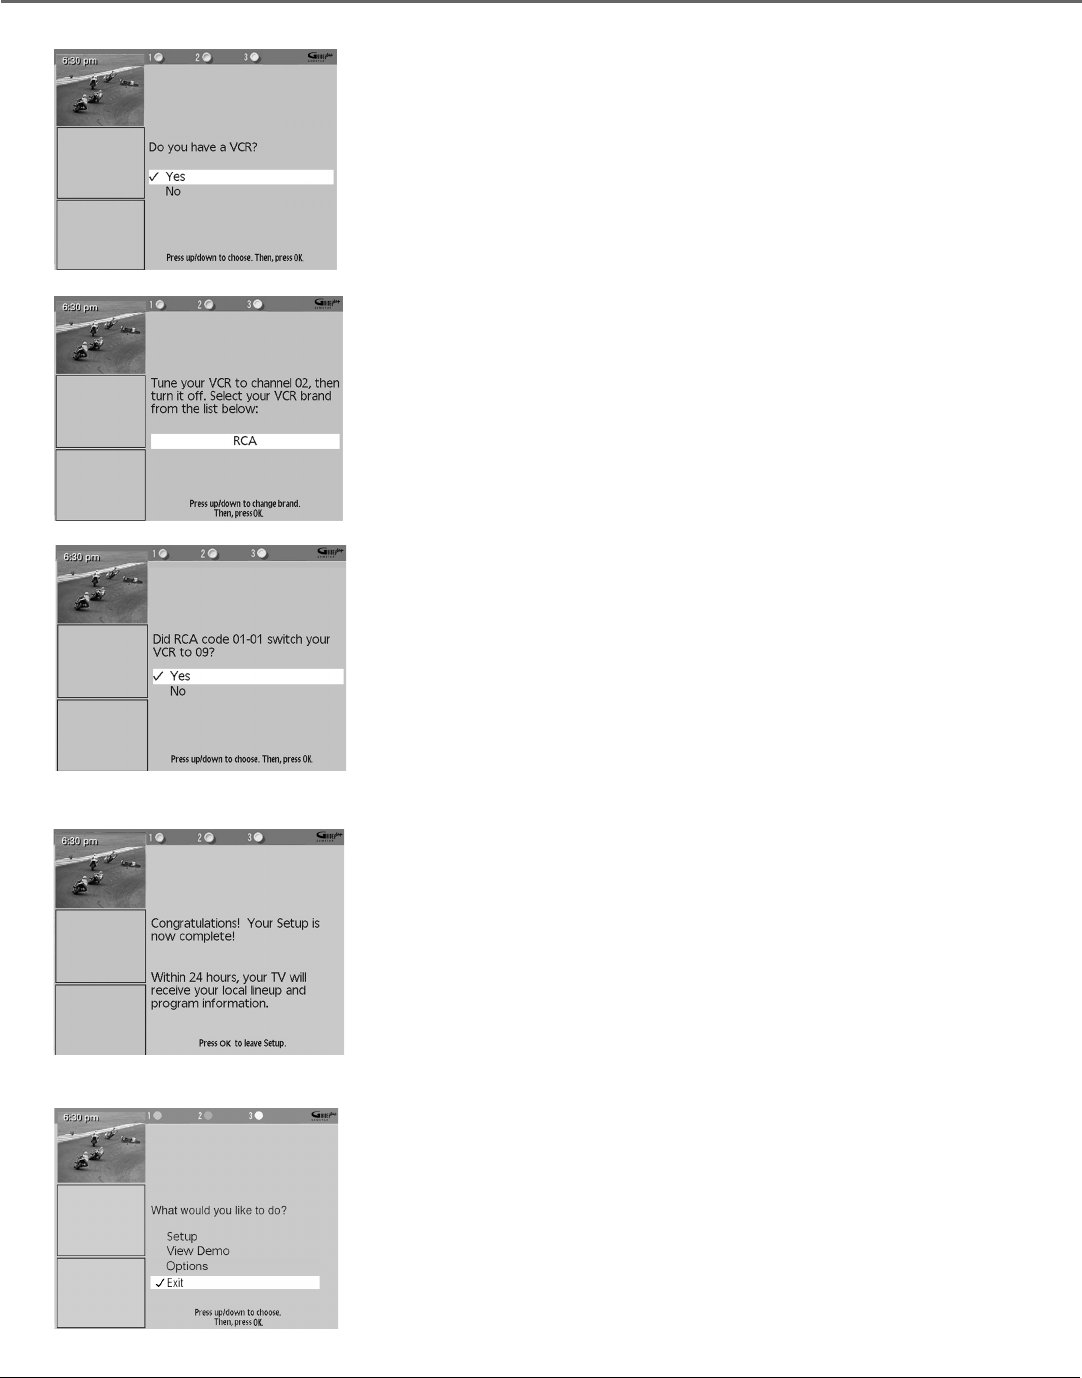
4. Look at the front display of your VCR. If your VCR turned on
automatically and changed to channel 09, the test was successful.
Highlight Yes and press OK.
If your VCR did not change to channel 9, highlight No. If you select
No, the system will try another code.
If the GUIDE Plus+ system cannot recognize your VCR after several
tries, a screen stating “Cable Box (VCR) test failed...Please consult
your manual and try again” appears. You have a choice to either Try
Again or Skip VCR Setup. If you get this message, you should also:
• Double check the brand of your VCR, and try entering it again.
• Check to make sure the G-LINK cable wand is positioned
correctly.
If you choose to skip the cable box or VCR setup some features of
the guide may not be available until you successfully complete this
procedure.
You can choose to view a demo of the GUIDE Plus+ features, which
may take a few minutes to load. If you don’t want to see the demo
right now, highlight Exit and press OK to watch TV.