


34 Chapter 6
Graphics contained within this publication are for representation only.
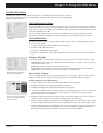
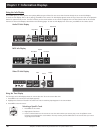
Using the TV’s Menu System
Video noise reduction Allows you to choose a setting to reduce picture “static” or any type of interference. It is especially useful for providing a
clearer picture in weak analog signal conditions. Press the right arrow to choose between: Off for no noise reduction; Minimum for a softer,
smoother picture and retains picture sharpness and detail; Medium for a slightly softer picture than the Minimum setting; Maximum for an even
softer, smoother picture than the other settings. However, the picture detail is somewhat decreased.
Note: Autoformat and Video noise reduction are available for DVI, CMP1 and CMP2 inputs if the signal is 480i.
Picture Presets Displays a choice list that lets you select one of the preset picture settings: Movie, Videogame, Personal, Sports, Ideal, Showroom or
Video Camera. Choose the setting that is best for your viewing environment.
Black Level Adjusts the brightness of the picture.
Color Adjusts the richness of the color.
Contrast Adjusts the difference between the light and dark areas of the picture.
Sharpness Adjusts the crispness of the edges in the picture.
Note: You can adjust sharpness for each channel. This is useful if channels appear fuzzy.
Color Warmth Displays a choice list that lets you set one of three automatic color adjustments: Cool for a more blue palette of picture colors;
Normal; and Warm for a more red palette of picture colors. The warm setting corresponds to the NTSC standard of 6500 K.
Tint Adjusts the balance between the red and green levels.
Note: Tint not available for DVI, CMP1 and CMP2 inputs.
When you change any of these picture settings, the Picture Preset changes to personal. Use the left or right arrow button to make adjustments. To
return to the Picture menu, press the up or down arrow button.
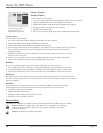
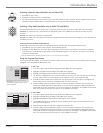
Channel Guide Menu
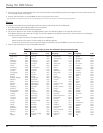
Allows you to view and select from the entire channel list and their labels. Press the GUIDE button to
bring up the Channel Guide menu. Use the up or down arrow to scroll through the list. Press OK to select
and tune to the chosen channel.
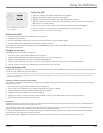
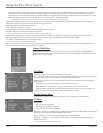
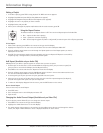
Time Menu
Sleep Timer Lets you set the TV to turn off after a given time.
Time Lets you enter the current time. If it is eight o’clock, for example, you must first enter the number
zero, then number eight. Use the OK button to choose between AM and PM.
Wake up timer Lets you set the TV to turn itself on. When you turn on Wake up timer, the following
options appear:
Wake up time Lets you set the time you want the TV to turn itself on.
Wake up duration Lets you set how long you want the TV to stay on when it turns on.
Channel number Lets you select a specific channel the TV tunes to when the wake up timer is set.
Daily Lets you choose if you want the wake up timer to turn on daily.
Parental Control Menu
The Parental Control Menu was explained in Chapter 4. Go to page 23 for more information.
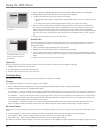
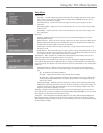
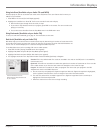
PIP Menu
Display Mode
Off No window is displayed.
PIP PIP (single) window is displayed.
POP POP (double) window is displayed.
PIP channel Allows you to choose the channel displayed in the PIP or main POP window. Scroll through
channel list as well as the VID1, VID2 and FRNT input channels.
PIP size Allows you to choose having a Small, Medium or Large PIP window.
PIP position Allows you to choose having the PIP window in the Top right, Top left, Bottom right or
Bottom left part of TV.
Note: Pip size and position are not available for POP.