


Chapter 3: Using the Monitor’s Features
Chapter 3 19
Graphics contained within this publication are for representation only.
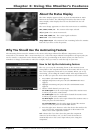
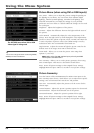
About the Status Display
The Status Display appears when you press the MONITOR or INFO
button on the remote. The following list describes the items on the
Status Display. Other displays that are not described here are self-
explanatory.
The icons change appearance to show the item’s status or availability.
DVI, CMP1, VID1, etc. The current video input selected.
16:9, 4:3, etc. The current zoom mode.
720P, 480i, 1080i, etc. The current signal resolution.
Mute Icon The sound is muted.
Sleep Timer 00:30 The amount of time remaining before the monitor
turns off if you have set the sleep timer.
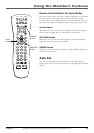
Why You Should Use the Autotuning Feature
The autotuning feature tunes the monitor to the correct Video Input Channel for different components you have
connected to your monitor (like a VCR, DVD Player, etc.). The Video Input Channel corresponds to the input jacks you
used to connect a component to the montior. When you set up autotuning in the menu system you don’t have to
remember to change your monitor to VID1, for example, when you want to watch the tape in your VCR.
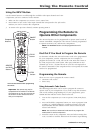
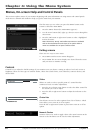
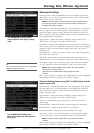
How to Set Up the Autotuning Feature
The way you set up the autotuning feature in the monitor’s menu
corresponds to the component buttons on the remote and the way you
have each component connected to your monitor. When you set up
auto tuning, you’re telling the monitor which Video Input Channel to
tune to when you press the VCR or DVD button on the remote control.
1. Press MENU (the MAIN MENU appears).
2. Highlight Preferences and press OK (the PREFERENCES menu
appears.
3. Highlight Autotuning and press OK (the AUTOTUNING menu
appears).
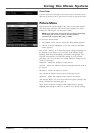
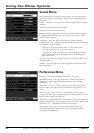
4. Choose which channel you want to set:
Set VCR1 input Sets the Video Input Channel the monitor tunes
to when you press the VCR1 button.
Set VCR2 input Sets the Video Input Channel the monitor tunes
to when you press the VCR2 button.
Set DVD input Sets the Video Input Channel the monitor tunes to
when you press the DVD button.
Set SAT-CAB input Sets the Video Input Channel the monitor
tunes to when you press the SAT•CABLE button.
5. Press the right arrow button to select the choice that matches the
way you have the component connected to this monitor. The
choices and a brief explanation follow:
N/A Choose this if you don’t have this particular component
connected to the monitor, or if you don’t want the monitor to
automatically tune to the correct input when you’re using this
component.