


15
DVD-R4000
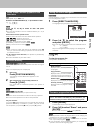
Recording
[RAM] [DVD-R]
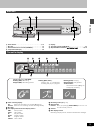
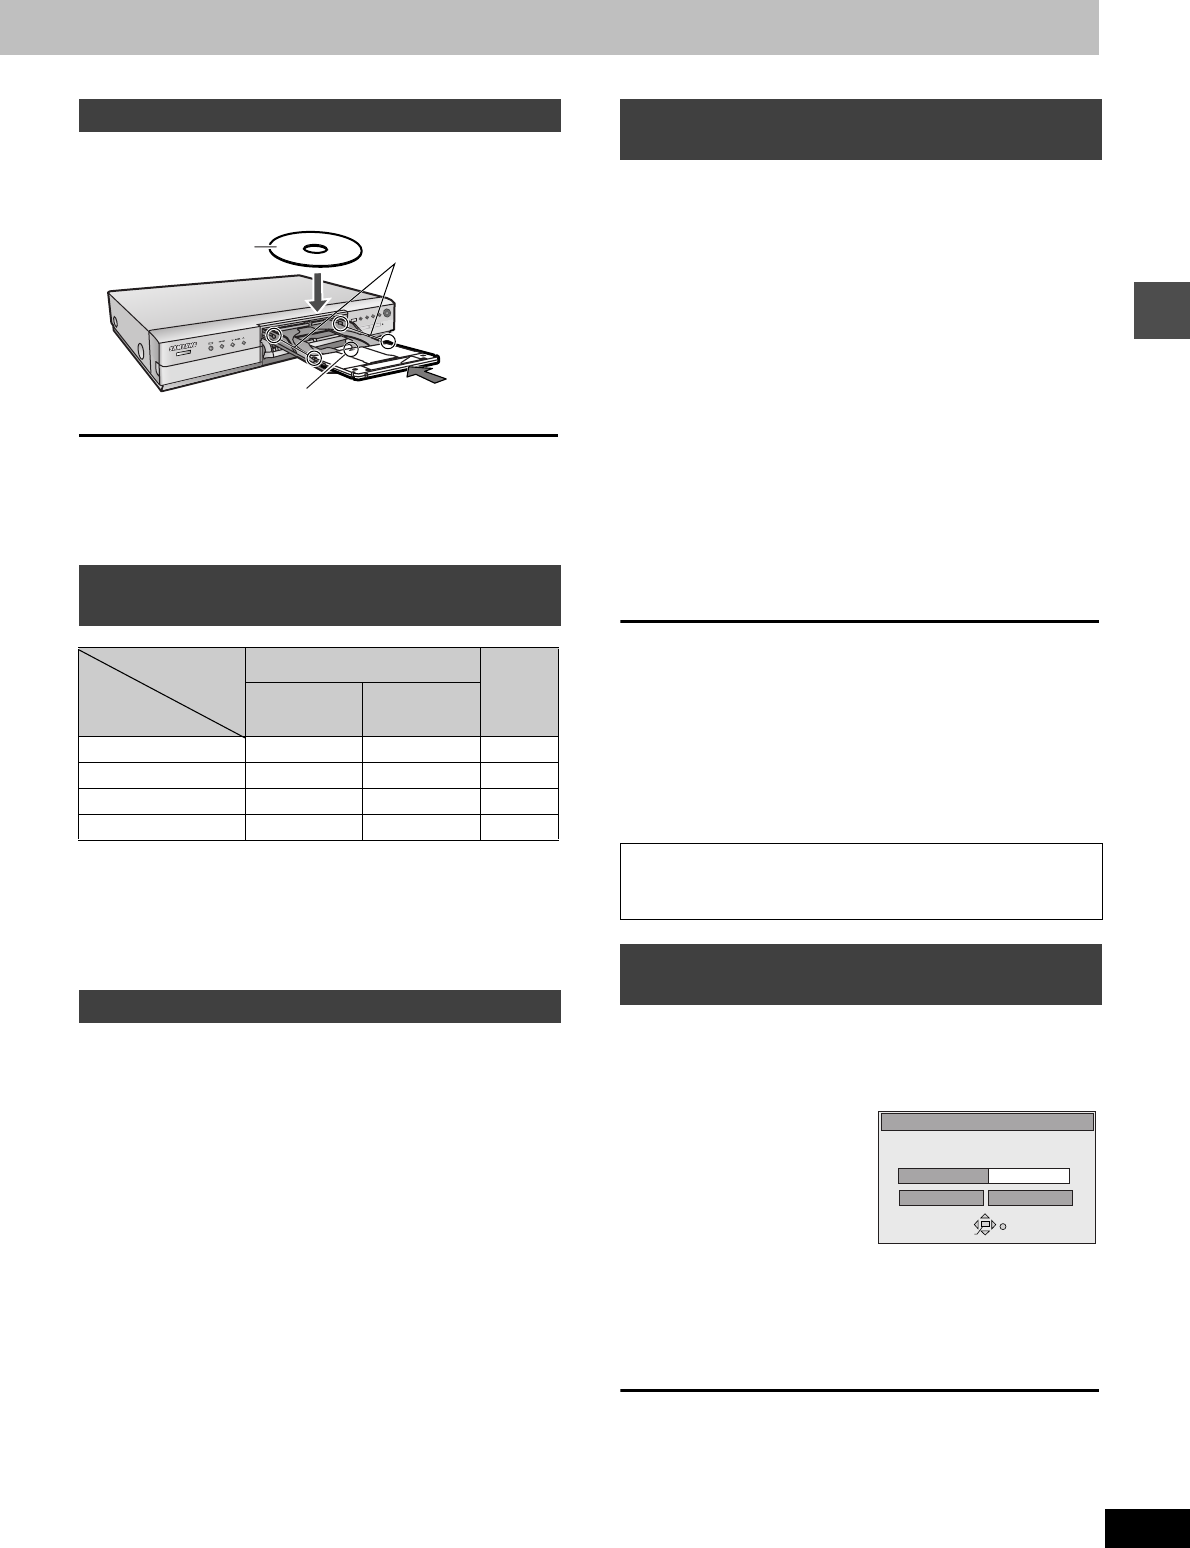
You can insert a cartridge or non-cartridge disc.
[Note]
≥Load double-sided discs so the label for the side you want to
record/play is facing up.
≥When using 8 cm (3″) DVD-RAM, remove the disc from the car-
tridge and insert it, making sure you align it with the groove.
FR (Flexible Recording Mode)
The unit automatically selects a recording rate between XP and EP
that will enable the recordings to fit in the available recording time
on the disc with the best possible recording quality.
You may use FR Mode in either Flexible Recording (➜ right) or in
timer recording (➜page 25).
[RAM] [DVD-R]
Pictures being recorded are unaffected.
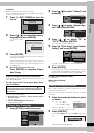
Switch [DVD, TV] to “TV”.
1 Press [TV/VIDEO] to change the television’s input mode to
“TV”.
2 Press [W, X, CH] to change channels.
≥You can also select the channel with the numbered buttons.
e.g., “5”: [0] ➜ [5]
“15”: [1] ➜ [5]
“115”: [100] ➜ [1] ➜ [5]
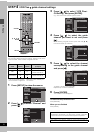
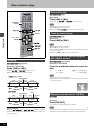
[RAM] [DVD-R]
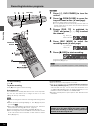
Preparation
Connect a video cassette recorder to this unit’s input terminals
(➜page 43).
1 While stopped
Press [INPUT SELECT] to select the
input channel for the equipment you
have connected.
Select L1, L2, or L3.
≥
You can also select the input channel by pressing [
W
,
X
, CH].
2 Press [REC MODE] to select the
recording mode (XP, SP, LP or EP).
3 Start play on the other equipment.
4 Press [¥, REC] at the point you want
to start recording.
Recording starts.
To skip unwanted parts
Press [;] to pause recording. (Press again to restart recording.)
To stop recording
Press [∫].
[Note]
≥When recording using L1, L2 or L3 terminals, only the sound
received at the time of recording will be recorded.
≥If flexible recording (➜ below) is used instead of steps 2 and 4,
settings can be made so that recording continues to the end of the
video.
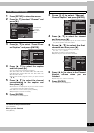
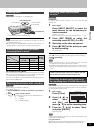
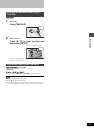
[RAM] [DVD-R]
The unit calculates a recording rate that enables the recording to fit
in the time you set (within the remaining time on the disc) and with
the best possible picture quality.
1 While stopped
Press [F Rec].
2 Press [2, 1] to
select “Hour”
and “Min.” and
press [3, 4] to set the recording time.
3 Press [3, 4, 2, 1] to select “Start”
and press [ENTER].
Recording starts.
[Note]
It may not be possible to record to the finish of the program if the
remaining time doesn’t allow.
For your reference
≥Press [STATUS] during recording to show the remaining time.
≥Recording time reduces if you repeatedly pause recording.
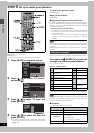
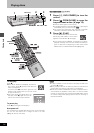
Inserting discs
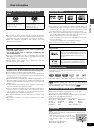
Recording modes and approximate
recording times in hours
Disc DVD-RAM
DVD-R
(4.7 GB)
Mode
Single-sided
(4.7 GB)
Double-sided
(9.4 GB)
XP (High quality) 121
SP (Normal) 242
LP (Long play) 4 8 4
EP (Extra long play) 6 12 6
Watching the television while recording
Insert label-up with the arrow facing in.
Insert inside the
tray’s guides.
Insert label-up.
Cartridge dis
c
Non-cartridge disc
Recording from a video cassette
recorder
Almost all videos and DVD software on sale have been
treated to prevent illegal copying. Any software that has
been so treated cannot be recorded using this unit.
Recording the best quality pictures in
the remaining time—Flexible Recording
FLEXIBLE REC
Start Cancel
Record on FR mode
ENTER
SELECT
RETURN
Set up rec time
1 Hour 23 Min.
Maximum rec time
1 Hour 23 Min.