


8 English
NETWORK
SETTINGS
NETWORK
CONTROL
NETWORK
OPERATION
DVR VIEWER
3
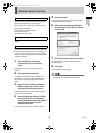
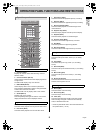
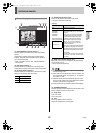
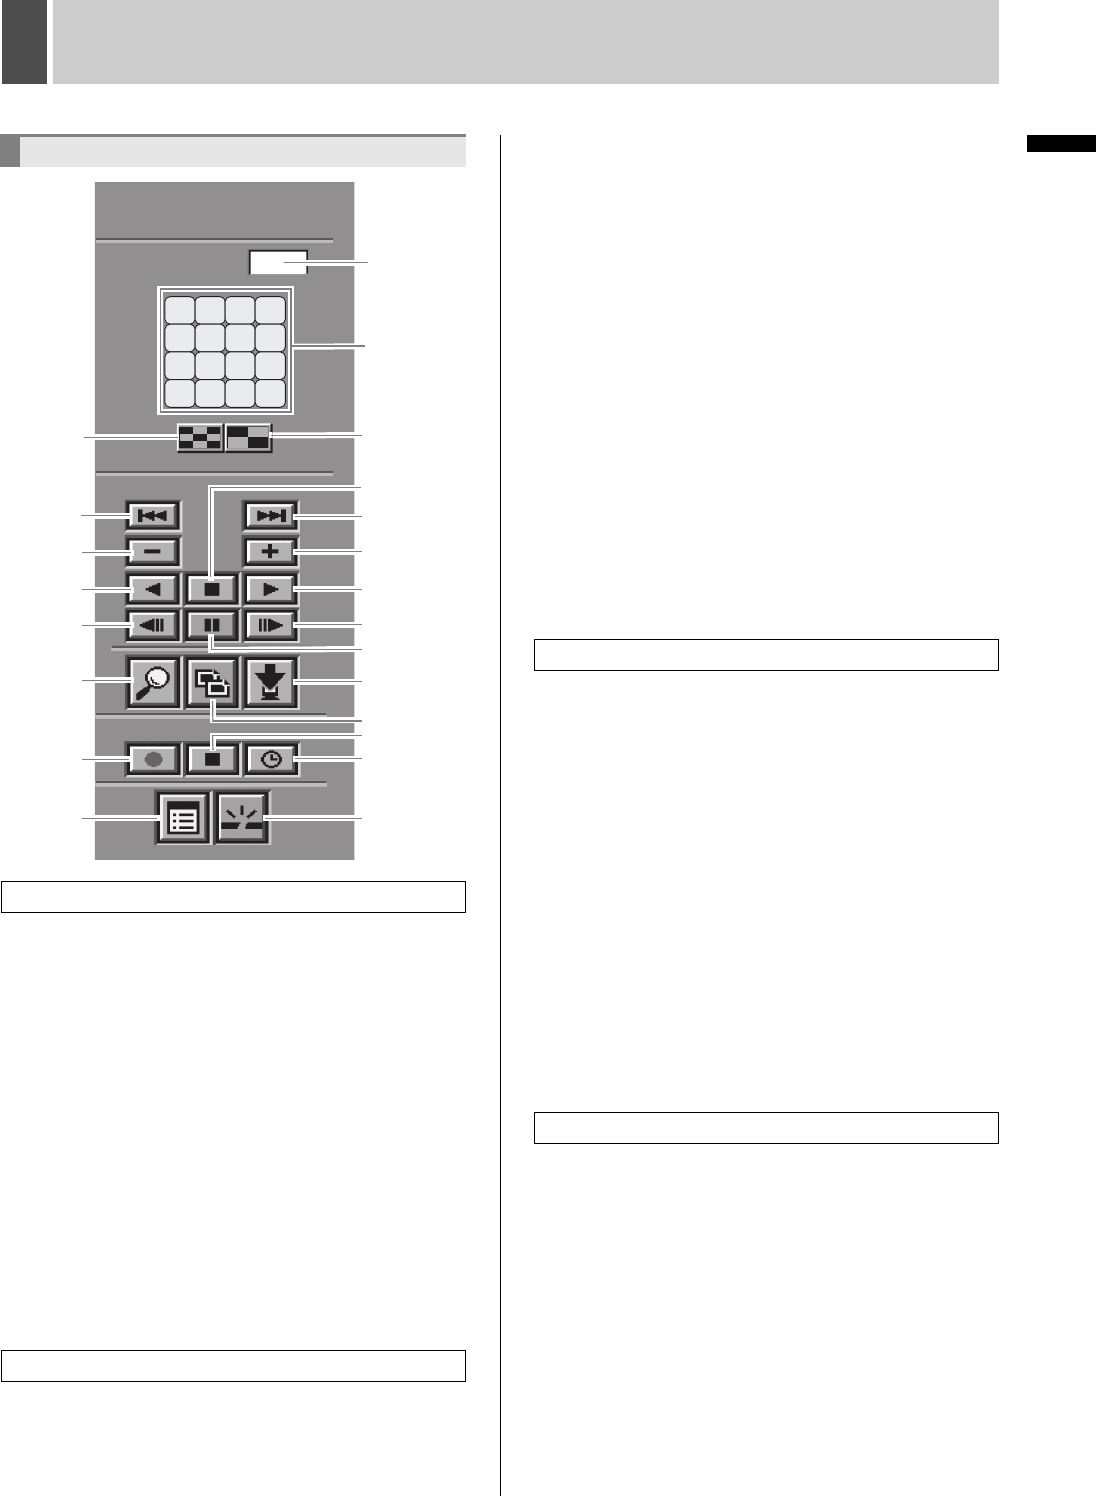
OPERATION PANEL FUNCTIONS AND RESTRICTIONS
1. Channel number
Displays the channel number selected using “Channel
selection” below.
2. Channel selection (ID1/2/3)
Used to select a camera channel when displaying video on
a single screen.
The DSR-3709P displays only nine channels.
3. MULTIVIEW (ID1/2/3)
Used to display video in nine or sixteen split screens.
Press the [MULTIVIEW] button again to change the DSR-
3716P from 9 screens to 16 screens.
The DSR-3709P can only display video in nine screens.
4. QUAD (ID1/2/3)
Displays video in four screens.
Press the [QUAD] button again to switch to a four screen
display that follows the current displayed channel.
5. Previous event (ID2/3)
This button starts playback from the previous alarm event.
6. Next event (ID2/3)
This button starts playback from the next alarm event.
7. Speed down (ID2/3)
This button reduces the playback speed by one setting.
8. Speed up (ID2/3)
This button increases the playback speed by one setting.
9. Reverse playback (ID2/3)
This button starts playback of recorded images in the
reverse direction.
10. Playback stop (ID2/3)
This button stops playback and calls up the live display.
11. Playback (ID2/3)
This button starts playback of recorded images.
12. Previous image (ID2/3)
This button moves a still image back by one frame.
13. Still (ID2/3)
This button pauses the image during playback.
14. Next image (ID2/3)
This button moves a still image forward by one frame.
15. Search (ID2/3)
This button calls up the search screen (i.e., the setting
screen).
16. Copy (ID2/3)
This button calls up the copy screen (i.e., the setting
screen).
17. Download (ID2/3)
This button calls up the download screen (i.e., the setting
screen).
18. Menu setting (ID3)
This button calls up the menu screen (i.e., the setting
screen).
19. Disconnect (ID1/2/3)
This button disconnects the PC from the network and
switches control rights to the unit.
20. Record (ID3)
This button starts normal recording.
21. Record stop (ID3)
This button stops normal recording.
22. Timer (ID3)
This button activates timer standby mode when clicked
while recording is stopped. If clicked in Timer Standby
mode, it deactivates this mode.
* Entries in parentheses refer to user level restrictions for
the specific button. (JP. 39)
Operation panel
Channel and screen selection buttons
Playback buttons
DIGITAL VIDEO RECORDER
CHANNEL
PLAYBACK
REC
O
R
D
01
DSR-3716
01 02 03 04
05 06 07 08
09 10 11 12
13 14 15 16
6
8
11
14
13
17
16
18
22
19
20
15
12
9
7
5
21
3
1
10
2
4
Setting buttons
Recording buttons
e00_l8hbe_xe_nw_7.book Page 8 Friday, November 5, 2004 11:01 AM