


51
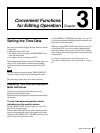
Setting the Time Data
Chapter 3 Convenient Functions for Editing Operation
Synchronizing Internal and External
Time Codes
The internal time code generator can be synchronized with
an external time code (LTC) input to this unit.
To synchronize the internal time code to
external time code
Input an external time code (LTC) signal to the TIME
CODE IN connector, then set the TC MODE menu item
(see page 66) to EXT REGEN.
The internal time code generator locks onto the external
time code and starts advancing. Once the internal time
code generator has been synchronized in this way, you can
disconnect the external time code input and this unit will
maintain the synchronized time code.
Note
When the selected input mode is “SDTI” or “i.LINK” (the
SDTI or i.LINK indicator is lit in the INPUT display),
setting the TC MODE menu item (see page 66) to EXT
REGEN causes the internal time code generator to
automatically synchronize with the external time code
input to the unit via the SDTI or i.LINK interface.
Once an external time code signal has been input, the
internal time code advancement mode and frame count
mode are automatically set as follows:
Advancement mode: FREE RUN
Frame count mode: Same as external time code (drop
frame or non-drop frame)
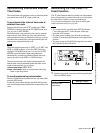
To confirm external synchronization
Press the STOP button to put the unit into stop mode, then
press the REC button.
Look at the time counter display and check that the time
code value displayed there matches the external time code
value.
Rerecording the Time Code—TC
Insert Function
The TC insert function makes it possible to use the internal
time code generator to rewrite time code or user bits when
the time code recorded on a tape is discontinuous.
You can start recording time code from an initial value
which can be set freely (see page 49).
Notes
• Use a tape which is recorded in the DVCAM format.
(You cannot use the TC insert function with a tape
recorded in DV format.)
• The time code recording starts from the current tape
position. Cue the tape up beforehand to the required start
position.
• If you use a tape on which ClipLink log data is recorded,
the ClipLink log data will be lost.
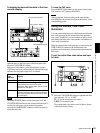
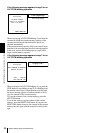
1
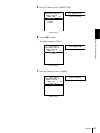
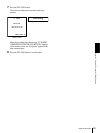
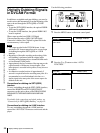
Open the door on the lower part of the front panel, then
press the MENU button.
A B
MARK
1 2,4 7,83,5
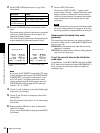
Setup menu
SYSTEM MENU
SETUP MENU
AUTO FUNCTION
HOURS METER
Monitor screen
Time counter display