69
DV/Digital8 Dubbing
2 Select “DV / D8 EDIT,” and press
ENTER.
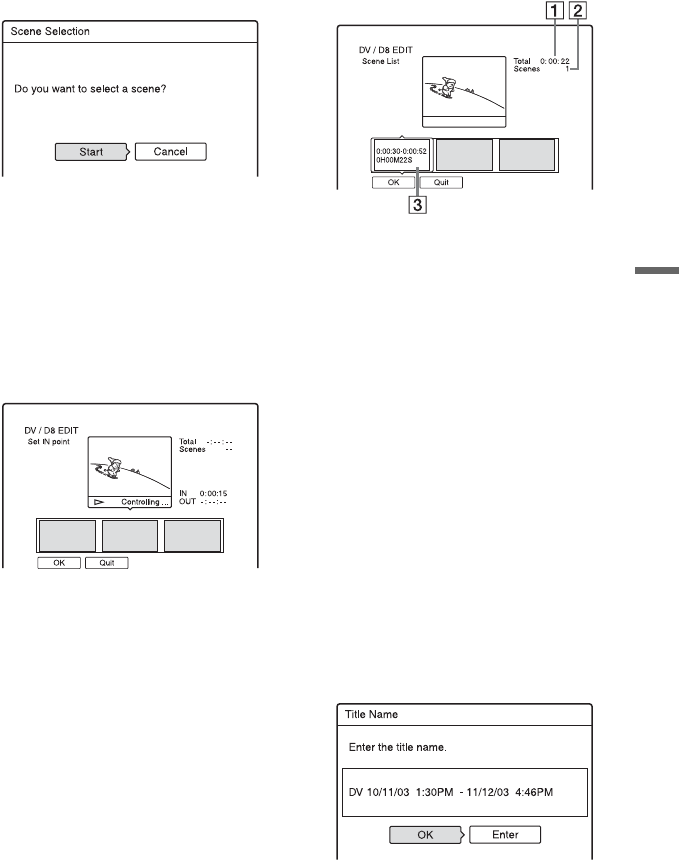
The display asks if you want to start
selecting scenes.
• If you have previously saved a
program, the display asks if you want to
edit an existing program or to create a
new program. To resume editing the
existing program, select “Saved Data,”
and go to step 9.
3 Select “Start,” and press ENTER.
The display for setting the IN point (start
of the scene) appears.
The scene starts to play.
4 Select the IN point using m/M,
and press ENTER.
Playback pauses.
5 Press ENTER if the IN point is correct.
If the IN point is incorrect, select the IN
point using c/C, and press ENTER.
The display for setting the OUT point
(end of the scene) appears.
6 Select the OUT point using m/M,
and press ENTER.
Playback pauses.
7 Press ENTER if the OUT point is
correct.
If the OUT point is incorrect, select the
OUT point using c/C, and press
ENTER.
The selected scene is added to the scene
information block.
• To add more scenes, go to step 4.
8 When you finish adding scenes, press
m.
The scene list is displayed.
A Total duration of the program
B Total number of scenes
C Scene information block
9 Select the scene information block
you want to edit using </,, and
press ENTER.
The sub-menu appears.
“Move”: Changes the scene order using
</, and ENTER.
“Erase”: Erases the scene. When asked
for confirmation, select “OK.”
“Preview”: Plays the selected scene.
• To add more scenes, press M and go to
step 4.
10
When you finish editing the scene list,
select “OK,” and press ENTER.
The display for entering the title name
appears. To enter a new name, select
“Enter,” and follow the explanations on
page 33.
,continued


