


126
• “Rename Album”: Changes the
selected album name (page 42).
• “Protect Album Contents”: Protects all
JPEG image files in the selected album.
• “Cancel Protection”: Cancels
protection of all JPEG image files in the
selected album.
“Copy to DVD”: Copies the selected
album or JPEG image file to a DVD
(page 120).
“Multi-Mode”: Selects multiple albums
or JPEG image files to edit.
“Copy all to HDD”: Copies all the
albums and JPEG image files to the HDD
(page 118).
“Copy to HDD”: Copies the selected
album or JPEG image file to the HDD
(page 118).
“File Options”
• “Erase”: Erases the selected JPEG
image file.
• “Copy”: Copies the selected JPEG
image file (page 119).
• “Rename File”: Changes the selected
JPEG image file name (page 42).
• “Protect”: Protects the selected JPEG
image file. Select again to cancel the
protection.
“Print”: Prints the selected JPEG image
file (page 126).
“Detailed Information”: Displays the
detailed information for the selected
JPEG image file (page 124).
“Single-Mode”: Cancels “Multi-Mode.”
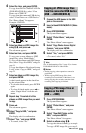
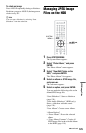
Printing JPEG Image
Files
You can print JPEG image files on the HDD,
DATA DVDs/DATA CDs, or connected
USB device by connecting a PictBridge-
compatible printer to the USB jack on the
recorder.
Refer to the instructions supplied with the
printer.
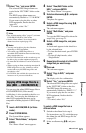
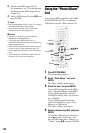
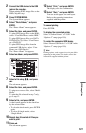
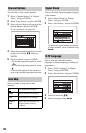
1 Connect a PictBridge-compatible
printer to the USB jack on the
recorder.
SYSTEM
MENU
</M/m/,,
ENTER
DVD recorder
to USB jack
PictBridge-compatible
printer