


– 37 –
KL-W7000/W9000
RM-Y980
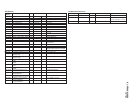
Adjustment Items and Procedure Tools and Test Points Adjustment Places Illustration Waveforms and Values
Signals
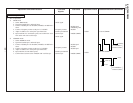
Registration Adjustment
Preparation
• Projected picture size ........... 49.1 inch
• Projection distance .............. 726.2 mm
• Aspect ratio ..................... 16:9
• Picture quality adjusting menu ... Standard
Note: To make the registration adjustment
The registration locking blocks are fixed with an adhesive, thus
requiring the registration adjusting block kit for service (4-047-
337-01).
• Tools and Kit
Hex. wrench keys (2mm, 5mm)
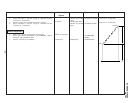
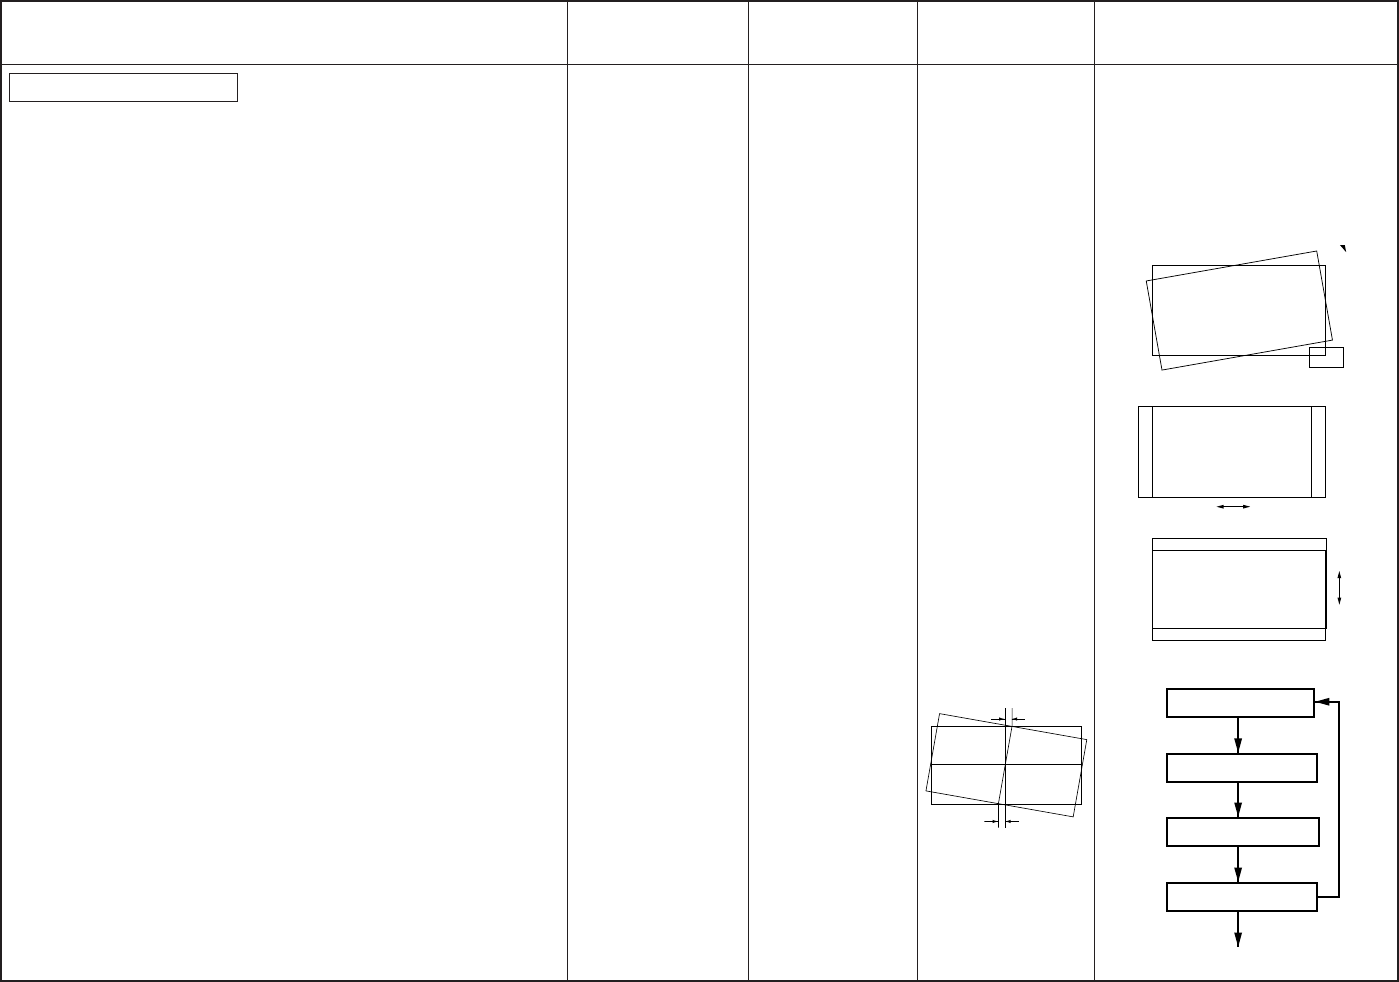
1. Enter G monochrome crosshatch signal and also B monochrome
crosshatch signal, then adjust registration between G and B.
Adjusting regi. adjusting screws in the order of θ → X → Y,
overlap the B picture on the G picture as shown in figure.
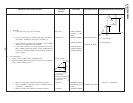
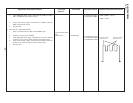
2. Enter all black signal to the B panel and also R monochrome
crosshatch signal, then adjust the registration between R and G.
3. Tighten tentatively the registration locking screws on the R and B
panels, and fix the registration blocks A and B with an adhesive.
4. Tighten the regi. locking screws.
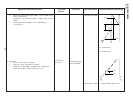
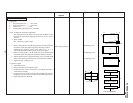
To replace G panel
1. Attach the G panel.
2. Enter G monochrome crosshatch signal.
3. Confirm that the center vertical line of crosshatch and that of
screen almost coincide.
4. Loosen two screws on the θ G panel, insert an adjusting rod into a
θ adjusting hole and rotate it to adjust the θ within specification.
5. Adjust registration of R and B.
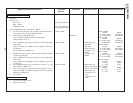
NTSC signal generator
θ adjusting screw
X adjusting screw
Y adjusting screw
Adjust θ
Adjust X (horizontal)
Adjust Y (vertical)
Within specification?
Lock the registration
No
Yes
Rotate with respect to the bottom right
G
G
G
B
B
X
θ
Y
B
a1+a2=Less
a1
a2
than 1.3mm