


– 6 –
6
-EN
Getting Started
2
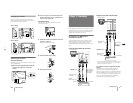
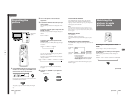
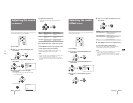
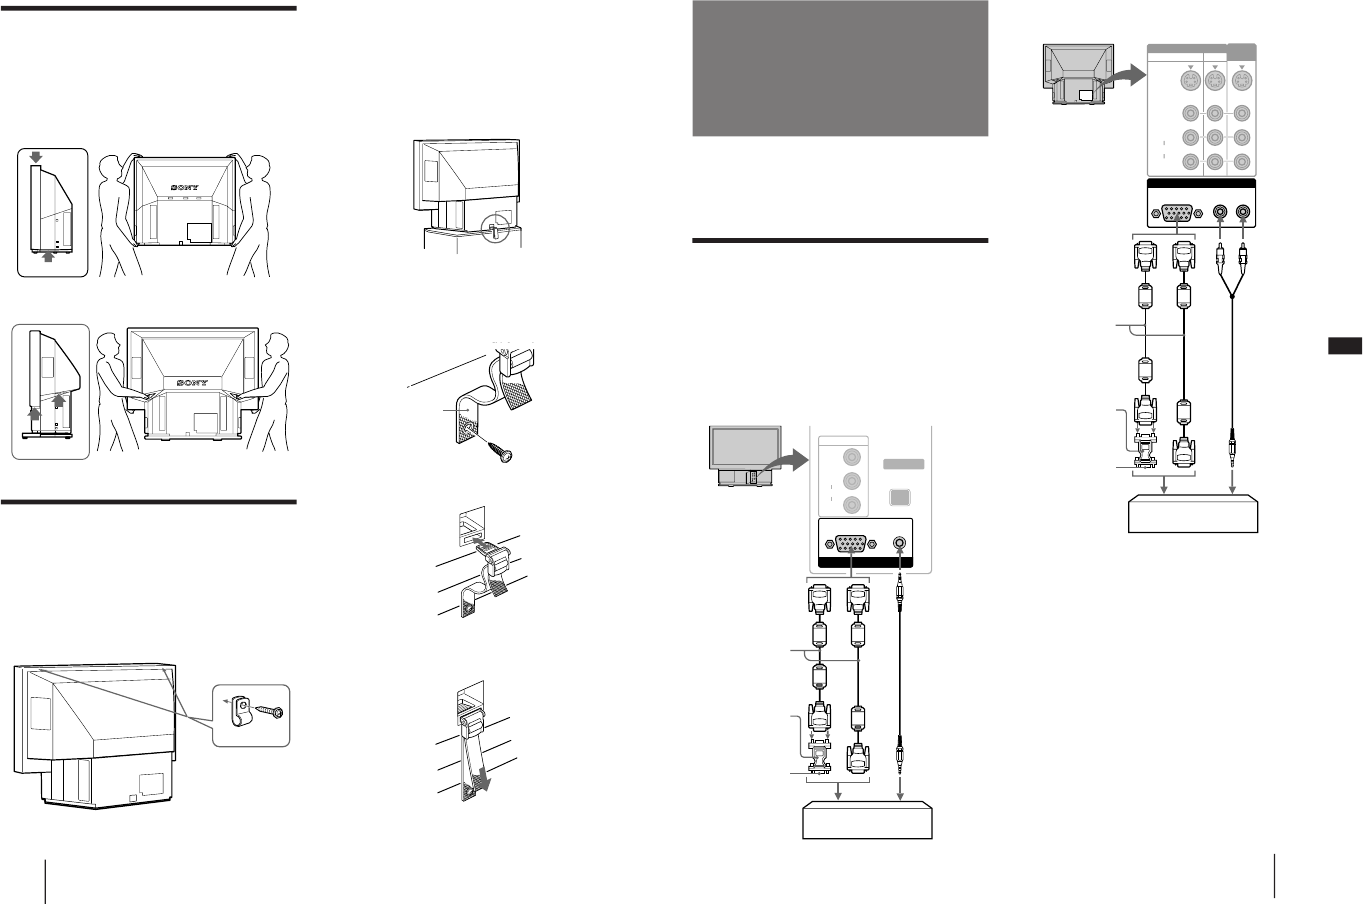
Pass a strong cord or a chain through each
bracket mounted in step 1, and then secure
it to a wall or a pillar, etc.
Using the buckle
You can also use the supplied buckle to secure the
monitor to the stand.
1
Attach the buckle to the stand on which the
monitor is mounted.
Tighten the supplied screw firmly.
2
Insert the buckle until it clicks.
3
Pull the belt to fasten.
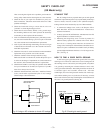
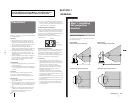
Carrying your monitor
Be sure to grasp the areas indicated by the arrows
when carrying the monitor, and to use more than two
people. Never grasp the front panel.
p for KL-W7000
p for KL-W9000
Stabilizing the monitor
Using the brackets
After setting up, secure the monitor to a wall, etc. with
the supplied brackets.
1
Mount the two supplied brackets with the
screws to the upper rear sides of the
monitor.
Bracket (supplied)
Belt
Getting Started
7
-EN
EN
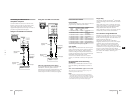
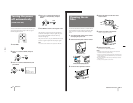
Using the rear RGB 1 IN connector
* The HD15–HD15 adaptor (supplied) may be needed for some
models. The male side (without the No. 9 pin) of the adaptor
should be connected to the computer.
For customers using the supplied HD15–HD15
adaptor
This monitor uses a No. 9 pin in the video signal
connector for DDC1 and DDC2B compatibility.
Some PC systems which are not compatible with either
DDC1 or DDC2B may not accept the No. 9 pin. If you
are not sure whether your PC system accepts the No. 9
pin or not, use the HD15 (Female) – HD15 (Male
without the No. 9 pin) adapter (supplied).
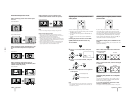
Step 2: Hookup
Before making the connection, turn off the power and
disconnect the AC power cords of the monitor and the
equipment to be connected. Refer to the instruction
manual of the equipment you connect.
Connecting to an IBM PC/AT or
compatible computer
Connect the RGB 2 IN connector on the front or the
RGB 1 IN connector at the rear of the monitor to the
video/audio outputs of the computer using the
supplied RGB signal cable (D-sub 15 pin ˜ D-sub 15
pin).
Using the front RGB 2 IN connector
Rear of the monitor
RGB signal cable
(supplied)
HD15–HD15 adaptor
(supplied)*
to video output
Audio connecting
cord
(phono plug × 2 ˜
stereo minijack)
(not supplied)
to audio output
IBM PC/AT or compatible
computer
Front of the monitor
RGB signal cable
(supplied)
HD15–HD15 adaptor
(supplied)*
to video output
Audio connecting
cord
(stereo minijack ˜
stereo minijack)
(not supplied)
to audio output
IBM PC/AT or compatible
computer
Male side
(without the No.9 pin)
Male side (without
the No.9 pin)
or
or
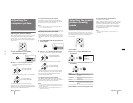
INPUT SELECT
VIDEO
R
L
AUDIO
VIDEO 2 IN
RESET
RGB AUDIO
RGB 2 IN
RGB 1 IN
AUDIO
L
R
RGB
VIDEO IN
S VIDEO
VIDEO
R
L
AUDIO
VIDEO
OUT
13