35
Creating a Video DVD
Dubbing From a Handycam
®
(HDD/
Memory Stick) –Using the Dubbing Mode–
When Handycam
®
(HDD/Memory Stick) is connected to the DVDirect, you
can use one of four dubbing modes as preferred.
Note
When storing both HD (High Definition) video and SD (Standard Definition) video on an
AVCHD Handycam
®
(HDD/Memory Stick), the DVDirect automatically detects HD (High
Definition) video and records it on the disc.
1 Press the 1 (power) button to turn on the DVDirect, and insert a
disc (page 19).
The DVDirect starts reading the inserted disc.
Hint
You can also operate from the “Menu” display to record video.
When dubbing HD (High Definition) video:
Press the RETURN button to display the “Menu,” and select
“AVCHD Dubbing.”
When dubbing SD (Standard Definition) video:
Press the RETURN button to display the “Menu,” and select “Video , DVD.”
Then select “USB” in the input selection screen.
2 Turn on the camcorder.
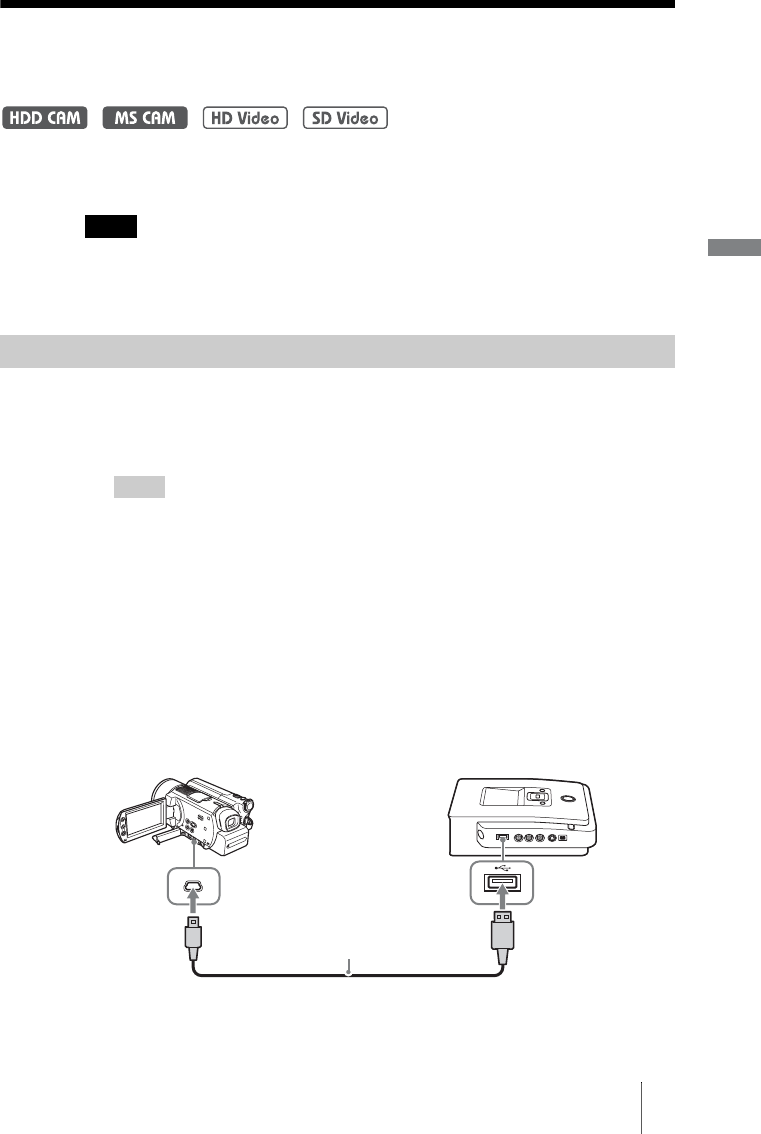
3 Connect the camcorder to the DVDirect.
Connect the camcorder’s USB connector (Type mini B) to the DVDirect’s
USB connector (Type A) using a USB cable (not supplied).
After connecting the USB cable, the [USB SELECT] screen appears in the
camcorder’s LCD screen.
Before selecting a dubbing mode…
HANDCAM
USB cable (not supplied)


