DVD remote control . . . . . . . . . . . . . . . . . . .6-7
Menus . . . . . . . . . . . . . . . . . . . . . . . . . . . . . . . . . . . . .8
Front and display . . . . . . . . . . . . . . . . . . . . . . . .10
Access to a scene . . . . . . . . . . . . . . . . . . .14-15
Sound and picture . . . . . . . . . . . . . . . . . . . . . .16
Repeat play / karaoke . . . . . . . . . . . . . . . . . . .17
34
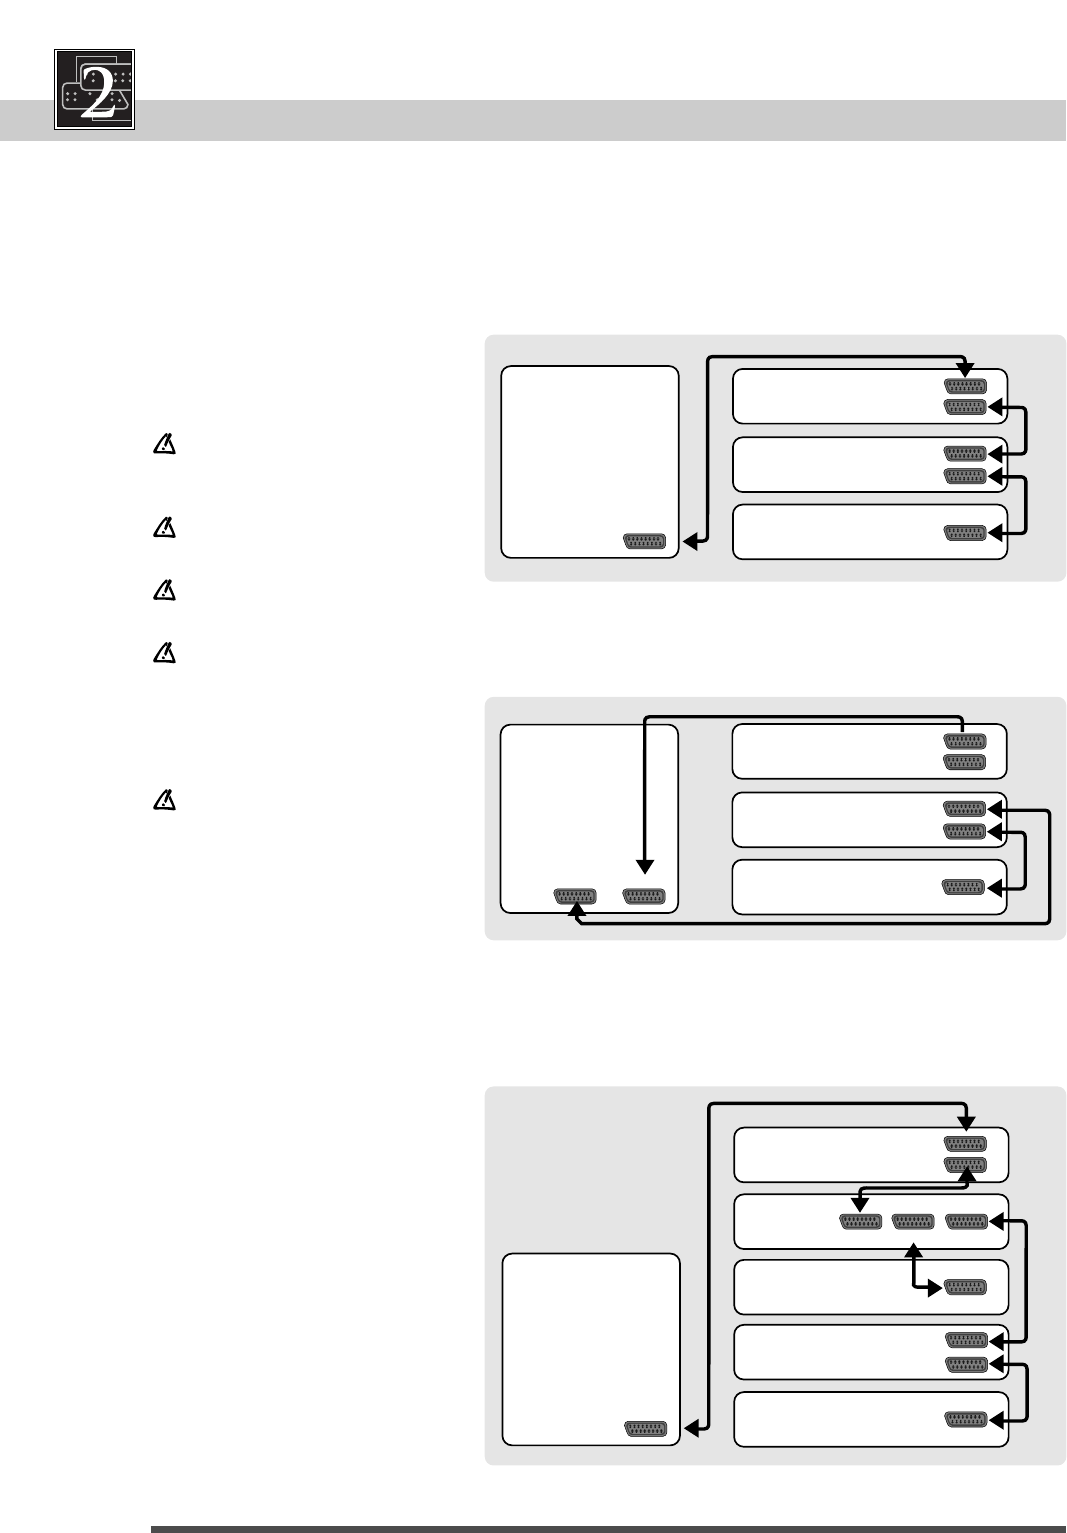
Video connections
Connecting a video recorder and a decoder
(for pay TV)
Connecting to a TV with two SCART sockets
Connecting a satellite receiver, video recorder and
decoders
Basically
In order to ensure the best picture
quality, you should first connect your
DVD player directly to your TV set,
and then arrange the connections to
your other audio / video equipment.
Do not stack electronic
components or other objects on
top of the DVD player.
Do not block ventilation holes of
any of the components.
Arrange components so that air
can circulate freely.
Also consult the user's manual of
additional components for
further information.
See page 25, the SCART Output
selection for AV1:
Video / S-Video / RGB.
TV
DECODER
VIDEO
DVD
AV2/DECODER
AV1/TV
AV2/EXT
AV1/TV
TV
VIDEO
AV2/DECODER
AV1/TV
SAT
DECODER 2
DVD
AV2/EXT
AV1/TV
DECODER VIDEOTV
DECODER 1
TV
DECODER
VIDEO
DVD
AV2/DECODER
AV1/TV
AV2/EXT
AV1/TV
AV1 AV2


