


20
Using the TV’s features (General)
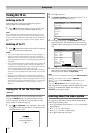
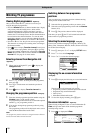
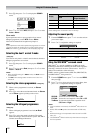
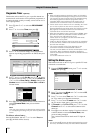
1 Select Picture settings from the PICTURE menu.
2 Use Y and Z to adjust the Backlight, Contrast,
Brightness, Colour, Tint, and Sharpness.
Setting the black/white level
Black/White Level improves the definition of dark areas of
the picture.
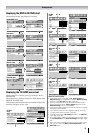
1 From the Picture settings menu, press V or U to
select Black/White Level on the 2nd page.
2 Press Y or Z to select High, Off, Low or Middle.
Using the cinema mode
A movie film’s picture runs at 24 frames a second, whereas
movie software such as DVD, etc., that you enjoy watching on
television at home runs at 30 (NTSC) or 25 (PAL) frames a
second. To convert this signal to reproduce a smooth motion
and picture quality, select the On mode.
Effective signal and setup conditions:
• When the Video input mode is selected.
• When the input signal format is 480i, 576i or 1080i signals.
1 From the Picture settings menu, press V or U to
select Cinema mode on the 2nd page.
2 Press Y or Z to select On or Off.
Note:
When a DVD movie with subtitle is playing back, this mode
may not work correctly.
Adjusting the film stabilization
The Film Stabilization function allows the adjustment of
improves motion smoothness.
1 From the Picture settings menu, press V or U to
select Film Stabilization on the 2nd page.
2 Press Y or Z to select Smooth, Off or Standard.
Using Activating the ClearFrame
This function eliminates motion blur without adding flicker or
reducing image brightness, improves the viewing quality of a
motion picture.
1 From the Picture settings menu, press V or U to
select ClearFrame on the 2nd page.
2 Press Y or Z to select On or Off.
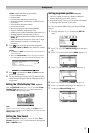
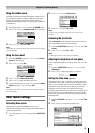
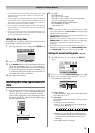
Adjusting the colour temperature
Colour Temperature increases the warmth or coolness of
the picture by setting the red, green or blue tint.
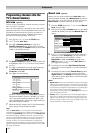
1 From the Picture settings menu, press V or U to
select Colour Temperature on the 2nd page, then press
Q.
2 Press Y or Z to select Cool, Natural, or Warm to suit
your preference, then press M.
3 Press V or U to select Red Level, Green Level or
Blue Level, then press Y or Z to adjust the setting as
required.
Resetting the picture settings
This function returns the picture settings to the factory settings.
1 From the Picture settings menu, press Y or Z to select
Reset on the 3rd page.
2 Press Q.
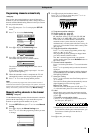
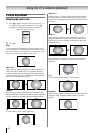
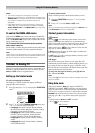
Activating the MPEG NR (Noise Reduction)
If the receiving signal of MPEG is a mosquito (grained) noise
depending on the compression and conversion, the noise may
be reduced when using this function.
1 From the PICTURE menu, press V or U to select
MPEG NR on the 2nd page.
2 Press Y or Z to select Off, Low, Middle or High.
Note:
In the PC input mode (- page 25), this mode is not available.
Activating the DNR (Digital Noise
Reduction)
- analog only -
If the receiving signal is weak and the picture is blurry, the
picture may be improved when using this function.
1 From the PICTURE menu, press V or U to select DNR
on the 2nd page.
2 Press Y or Z to select Auto, Off, Low, Middle or High.
Colour
Brightness
Picture Mode
MENU
Back Watch TV
EXIT
Dynamic
50
50
0
Tint
Back light
100
Picture settings 1/3
Contrast
100
Black/White Level
High
Blue Level
Color Temperature
MENU
Back Watch TV
EXIT
Cool
0
Red Level
0
Color Temperature
Green Level
0
MPEG NR
High
DNR
Auto