


Chapter 5: Quick DVD
52
- Capture one video to DVD:
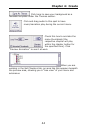
Enter a title for your movie. Optionally, you can also enter the
date, which will appear below the title. You can also choose a
menu design. From the pull-down, select the category you wish to
view. Then, use the left and right arrows to browse through the
different designs within the category.
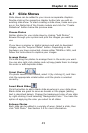
Use the navigation controls on your video device to go to the start
of the video you want to capture. Set the amount of time that you
would like the program to capture. You can even add a few
existing video clips if you want.
Once the program finishes capturing your video, it will burn your
DVD disc automatically. Therefore, once capturing starts, you no
longer need to wait by the computer – the program does
everything by itself! Skip to step 8.
- Capture multiple videos to DVD: This step is similar to
capturing a single video to DVD (see above), but you can capture
several clips and incorporate existing video clips before, after, or
in between each newly recorded clip. You can trim any clip that
you capture, or any existing clip that you add, before you burn
your movie.
To trim any clip, click and drag the green and red markers to trim
sections at the beginning and end of your videos respectively.
After you finish adding, recording, and trimming your video clips,
skip to step 7.
6. Create your DVD from existing clips. (Ignore this step if
you are capturing video and not creating a DVD from existing
clips.)
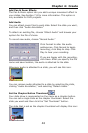
Click "Get Files" to browse your system for files to add to your
project. The files you add appear on the Storyboard at the bottom
of the wizard. Click a thumbnail on the Storyboard, and then click
"Preview" to view the clip.
You can trim video clips by dragging the green and red markers
along the video timer.
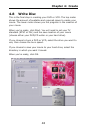
7. Design your DVD. Enter a title for your movie. Optionally, you
can also enter the date, which will appear below the title.