


20
Setting up the Projector
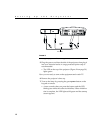
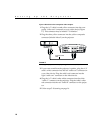
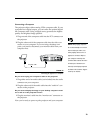
5 Plug the power cord into the side of the projector, then plug it
into your electrical outlet. A surge-protected power strip is
recommended.
•
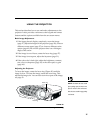
The LED on the top of the projector (Figure 24 on page 30)
lights green.
Now you are ready to turn on the equipment and watch HDTV.
6 Remove the projector’s lens cap.
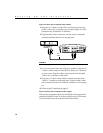
7 Turn on the lamp by pressing the green
power
button on the
keypad or remote.
•
A tone sounds when you press the button, and the LED
blinks green while the software initializes. When initializa-
tion is complete, the LED lights solid green and the startup
screen appears.
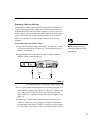
8 Turn on your HDTV tuner.
•
The HDTV image should display on the projection screen.
If it doesn’t, press the
source
button on the keypad or the
video
button on the remote to display your HDTV image.
You can select a default source to determine which source
the projector examines first during power-up for active
video; see “Default Source” on page 45.
•
If necessary, adjust the zoom or focus of the image by turn-
ing the rings around the lens. See page 27.
•
If you are projecting on a 4:3 screen, change the screen
aspect to 4:3. See page 35.
•
If necessary, make adjustments to the image using the pro-
jector’s on-screen menus. To open the menus, press the
menu/select
button on the keypad or remote, then select the
Display or Image sub-menu. For more information about
the menus, see page 33. If you want to return to the factory
default settings, choose Reset in the Advanced menu.
•
If the image is not square, use the keystone buttons on the
remote to adjust the image’s shape. See page 31.
•
If you connected the audio cables to the projector, use the
volume
buttons on the keypad to adjust the volume. If you
connected the audio cables from your video device to your
receiver, use the receiver’s volume control.