


Setup
38 312759R
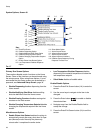
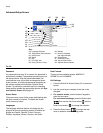
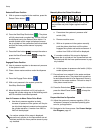
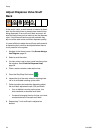
Retracted Piston Position
9. With air pressure applied to the machine, press the
Retract Piston button ( ).
10. Press the Start/Stop Shot button ( ). The piston
will fully retract and a number from 1250 to 1600 will
be displayed next to the Retract Piston button. If a
number outside of this range is displayed, ensure
the air cylinder air line connections are not switched
and that the linear position sensor is properly
installed.
11. Press the Enter button ( ) to accept the value or
press the Abort/Cancel button ( ) to keep the
previous value.
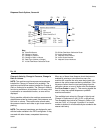
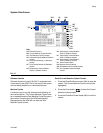
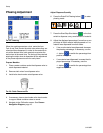
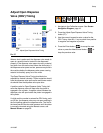
Engaged Piston Position
12. Use air pressure regulator to decrease air pressure
in the system to zero.
13. Place a clean waste container under the dispense
valve.
14. Press the Engage Piston button ( ).
15. With no air pressure in the system, press the
Start/Stop Shot button ( ).
16. Move the piston drive block until it just begins to
engage the cylinder using one of the following meth-
ods. No material should be dispensed.
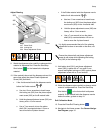
Use Air Pressure to Move Piston Drive Block
a. Use the air pressure regulator to slowly
increase air pressure in the system until the pis-
ton drive block begins to extend and encounters
the cylinder entrance. A number from 2000 to
2400 will be displayed.
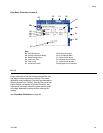
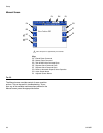
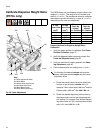
Manually Move the Piston Drive Block
a. Press down the system air pressure relief
switch (106).
b. Remove machine cover.
c. With no air pressure in the system manually
push the piston drive block until the piston
engages the cylinder and resists movement. A
number from 2000 to 2400 will be displayed.
d. Lift the system air pressure relief switch (106) to
enable system pressure.
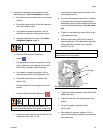
17. Ensure there is no material in the waste container
under dispense valve. The piston block moved too
far and caused material to be dispensed if there is
material in the waste container. Go back to step 12
if the piston moved too far.
18. Press the Enter button ( ) to accept the value or
press the Abort/Cancel button ( ) to keep the
previous value.
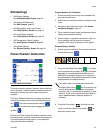
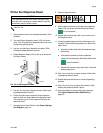
Prepare Machine for Operation
19. Adjust the system air pressure regulator (105) to
increase air pressure to standard operating pres-
sure for your application.
20. Navigate to the Home screen. See Screen Naviga-
tion Diagram, page 16.
If a number outside of this range is displayed,
ensure the air cylinder air line connections are not
switched and that the linear position sensor is prop-
erly installed.
In the steps below, ensure pressure is off or piston
may activate and pinch fingers against machine
block.
If a number outside of this range is displayed,
ensure the air cylinder air line connections are not
switched and that the linear position sensor is prop-
erly installed.