Configuration
40
Other Options in the Information Screen
Setting Up the Date and Time
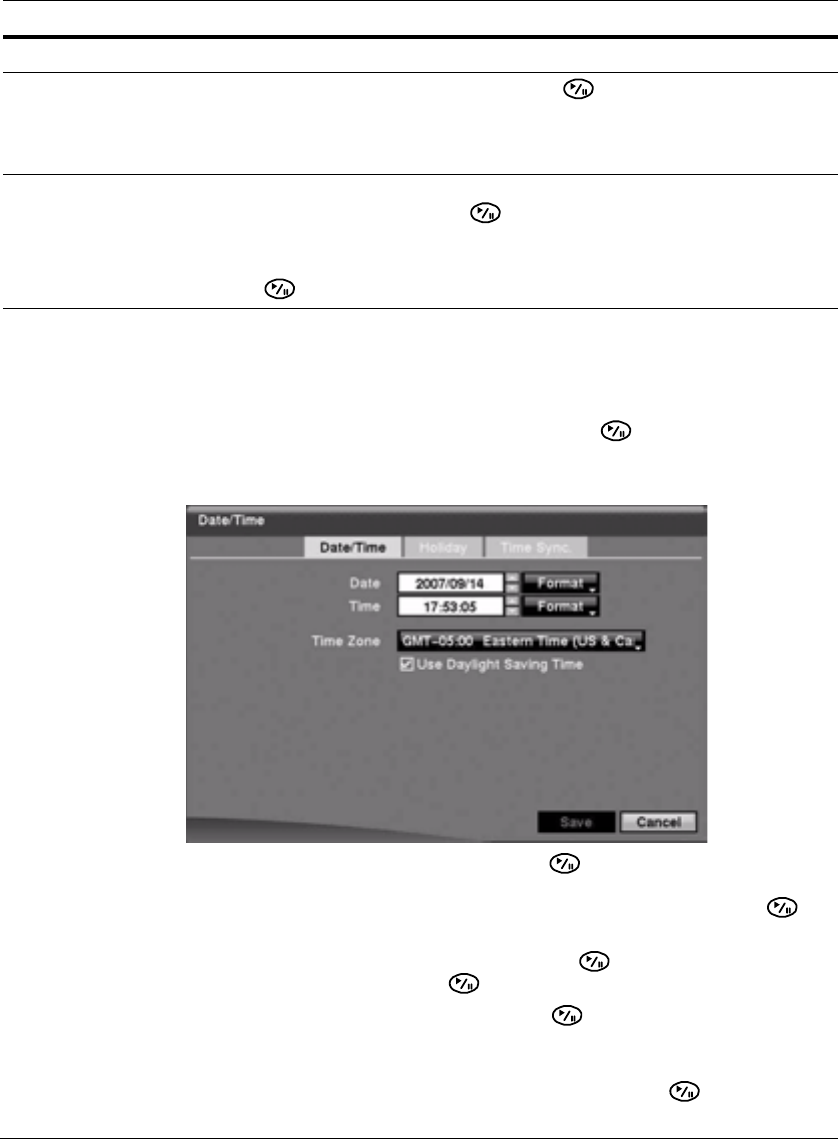
1. Highlight Date/Time in the System menu and press . The Date/Time setup
screen appears.
Figure 3-10 Date/Time Setup Screen
2. Highlight the first field beside Date and press . The individual sections of the
date highlight. Use the UP and DOWN arrows to change the number. Use the
LEFT and RIGHT arrows to move between month, date, and year. Press
when you have the correct date.
3. Highlight the Format field beside Date and press . Select from the three
available date formats and press to save the selected format.
4. Highlight the first field beside Time and press to scroll through the individual
sections of the time.
Use the UP and DOWN arrows to change the number. Use the LEFT and RIGHT
arrows to move between hour, minutes, and seconds. Press when you have
the correct time.
Table 3-2 Information Screen Options
Option Action
Recorded Data - From / To Displays the time information of recorded data
Clear All Data… Highlight Clear All Data… and press to clear all video data. You
are asked to verify that you wish to clear all data before the DVR
erases the video data. Clear All Data… does not clear the System
Log.
Save After you have finished with the Information Screen, you can
highlight Save and press to save the changes and exit the
screen.
If you do not wish to save the changes, highlight Cancel and press
to exit the screen.
