


EN 35
Master Page: Right
NOTES:
● After dubbing, set “S/AV INPUT” back to “OFF”.
● Analog signals can be converted to digital signals
with this procedure.
● It is also possible to dub from another player.
● Depending on the tape source input, images may
appear with horizontal jitter on the player’s LCD
monitor during dubbing. This does not affect the
actual recording.
Using an i.LINK cable (optional), it is possible to dub
recorded scenes in DV format from the player onto
another video unit equipped with i.LINK connector.
Since a digital signal is sent, there is little if any
image or sound deterioration.
Images recorded in SD or HD mode can be dubbed
only to a D-VHS VCR with HS mode or digital HD
video camera (ex. GR-HD1 or JY-HD10).
NOTES:
● It is recommended to use the AC Power Adapter/
Charger as the power supply instead of the
battery pack. (੬ pg. 12)
● When using an i.LINK cable, be sure to use the
optional JVC VC-VDV204U i.LINK cable.
● If the remote control is used when both the player
and recorder are JVC video units, both units will
perform the same operation. To prevent this from
happening, press the buttons on both units.
● It is possible to dub in MPEG2 format from a
D-VHS VCR, if the source tape (D-VHS) has been
originally dubbed from this digital HD player or
digital HD video camera (ex. GR-HD1 or
JY-HD10) in MPEG2 format.
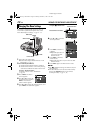
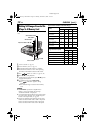
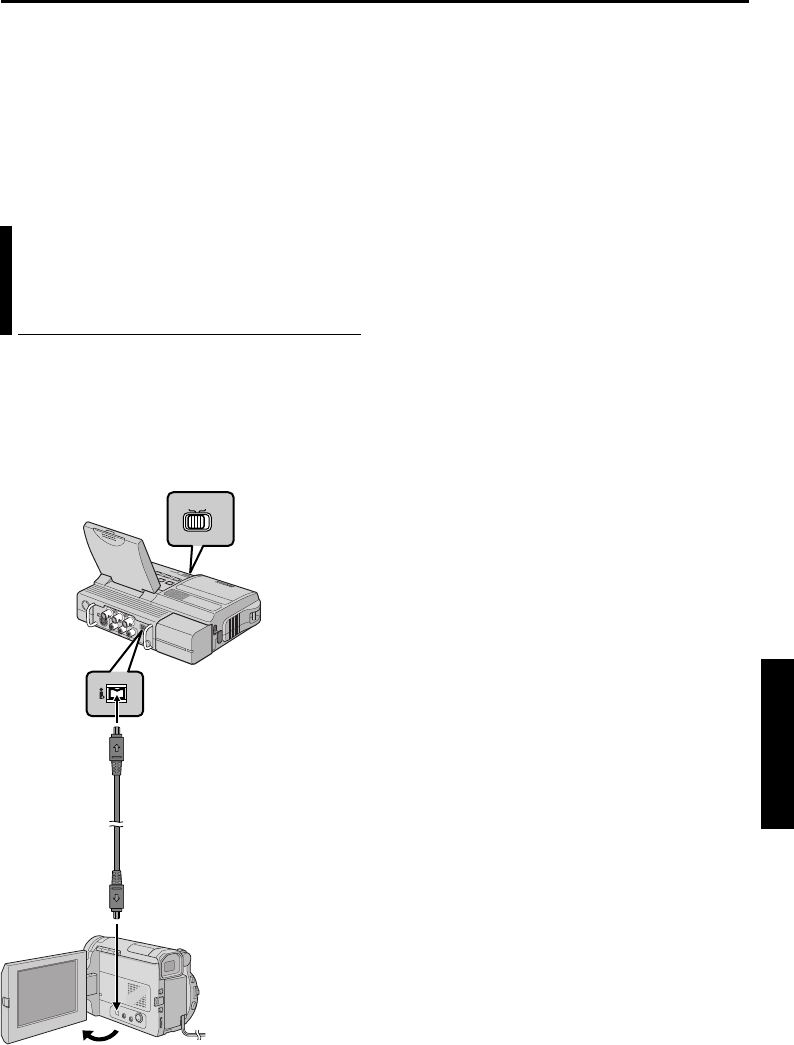
To use this player as a player
1 Make sure all units are turned off.
2 Connect this player to a video unit equipped with
an i.LINK input connector using an i.LINK cable
as shown in the illustration.
3 Set this player’s Playback Mode Switch to
“VIDEO”.
4 Set “i.LINK OUT” to “SW”. (੬ pg. 28, 30)
● If, in future, the connected video unit
automatically detects the DV and MPEG2
formats, set “i.LINK OUT” to “AUTO”. In this
case, proceed to step 6.
5 Set the i.LINK Output Select Switch on this player
to “DV” to output scenes recorded in DV mode,
or “MPEG2” to output scenes recorded in HD or
SD mode.
6 Turn on the video unit’s power.
7 Insert the source cassette in this player.
8 Insert the recording cassette in the video unit.
9 Press 4/9 on this player to start playback of the
source cassette.
10 At the point you want to start dubbing, engage
the video unit’s Record mode.
11 To pause dubbing, engage the video unit’s
Record-Pause mode and press 4/9 on this
player.
12 Repeat steps 10 – 11 for additional editing.
Stop the video unit and player.
NOTES:
● If a blank portion or disturbed image is played
back on the player during dubbing, unusual
images may be dubbed or the dubbing may stop.
● If a scene which has been paused during
recording is dubbed to other devices, playback
may stop at the point.
● Do not connect the player through a hub.
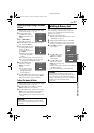
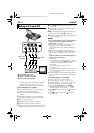
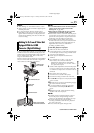
Dubbing To Or From A Video Unit
Equipped With An i.LINK
Connector (Digital Dubbing)
MPEG2MPEG2
DVDV
I.LINK OUTI.LINK OUT
To i.LINK Connector
i.LINK cable
(optional)
To i.LINK IN/OUT
Video unit equipped
with i.LINK connector
i.LINK Output
Select Switch
CONTINUED ON NEXT PAGE
ADVANCED FEATURES
CU-VH1US_07Advanced.fm Page 35 Tuesday, December 9, 2003 2:05 PM