32
2. To change from the default setting of Normal to PCM
use the Up or Down directional Push-buttons to
select DIGITAL OUT followed by the SELECT Push-
button. Refer to figure 40 on page 31.
Notes: The title of the icon button-bar will change color
from yellow (the cursor color) to green indicating
the selected item.
3. Return to the Audio Setup Menu by pressing the Up
directional Push-button.
4. Next continue to the LPCM (44.1kHz/48kHz) Menu. If
no other changes are to be made in Setup Mode at this
time, exit by pressing the Down directional Push-
button to select the EXIT SETUP menu choice fol-
lowed by the SELECT Push-button and the MVP861
will return to normal operation.
Note: The SETUP Push-button may be also pressed to
exit the setup mode.
LPCM (44.1kHz/48kHz)
The MVP861’s default setting is to make available at the
Digital Outputs, the Digital Audio Signals of 96kHz or
88.2kHz from non-copyright protected DVDs. When the
MVP861 is connected to a Digital-to-Analog Processing
unit without the ability to process the higher digital sam-
pling rate, the default setting can be changed to a 44.1kHz
or 48kHz digital signal output by performing the following
steps:
Notes: If the disk is copyright protected, the MVP861 will
down convert the Digital Audio Signal to 44.1kHz
or 48kHz. The MVP861’s internal digital to analog
ciruitry will allways decode the highest sampling
rate and will be available at the analog audio
outputs.
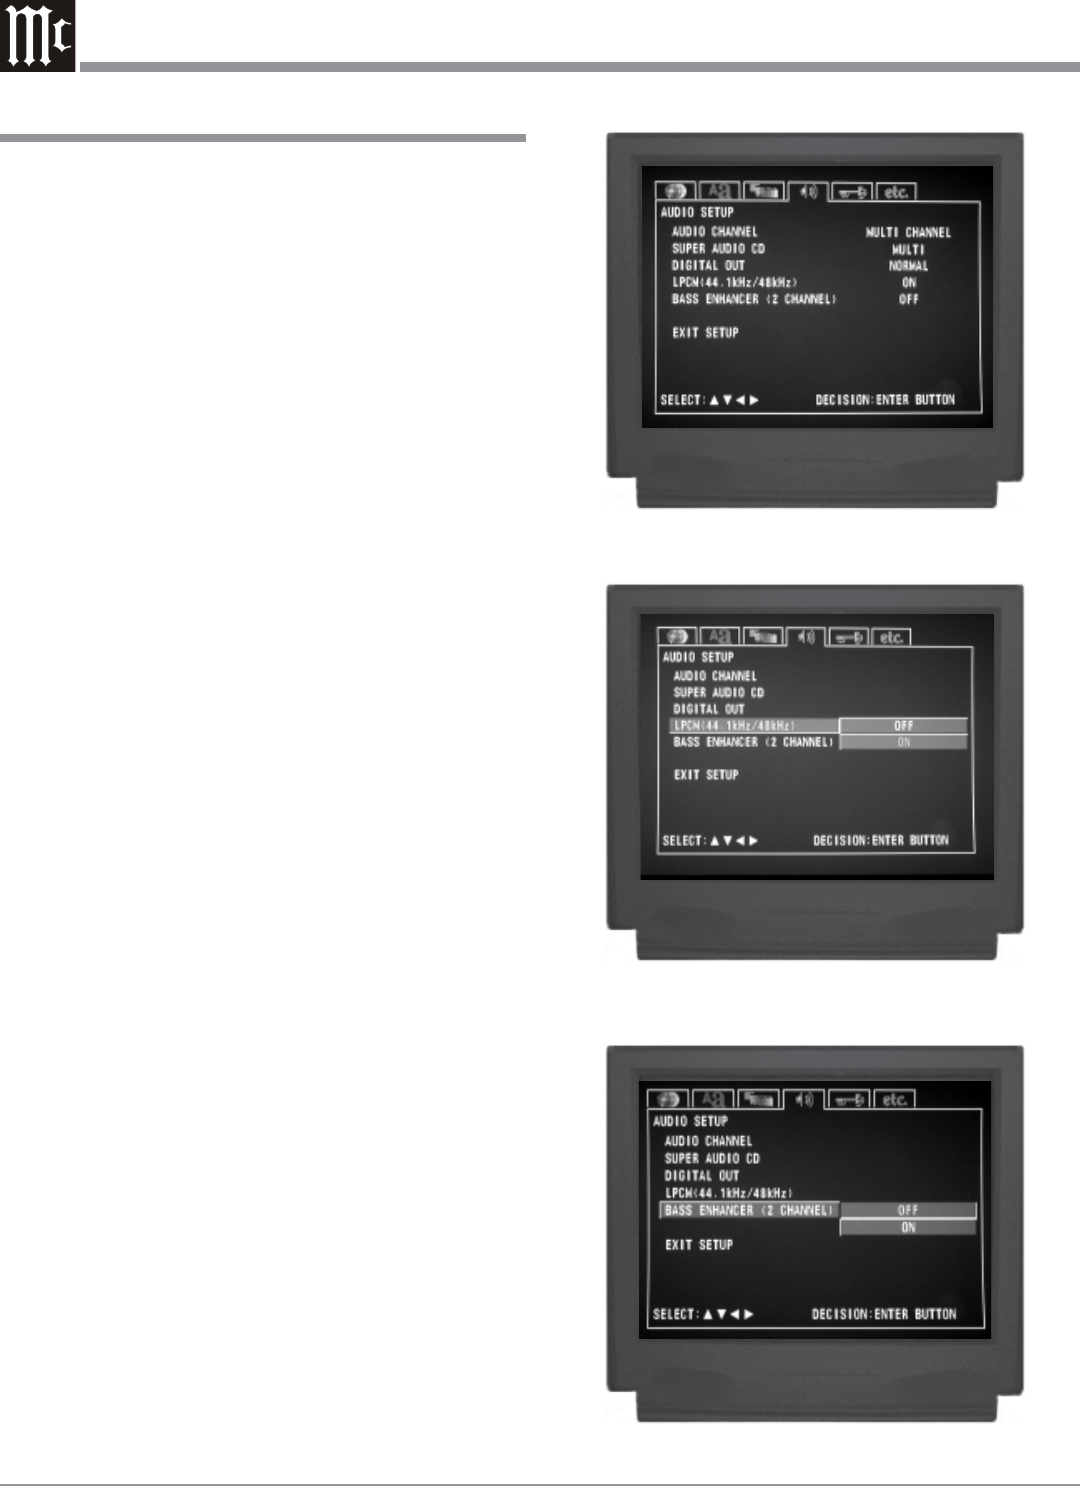
1. Press the SETUP Push-button on the supplied Remote
Control to access the On-Screen Disc Setup Menu.
Then press the Right directional Push-button to se-
lect the Audio Setup Menu Icon Tab. Refer to figure
41.
Note: If there is a Disc playing in the MVP861 press the
STOP Push-button twice before pressing the
SETUP Push-button.
2. To change from the default setting of Off to On use the
Up or Down directional Push-buttons to select
LPCM (44.1kHz/48kHz) followed by the SELECT
Push-button. Refer to figure 42.
Notes: The title of the icon button-bar will change color
from yellow (the cursor color) to green indicating
the selected item.
3. Return to the Audio Setup Menu by pressing the Up
directional Push-button.
How to Set the Audio, con’t
Figure 41
Figure 42
Figure 43


