


39
Chapter 3. NetCommand Setup and Editing
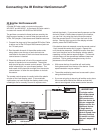
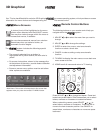
Remote Control Buttons
The following buttons on your remote control help you
navigate within the system :
1. ADJUST or to select the menu item you want to
change.
2. ADJUST or to change the settings.
3. ENTER to enter into a menu, start an automatic
function or select a check box.
4. CANCEL to clear a setting or stop an automatic
function.
5. TV MENU to display the main menu or move back one
menu screen at a time.
6. HOME to exit all menus and return to TV viewing.
Press ADJUST or to change text boxes. Some text
boxes have preset labels. Other boxes allow you to select
letters, numbers or characters to customize names.
When customizing names, press ADJUST or to
select letters, numbers or characters. Press ENTER to
move to the next character position. Use CANCEL to
erase letters, numbers or characters or move one space
backward.
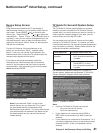
Menu Screens
A picture (icon) will be highlighted on the menu
screen when selected with the ADJUST arrows.
You may then make changes within the menu or
access sub-menus, if available.
You can also access sub-menus from a button.
Sometimes when you select a button, an
automatic function begins.
The system includes the following special
features:
• The currently selected icon or button is
highlighted with a yellow outline; the text color is
yellow.
• On-screen instructions, shown in the message line
at the bottom of the menu, provide feature selection
and adjustment information.
• Some on-screen menu options must be set before
other options are available.
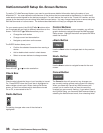
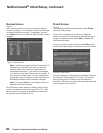
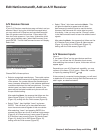
3D Graphical Menu
Main Menu: This screen will always be the first screen that
appears when you press the remote’s TV MENU button.
Your TV also has Mitsubishi’s exclusive 3D Graphical on-screen operating system, which provides on-screen
information for menu choices and changes using the TV’s remote control.
QV
DEVICE
MENU
HOME
SQV
SUB/CANCEL
0
TVMENU
GUIDE
MUTE
DEVICE
CH
VOL
SUB/CANCEL
HOME
TVMENU