76
Chapter 4 Adjustments and Settings for Recording
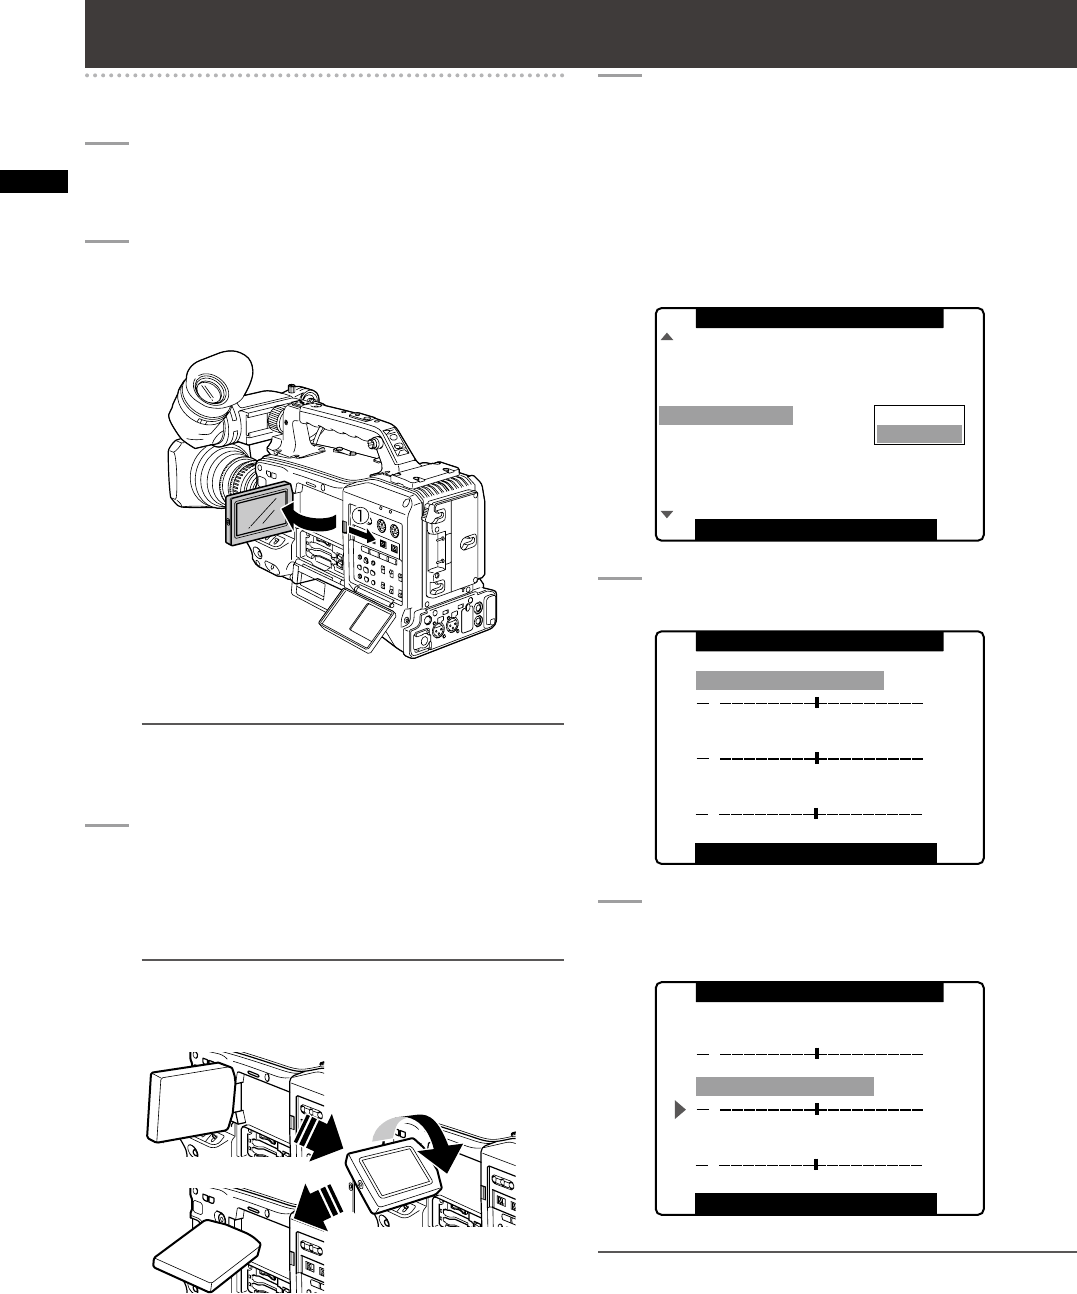
Adjusting and setting the LCD monitor
Using the LCD Monitor
1
Turn on the POWER switch of the AG-
HPX300P.
2
Slide the OPEN button in the arrow A direction
to open the LCD monitor.
NOTE
The LCD monitor opens to an angle of 120 degrees.
Attempts to open it further will damage the monitor.
3
Adjust the angle of the LCD monitor for most
convenient viewing.
• The monitor can turn up to 180 degrees towards
the lens and up to 90 degrees towards you.
NOTE
To prevent camera-recorder failure, do not use force
when adjusting the monitor (when open).
4
Use the subscreen in the menu option LCD
SETTING in the DISPLAY SETUP screen
to adjust screen color level, brightness and
contrast.
For details on menu operation, refer to [Using the
menus] (page 120).
• At LCD SETTING of the DISPLAY SETUP screen,
select CHANGE.
PUSH MENU TO RETURN
SAFETY ZONE
FOCUS BAR
LCD SETTING
SELF SHOOT
LCD BACKLIGHT
SYNC SCAN DISP
ON
90%
ON
RETURN
CHANGE
DATE/TIME OFF
NORMAL
sec
MARKER
DISPLAY SETUP
5
Use the JOG dial button to select an item.
[ ]
LCD COLOR LEVEL
PUSH MENU TO RETURN
LCD SETTING
[+]
LCD BRIGHTNESS
LCD CONTRAST
[ ]
[+]
[ ]
[+]
6
Press the JOG dial button, and turn the JOG
dial button to adjust the selected item.
[ ]
LCD COLOR LEVEL
PUSH MENU TO RETURN
LCD SETTING
[+]
LCD BRIGHTNESS
LCD CONTRAST
[ ]
[+]
[ ]
[+]
NOTE
• Pressing the RESET button when a value that can be
adjusted is selected in the setting menu LCD SETTING will
return the setting to its factory default.
• When closing the LCD monitor make sure that it is shut tight.
• In an environment with sudden temperature changes,
condensation may form on the liquid crystal surface of the
monitor. If this happens, wipe off the moisture with a soft, dry
cloth.
