


39
Enabling Internet Connection Sharing for Windows
98SE
While installing, you may be asked for the Windows Installation CD.
Please, keep it at hand.
1 Before you begin, check if you have a working Internet
connection and if your home network is working properly
(if you have one).
• Check the Internet connection by opening a web page with your
browser.
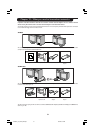
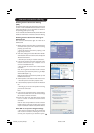
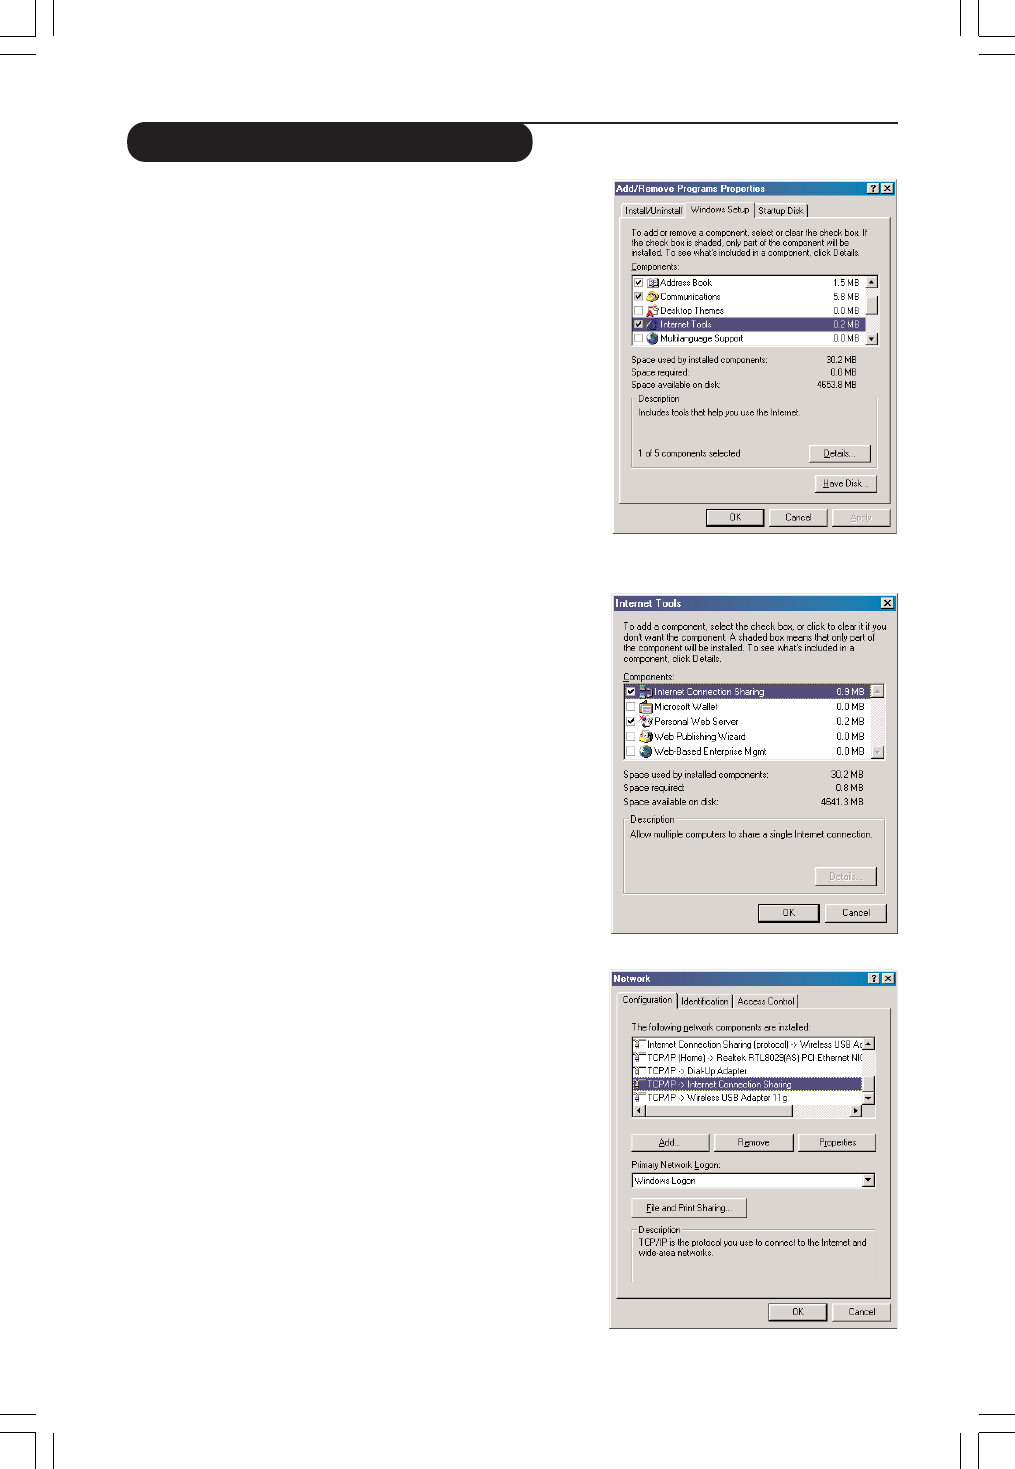
2 Click Start, Settings, and Control Panel.
Then double-click Add/Remove Programs and click the Windows
Setup tab.
> The window to the left will appear.
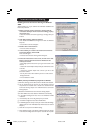
3 Double-click on Internet Tools
> The next window will appear.
4 In this window, put a mark in the check box for Internet
Connection Sharing and click OK.
Then click OK again.
> The Internet Connection Sharing wizard will appear.
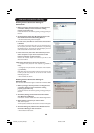
5Follow the instructions on the screen, in each screen click
Next to continue the wizard until it is finished. In the
wizard you need to:
– Select ‘High-speed connection’ for your type of connection to the
Internet.
– Choose the network adapter that provides you with Internet access
to the PC.
– Choose the network adapter that connects your PC to the
Streamium LCD TV.
– You may click ‘Cancel’ when asked if you want to make a Client
Configuration disk.
> This concludes the wizard.
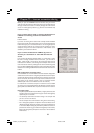
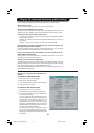
6 Next, check your Network properties as follows:
a) Click Start, Settings, Control Panel, and then double-click Network.
b) On the Configuration tab, browse the ‘The following network
components are installed’ box. It should now include ‘Internet
Connection Sharing adapter’ and ‘TCP/IP->Internet Connection
Sharing adapter’.
c) Double-click ‘TCP/IP->Internet Connection Sharing adapter’.
d) In the IP Address tab, select ‘Obtain an IP Address automatically’.
e) In the WINS Configuration tab, select ‘Use DHCP for WINS
resolution’.
f) In the Gateway tab, remove all gateways if any are listed.
g) In the DNS Configuration tab, select ‘Disable DNS’.
h) In the Bindings tab, for security reasons you must de-select all bindings.
(Please, do the same for ‘TCP/IP (Shared)->External access network
adapter’.)
i) Click OK to accept the new TCP/IP settings.
j) Select ‘Windows Logon’ as the Primary Network Logon. Any changes
to the network configuration will require a restart of the computer.
Internet connection sharing
23iF9946_12_StDFU_ENG.p65 8/31/04, 4:30 PM39