Install Batteries in the Remote
1. Remove the battery compartment cover on the back of the remote.
2. Insert new batteries.Match the polarities (+ and –) on the batteries with the diagram on the remote.
3. Put the battery compartment cover back on the remote.
Important Battery Information
• If you’re not going to use the remote for a month or more,be sure to remove the batteries because they can leak and cause damage.
• Dispose of batteries in the proper manner,according to federal,state,and local regulations.
• Any battery may leak electrolyte if mixed with a different battery type,if inserted incorrectly,if all batteries are not replaced at the same time,if disposed of in fire,or if an
attempt is made to charge a battery not intended to be recharged.
•Discard leaky batteries immediately.Leaking batteries can cause skin burns or other personal injury.
Point the Remote in the Right Direction and Put it in DVD Mode
When you want the remote to operate the DVD Recorder,point the remote at the DVD Recorder, not the TV.The remote has to be pointed in the
correct direction and toward the correct component in order for the remote control’s signal to communicate with the sensor on the component.Make
sure there is a clear path between the remote control and the component you want to operate,so the signal isn’t blocked.
Make sure the remote is in DVD mode — press the DVD button.
Turn on the TV and DVD Recorder
1. Turn on the DVD Recorder—press the DVD button on the remote.
2. Turn on the TV and tune it to the correct Video Input Channel—if you have an RCA,GE,or Proscan TV, press the TV button on the remote and then
press the INPUT button on the remote (the TV turns on and tunes to the correct Video Input Channel).
If you have another brand of TV, turn on the TV and tune the TV to the correct Video Input Channel (if you don’t know how to access the Video Input
Channel on your TV,go to page 16 for help).
Note:You can program your remote to operate most brands of remote controllable TVs.Instructions are on page 19.
O
N
•
O
FF
M
U
T
E
R
E
T
URN
GO
•
BACK
I
N
P
U
T
A
N
T
E
NN
A
123
4
5
6
78
0
9
V
O
L
C
H
S
A
T
•
CAB
L
E
T
V
D
V
D
M
E
NU
C
L
E
A
R
I
N
F
O
A
N
G
L
E
T
I
M
E
R
•
G
U
I
D
E
O
P
E
N
•
C
L
O
S
E
Z
OO
M
R
E
V
E
R
S
E
P
L
A
Y
F
O
R
W
A
RD
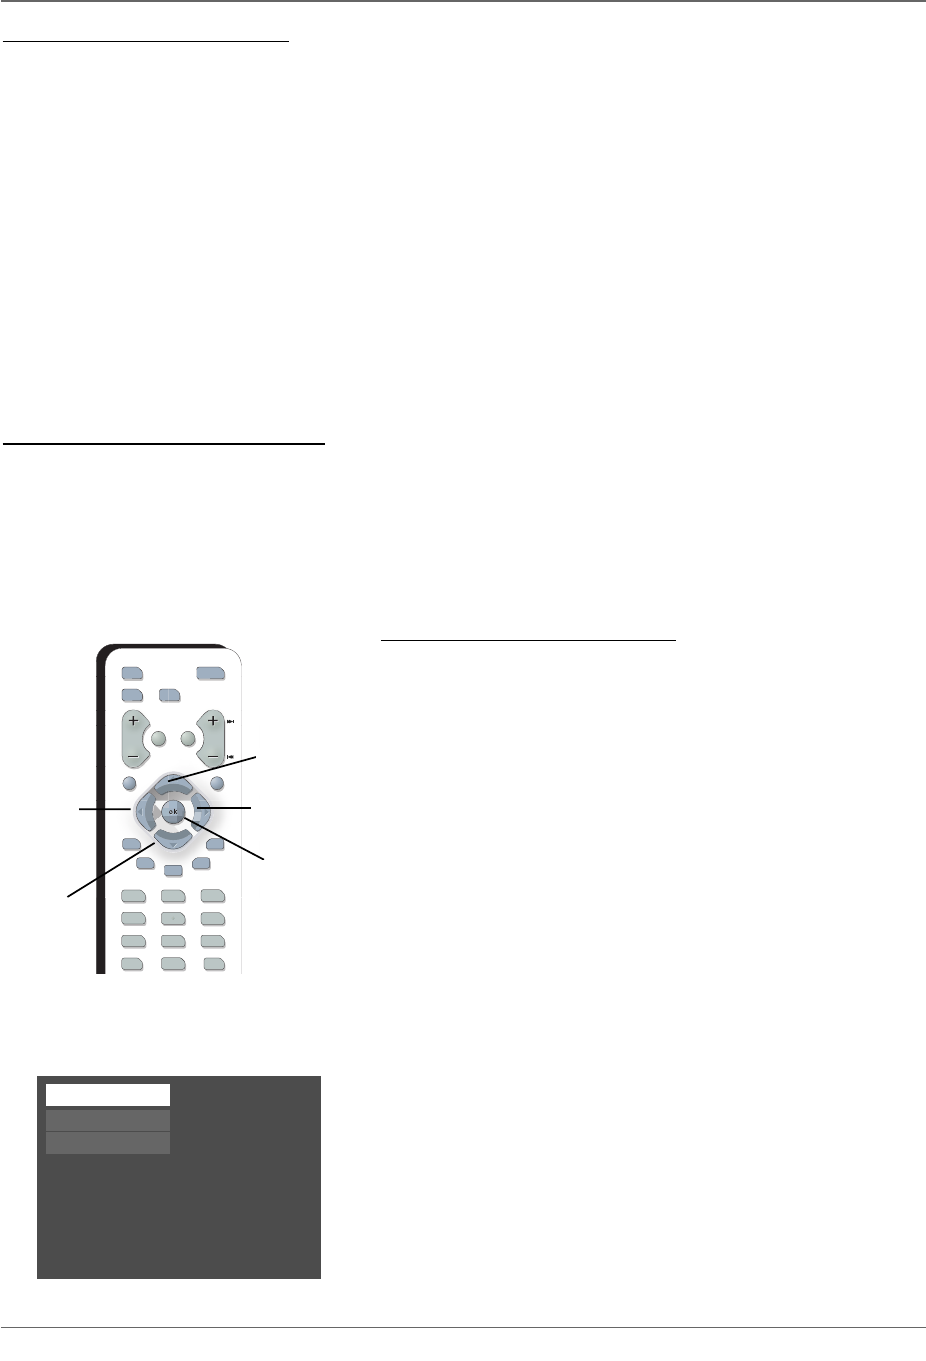
Up arrow
button
Right arrow
button
OK button
Left arrow
button
Down arrow
button
Use the arrow buttons on the remote to
move through on-screen menus and
highlight different options.Press the OK
button to select a menu item that is
highlighted.
Complete the Interactive Setup
The next few pages step you through the series of screens that will appear the first time
you turn on your DVD Recorder.
Use the remote control to follow the on-screen instructions.The arrow buttons move the
on-screen highlight in the corresponding directions on the screen (up,down,left,right).
Press the OK button to select a highlighted item.
Notes:
You can access the setup screens from the main menu.If you move,get a different program provider for
TV shows,or change your connections,you’ll need to complete the Interactive Setup again.
If you don’t see the Language selection screen (below) the first time you turn on the DVD Recorder,
make sure you’ve tuned your TV to the Video Input Channel that corresponds to the way you’ve
connected the TV to the DVD Recorder.If you need help,go to page 16.
1) Select on-screen menu language
Make sure the remote is in DVD mode (press the DVDbutton).If you want the on-
screen menus to appear in
English, press the OK button on the remote control.If
you prefer another language,press the arrow down button until that language is
highlighted.Press OK to select the language.Next, the connection screen appears.
Note:If you don’t see the Language selection screen the first time you turn on the DVD Recorder,make
sure you’ve tuned your TV to the Video Input Channel that corresponds to the way you’ve connected the
TV to the DVD Recorder.If you need help,go to page 16.
Francois
Espanol
English
Chapter 1: Connections and Setup
Graphics contained within this publication are for representation only. 13
DRC8005N_part1_2_1 2/2/04 6:21 PM Page 13


