Additions and Changes to Network Operations
6
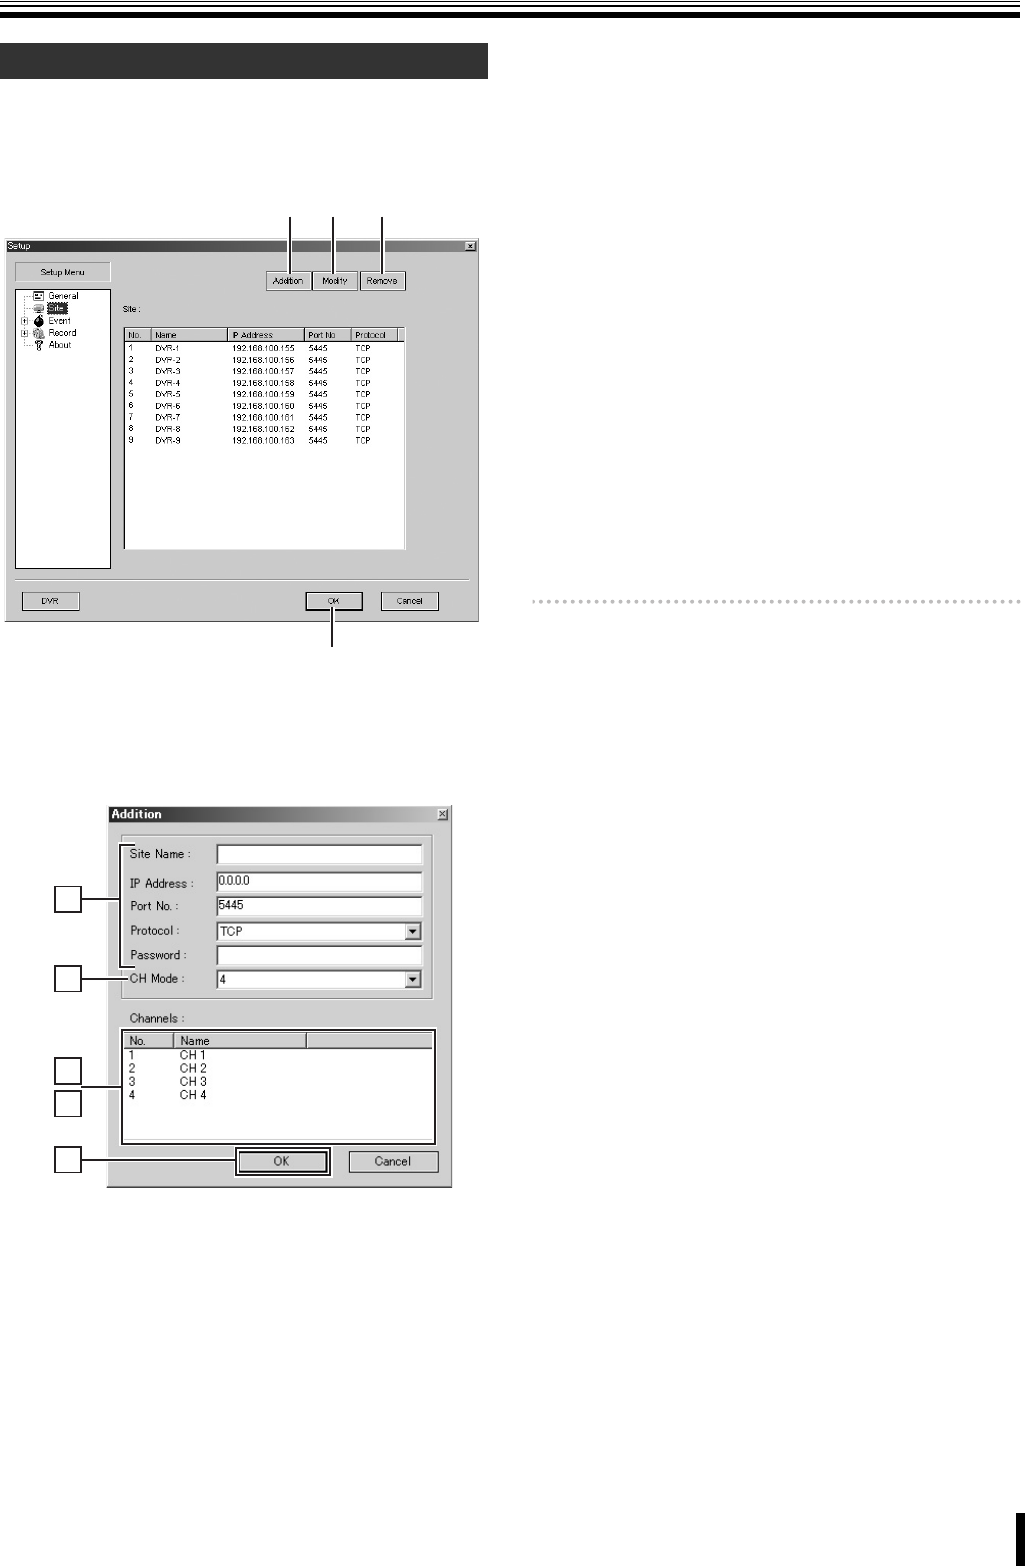
The connection information you register with the [Connect]
dialog box when connecting to the DVR can be updated later
with additions, changes, and/or deletions by choosing [Site]
from the setup menu.
■ To register an additional DVR (Addition):
1
Click [Addition] (A).
The [Addition] dialog box appears.
2
Enter necessary connection information such as
addresses.
You can enter the information in the same way as when
using the [Connect] dialog box (refer to page 41 of the
instruction manual).
3
In [CH Mode], set the number of DVR channels to
"4".
4
On the [Channels] list, click your desired channel to
highlight it in blue, and then click it again.
The field becomes an input box.
5
Enter the channel name.
Your entered channel name will be displayed when, for
example, you monitor the video from a camera.
6
Click [OK].
Close the [Addition] dialog box. The new DVR is added
to the [Site] list.
■ To change the registered information (Modify):
1
On the [Site] list, click the site you want to change.
The selected site row is highlighted in blue.
2
Click [Modify] (B).
The [Modify] dialog box appears.
3
Change the information displayed on the dialog box
as appropriate.
4
Click [OK].
Close the [Modify] dialog box. The [Site] list is updated.
Memo: You cannot set channel names when you connect to
the DVR.
To set the name of each channel, you have to change
the registered information using the [Modify] dialog
box, as described above.
■ To delete the registered information (Remove):
1
On the [Site] list, click the site you want to delete.
The selected site row is highlighted in blue.
2
Click [Remove] (C).
The selected site is deleted from the [Site] list.
☞ When you are done, click [OK] (D).
Your changes are applied and saved.
Editing Site Information (P51)
A B C
D
6
5
4
2
3
