


21
Hookups and Settings
z Hint
For correct speaker location, see the operating
instructions supplied with the connected components.
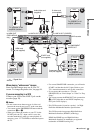
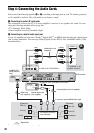
b Notes
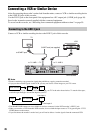
• Do not connect your TV’s audio output jacks to the
LINE IN (R-AUDIO-L) jacks at the same time. This
will cause unwanted noise to come from your TV’s
speakers.
• In the connection A, do not connect the LINE IN (R-
AUDIO-L) and LINE 2 OUT (R-AUDIO-L) jacks to
your TV’s audio output jacks at the same time. This
will cause unwanted noise to come from your TV’s
speakers.
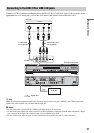
• In the connection B, after you have completed the
connection, make the appropriate settings under
“Audio Connection” in “Easy Setup” (page 25).
Otherwise, no sound or a loud noise will come from
your speakers.
• With the connection B, the surround sound effects of
this recorder cannot be used.
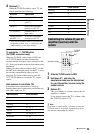
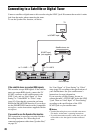
• When you connect the recorder to an AV amplifer
(receiver) using an HDMI cord (RDR-HXD910 only),
you will need to do one of the following:
– Connect the AV amplifier (receiver) to the TV with the
HDMI cord.
– Connect the recorder to the TV with a video cord other
than HDMI cord (component video cord, SVIDEO
cord, or audio/video cord).
*1
Manufactured under license from Dolby Laboratories.
“Dolby,” and the double-D symbol are trademarks of
Dolby Laboratories.
*2
“DTS” and “DTS Digital Out” are trademarks of
Digital Theater Systems, Inc.
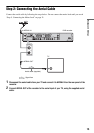
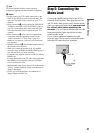
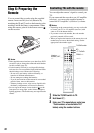
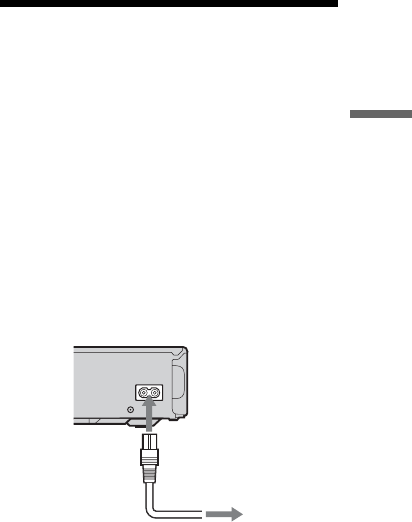
Step 5: Connecting the
Mains Lead
Connect the supplied mains lead to the AC IN
terminal of the recorder. Then plug the recorder
and TV mains leads (power cords) into the mains.
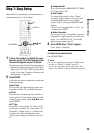
After you connect the mains lead, you must wait
for a short while before operating the
recorder. You can operate the recorder once the
front panel display lights up and the recorder
enters standby mode.
If you connect additional equipment to this
recorder (page 26), be sure to connect the mains
lead after all connections are complete.
~ AC IN
to mains
to AC IN
1
2