


79
EN
DivX
®
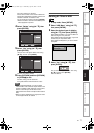
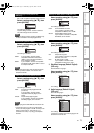
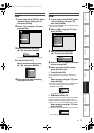
1 In stop mode, press [SETUP]. Select
“General Setting” using [U \ D],
then press [ENTER].
2 Select “DivX” using [U \ D], then
press [ENTER].
3 Select the desired item using
[U \ D], then press [ENTER].
For “DivX
®
VOD”, refer to page 50 for details.
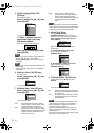
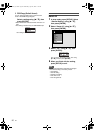
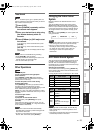
DivX Subtitle (Default: OFF)
Select the desired setting using
[U \ D], then press [ENTER].
4 When you finish with the setting,
press [SETUP] to exit.
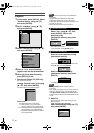
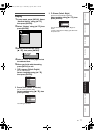
HDMI
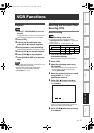
1 In stop mode, press [SETUP]. Select
“General Setting” using [U \ D],
then press [ENTER].
• Make sure that the HDMI cable is connected and the
TV input is set to HDMI.
2 Select “HDMI” using [U \ D], then
press [ENTER].
3 Select the desired item using
[U \ D], then press [ENTER].
4 Refer to 1. to 3. on pages 79 to 80 and
set the selected item.
5 When you finish with the setting,
press [SETUP] to exit.
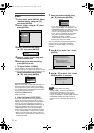
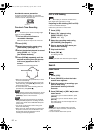
1. Format (Default: RGB)
You can select the colour space for HDMI output.
Set the appropriate colour space for your display
device.
Select a setting using [U \ D], then
press [ENTER].
• When the connected device is not compatible with
the Y/Cb/Cr, HDMI signal is output as RGB
regardless of the setting.
Your setting is activated.
2. HDMI Audio (Default: ON)
If you do not want to output the audio through HDMI
(when you digitally output the audio through the
DIGITAL AUDIO OUT (COAXIAL) jack to your audio
system, etc.), you can set the HDMI audio output off.
Select a setting using [U \ D], then
press [ENTER].
• Set to “OFF” when the HDMI sound is not required.
Your setting is activated.
Playback
Display
Video
Recording
Clock
Channel
DivX
HDMI
Reset All
General Setting
DivX
®
VOD
DivX Subtitle
DivX Subtitle
OFF
English
French
Spanish
German
Italian
Swedish
Playback
Display
Video
Recording
Clock
Channel
DivX
HDMI
Reset All
General Setting
1
2
3
Format
HDMI Audio
RGB Range
Format
RGB
YCbCr
HDMI Audio
ON
OFF
Introduction Connections Basic Setup Playback Editing OthersFunction SetupRecording VCR Functions
E3LG0ED_EN.book Page 79 Wednesday, April 30, 2008 11:52 AM