


ASUS TS100-E4/PI2 5-3
5.1.2 Installing Serial ATA hard disks
The motherboard supports Serial ATA hard disk drives. For optimal perfor-
mance, install identical drives of the same model and capacity when creating
a disk array.
To install the SATA hard disks for a RAID conguration:
1. Install the SATA hard disks into the drive bays.
2. Connect the SATA signal cables.
3. Connect a SATA power cable to the power connector on each drive.
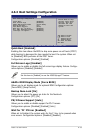
5.1.3 Setting the RAID item in BIOS
You must set the RAID item in the BIOS Setup before you can create a RAID
set(s). To do this:
1. Enter the BIOS Setup during POST.
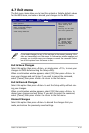
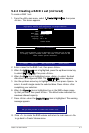
2. Go to the
Main Menu, select IDE Conguration, then press <Enter>.
3. Select the item
Congure SATA As, then press <Enter> to display the
conguration options.
4. Select
RAID from the Congure SATA As item options, then press <En-
ter>.
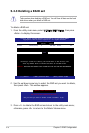
5. Select the item
Onboard Serial-ATA BOOTROM, press <Enter>, then
select Enabled from the options.
6. Save your changes, then exit the BIOS Setup.
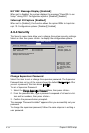
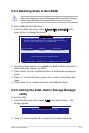
5.1.4 RAID conguration utility
Depending on the RAID_SEL1 jumper setting and the operating system, you
can select a utility to create a RAID set. Refer to section “3.2 Jumpers” for
details on the RAID_SEL1 jumper settings.
Use the Intel® Matrix Storage Manager to create a RAID 0 or RAID 1 set
under Windows® 2000/2003 Server/XP operating system.
Use the LSI Logic Embedded SATA RAID Setup Utility to create a RAID 0 or
RAID 1 under Windows® 2000/2003 Server or Red Hat® Enterprise ver. 3.0
operating system.
Refer to the succeeding sections for details on how to use the RAID congu-
ration utilities.
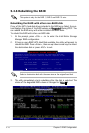
Refer to Chapter 4 for details on entering and navigating through the
BIOS Setup.