


5.7.5 AUDIO REC
• Choose the AUDIO REC in the RECORD menu by using UP/DOWN buttons.
• Select ON or OFF by pressing the ENTER button.
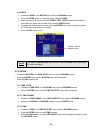
5.7.6 SCHEDULE REC
• Choose the SCHEDULE REC in the RECORD menu by using UP/DOWN buttons.
• Press the ENTER button and the SCHEDULE RECORD SET menu will be displayed.
5.7.6.1 SCHEDULE REC
• Choose the SCHEDULE REC in the SCHEDULE RECORD SET menu by using
UP/DOWN buttons.
• Choose one among ONCE, DAILY and OFF by pressing the ENTER button.
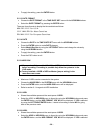
5.7.6.2 SCHEDULE REC TIME SETUP
• Select a line where you wish to setup the start and time with the UP/DOWN buttons and
press the ENTER button.
• Select the START TIME and END TIME by using the LEFT/RIGHT buttons and change
the values with the UP/DOWN buttons.
• After completing, press the ENTER button to apply the values to the system.
• To delete, select a scheduled recording line with the UP/DOWN buttons and press the
LEFT or RIGHT button. You will be asked whether the scheduled recording line clear or
not. Select YES or NO with the LEFT/RIGHT buttons and press the ENTER button.
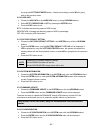
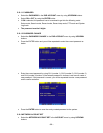
5.8 DISPLAY
- Choose the DISPLAY in the MAIN SETUP menu by using UP/DOWN buttons.
- Press the ENTER button and the DISPLAY menu will be displayed.
- Press the ESC button to exit.
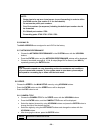
5.8.1 TITLE DISPLAY
• Choose the TITLE DISPLAY in the DISPLAY menu by using UP/DOWN buttons.
• Select ON or OFF by pressing the ENTER button.
At “ON” mode, the camera title will be shown on the screen.
5.8.2 BORDER LINE
• Choose the BORDER LINE in the DISPLAY menu by using UP/DOWN buttons.
• Select ON or OFF by pressing the ENTER button.
NOTE: The system does not record when the recording speed is set to less than 4 IPS.
NOTE: The recording schedule time can be set in military hour mode (24 hour)
- 31 -