


4
IntroductionDX-32L200NA14
Introduction
Congratulations on your purchase of a high-quality
Dynex product. Your DX-32L200NA14 represents the
state of the art in LCD TV design and is designed for
reliable and trouble-free performance.
Attaching the stand or preparing
your TV for wall mounting
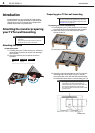
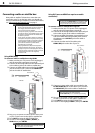
Attaching the stand
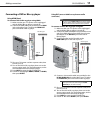
To attach the stand:
1 Carefully place your TV face-down on a cushioned,
clean surface to protect the screen from damages
and scratches.
2 Secure the stand to the TV with the six screws
provided.
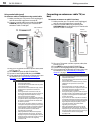
Preparing your TV for wall mounting
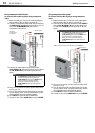
To prepare your TV for wall mounting:
1 Carefully place your TV face-down on a soft surface
to protect the screen from damages and scratches.
2 Remove the four screws that secure the stand
column to the TV.
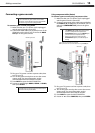
3 Remove the stand column.
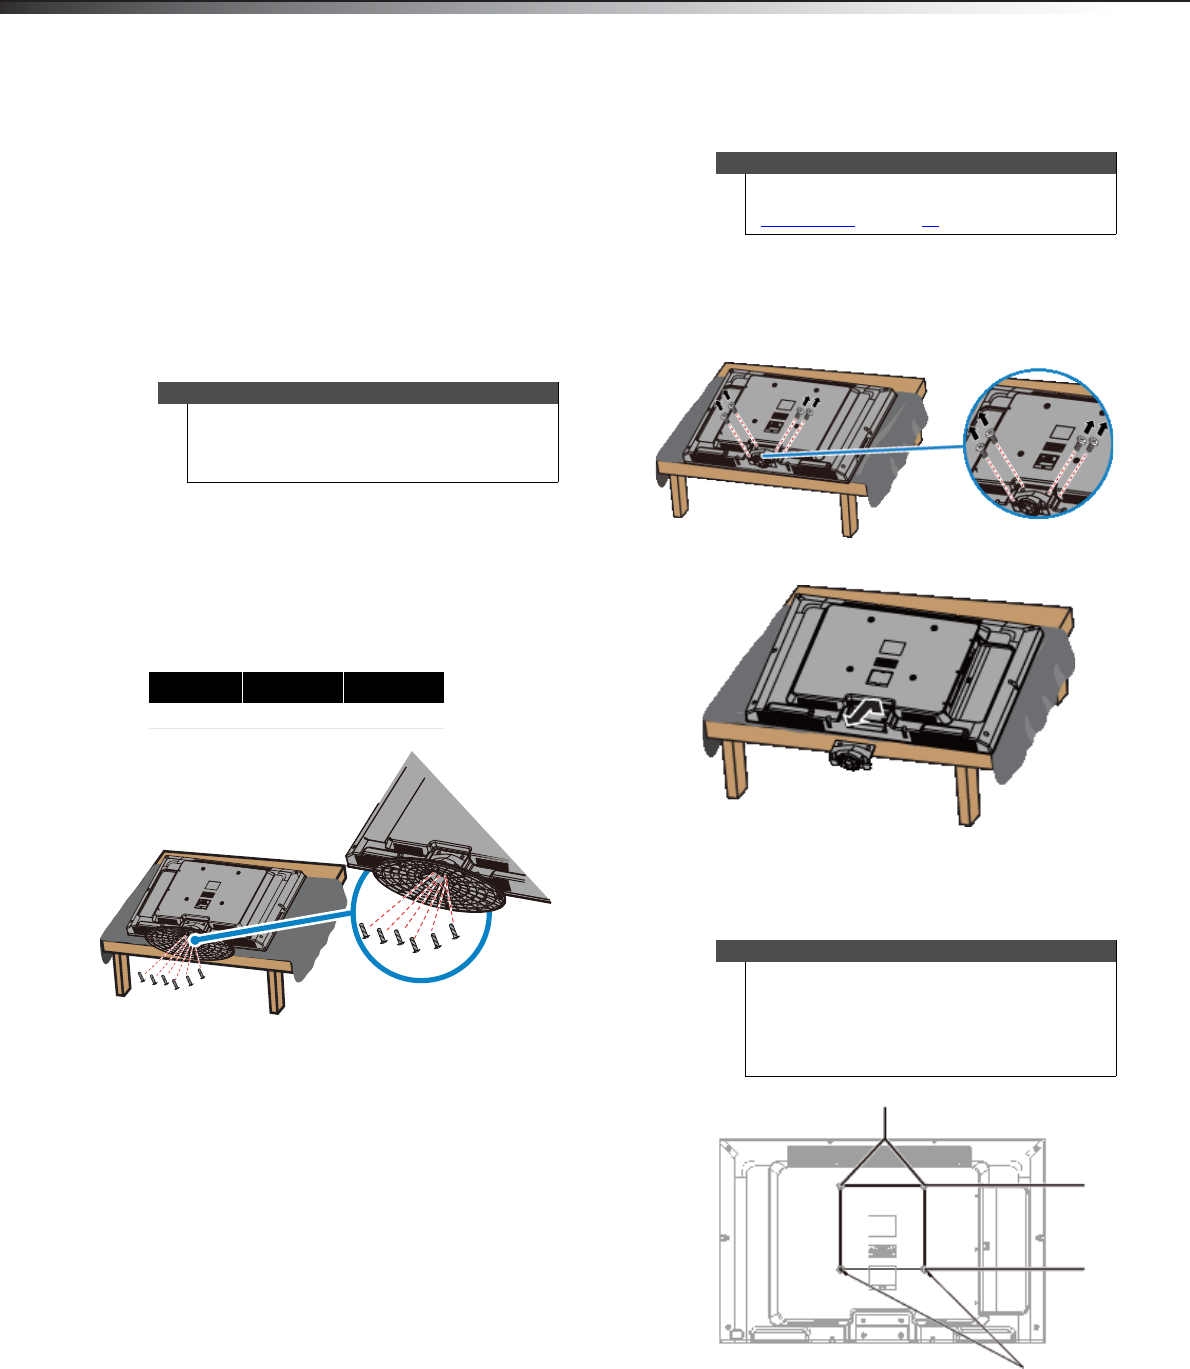
4 Attach the wall-mount bracket to your TV using the
mounting holes on the back of your TV. See the
instructions that came with the wall-mount bracket
for information about how to correctly hang your TV.
Notes
• If you plan to wall-mount your TV, do not install
the stand.
• Store the stand and stand screws in case you
decide to use the stand in the future.
Screw type Screw length # of screws
M5 16 mm 6
M5 (16mm)
Warning
This TV is intended to be supported by a UL Listed
wall mount bracket with suitable weight/load. (See
“Miscellaneous
” on page 40.)
Note
• The length of the wall-mount screws vary
depending on the wall-mount bracket you
purchased. See the instructions that came with
the wall-mount bracket for screw lengths.
• The mounting holes on the back of your TV take
type M5 screws.
15.75 in. (400 mm)
15.75 in. (400 mm)
Wall-mount brackets