Recovering Your Data 10-7
Chapter 10: HP Disaster
Recovery
The recovery process will take some time to complete, depending upon
the amount of data you are recovering. You will be prompted to insert
the CDs in the order they were created.
12. Once the volume has been recovered, a summary of the process will be
displayed. To exit this screen, press Enter. If there is more than one
volume to be recovered, you may select it at this time.
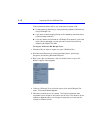
After recovering the volume(s), you may wish to view the REPORT.TXT
file which contains a text summary of the files that could not be
recovered. If you wish to view this file, you must first exit the program by
pressing Esc
twice, then type EDIT REPORT.TXT. After reading the
text, press Alt
+F, then press X to exit the editor. For more information on
files that could not be recovered, see “Files Not Recovered” on page 1-9.
Your recovery is complete. Remove any diskettes and CDs from your
drive(s) and restart your computer.
NOTE: It may be necessary to restart your computer more than once if any
hardware in your system has changed since your DR Set was created.
For Windows NT
The Disaster Recovery process for Windows NT begins with a minimal
install of the Windows NT Workstation, performed from the Disaster
Recovery Set.
HP Disaster Recovery screens will display messages instructing you when
to insert the diskettes and CD(s) from your Disaster Recovery Set. Once
the Setup portion of the minimal install has been completed, the Disaster
Recovery Wizard will appear and guide you through the rest of the
recovery process.
To recover your data:
1. You should first decide if another recovery method is possible. For
example, if the problem appears to be associated with the Windows
operating system, such as a corrupt registry, try to recover by following
the steps outlined in your Microsoft Windows User’s Manual before
attempting the following procedures. If you have determined that a hard-
drive failure has occurred, proceed to Step 2.
2. Replace any damaged hard-drives with comparable drives.


